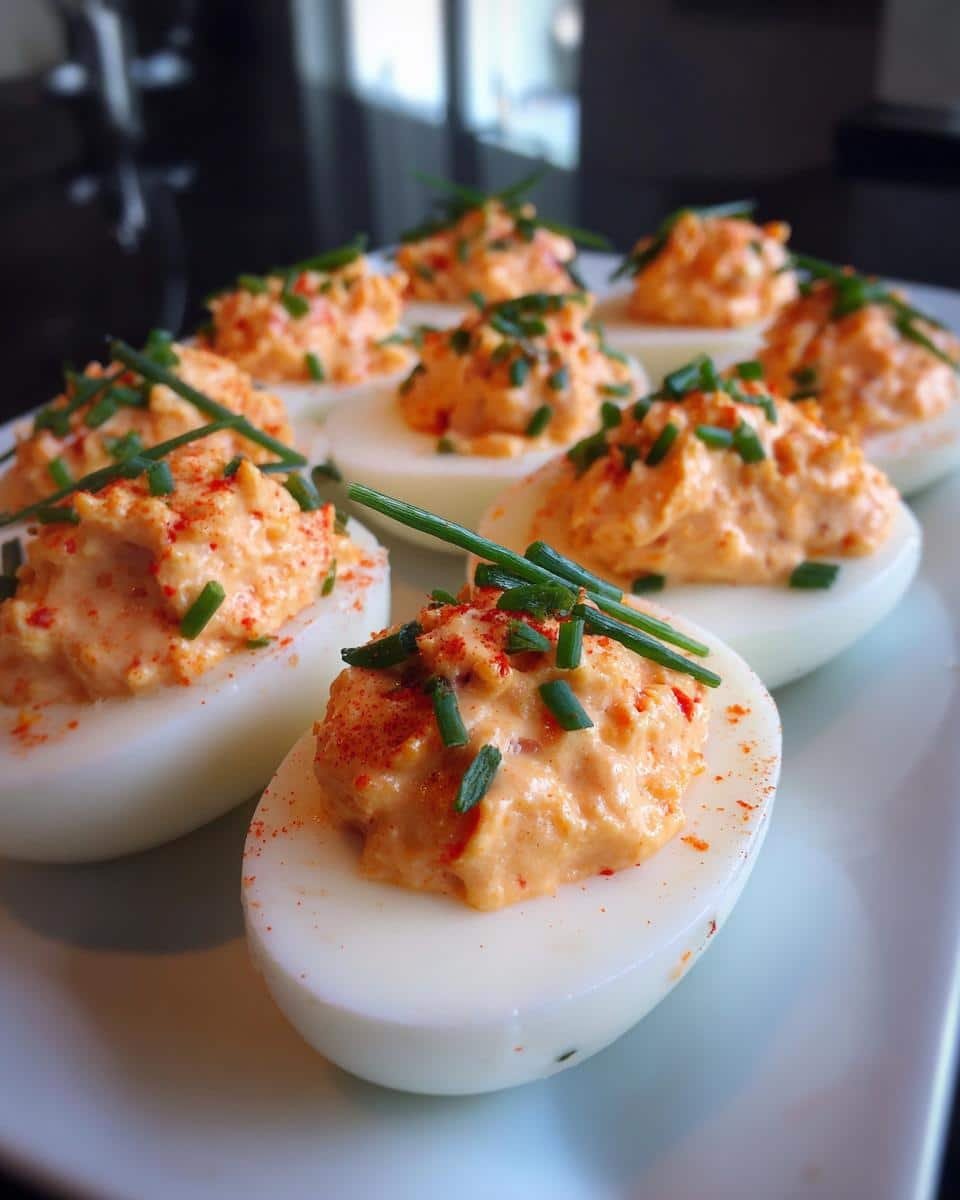
Oh my gosh, you guys – let me tell you about the first time I tried kimchi in deviled eggs. It was at this tiny fusion food truck in Austin, and I nearly dropped my plate! That tangy, spicy kick mixed with creamy egg yolks? Absolute magic. I rushed home and spent weeks tweaking my grandma’s deviled egg recipe until I nailed these fermented kimchi gluten-free deviled eggs. They’re this crazy-good mashup of Southern comfort food and Korean flavors – plus they happen to be gluten-free (just double-check your kimchi brand!). Perfect for when you want to shake up your appetizer game without scaring off picky eaters. Trust me, these disappear faster than you can say “more please!”

Why You’ll Love These Fermented Kimchi Gluten-Free Deviled Eggs
Oh, where do I start? These little flavor bombs are about to become your new party trick. Here’s why:
- That tangy-spicy kick! The fermented kimchi cuts through the richness of the yolks perfectly – like aoguess-what’s-in-this? moment for your taste buds.
- Super easy to make – we’re talking 15 minutes active time if you’ve got boiled eggs ready (and my ice water trick makes peeling a breeze).
- Gluten-free without tasting “healthy” – just grab certified GF kimchi and you’re golden (literally, look at those golden yolks!).
- Crowd-pleaser alert: Even my kimchi-skeptic uncle went back for thirds last Thanksgiving. The spice level? Totally adjustable to your crew’s taste.
Ingredients for Fermented Kimchi Gluten-Free Deviled Eggs
Okay, time to raid your fridge! Here’s everything you’ll need to make these flavor-packed deviled eggs – and yes, every measurement matters. I learned the hard way that eyeballing kimchi leads to either “whoa that’s spicy!” or “where’s the flavor?” moments. Not fun.
- 6 large eggs – hard-boiled, cooled, and peeled (farm-fresh ones peel easier, just saying)
- 1/4 cup mayonnaise – the real stuff, none of that “light” nonsense that makes your filling weep
- 1 tablespoon mustard – I use Dijon for extra zing, but yellow works in a pinch
- 1/4 cup finely chopped fermented kimchi – must be gluten-free (check labels!), squeezed dry-ish but not bone-dry
- 1 teaspoon rice vinegar – that subtle tang makes all the difference
- 1/4 teaspoon salt – start with this, taste, then add more if needed
- 1/4 teaspoon black pepper – freshly cracked if you’re fancy
- 1 tablespoon chopped chives – for that pretty green sprinkle on top
Pro tip from my many kimchi-stained aprons: chop your kimchi small (like confetti!) so you get flavor in every bite without overwhelming chunks. And don’t skip squeezing out excess liquid – soggy deviled eggs are sad deviled eggs.
Equipment You’ll Need
Don’t worry – you won’t need any fancy gadgets for these kimchi deviled eggs! Just grab these basics from your kitchen, and you’re good to go. (Though I’ll admit, a piping bag makes them look extra fancy – my niece calls them “restaurant eggs” when I use one!)
- A medium mixing bowl – for mashing those yolks into creamy perfection
- Piping bag with star tip OR a spoon – I’ve used a zip-top bag with the corner snipped off in desperate times!
- Sharp knife – for halving eggs cleanly (dull knives = lopsided egg boats)
- Cutting board – bonus points if it’s the one that doesn’t slide around
That’s seriously it! Though I sometimes throw in a small strainer when squeezing kimchi liquid – it’s less messy than using my hands. And if you’re feeling extra, a microplane makes the chives look like they came from a cooking show.
How to Make Fermented Kimchi Gluten-Free Deviled Eggs
Alright, let’s get cracking! (Pun totally intended.) These kimchi deviled eggs come together in three simple steps – but I’ve got some tricks up my sleeve to make sure yours turn out perfect every single time.
Step 1: Prepare the Eggs
First things first – we need perfectly boiled eggs that peel like a dream. Here’s my can’t-fail method:
1. Place eggs in a single layer at the bottom of a saucepan and cover with cold water by about an inch. (Starting with cold water prevents that weird green ring around the yolks!)
2. Bring to a rolling boil, then immediately cover and remove from heat. Let sit for 12 minutes – set a timer! This gives you that perfect creamy yolk texture.
3. Drain and transfer eggs to an ice bath. Don’t skip this step! The sudden temperature change makes the shells practically jump off the eggs. Let them chill for at least 15 minutes – I usually prep other ingredients while waiting.
4. Once cooled, gently crack and peel under running water (helps loosen any stubborn bits). Pat dry, then carefully slice each egg in half lengthwise. Pop those yolks out into a bowl – I use a teaspoon for neat removal.
Step 2: Mix the Filling
Now for the fun part – creating that dreamy, kimchi-packed filling!
1. Mash the yolks with a fork until they’re crumbly with no big lumps. (Pro tip: Push them through a fine mesh strainer if you want ultra-smooth texture.)
2. Add mayo, mustard, rice vinegar, salt and pepper. Stir until creamy and well combined – I like to use a silicone spatula to get every bit incorporated.
3. Fold in your chopped kimchi gently – we want to distribute it evenly without turning the whole mixture pink! Taste and adjust seasonings here if needed.
4. For extra fluffiness, you can whip the mixture with an electric mixer for 30 seconds. (But honestly? I usually skip this when I’m feeling lazy and they still taste amazing.)
Step 3: Fill and Garnish
The grand finale! Here’s how to make them look as good as they taste:
1. Spoon your filling into a piping bag fitted with a star tip (or that zip-top bag hack I mentioned earlier). No piping tools? No problem – a teaspoon works just fine for that rustic homemade look.
2. Pipe or spoon the filling into each egg white half, swirling slightly for height. (I go for slightly overfilled – nobody ever complains about too much filling!)
3. Sprinkle with chopped chives right before serving – this keeps them bright green and fresh-looking. Sometimes I add a tiny kimchi piece on top for a “here’s what’s inside!” visual cue.
4. Serve immediately or chill for up to 2 hours. Any longer and the kimchi might make the filling weep a bit – still tasty, just not as pretty!
Tips for Perfect Fermented Kimchi Gluten-Free Deviled Eggs
Okay, let me share the little secrets I’ve picked up after making these kimchi deviled eggs approximately a bazillion times. (Okay, maybe more like 37 times, but who’s counting?) These tips will take your eggs from “good” to “can-I-please-get-your-recipe?” status:
1. Kimchi is your flavor dial – Love heat? Use more kimchi or pick a spicier brand. Nervous about spice? Start with 2 tablespoons and taste as you go. The beauty is you can adjust this right up until you fill those egg whites!
2. Blend if you’re fancy – For ultra-smooth filling (think fancy restaurant texture), pulse the yolk mixture in a mini food processor before adding the kimchi. Just don’t overdo it or you’ll get mayonnaise soup!
3. Chill out, literally – Letting the filled eggs rest in the fridge for 30 minutes before serving lets the flavors marry beautifully. But here’s my rule: no more than 2 hours or the kimchi starts making things watery.
4. The squeeze test – When prepping your kimchi, give it a gentle squeeze in a clean kitchen towel – you want it damp, not dripping. Too much liquid = runny filling disaster!
Bonus tip from my last BBQ fail: label these if serving to guests! That gorgeous pink color makes people think they’re regular deviled eggs… until the kimchi hits their taste buds. Cue the surprised (but delighted) reactions!
Ingredient Substitutions & Notes
Listen, I get it – sometimes you’re staring into your fridge thinking “I don’t have THAT ingredient!” No worries – I’ve tested plenty of swaps for these kimchi deviled eggs. Just promise me one thing: never ever skip checking your kimchi’s gluten-free status. (I learned that lesson the hard way when my gluten-intolerant friend gave me the saddest puppy-dog eyes.)
Mayo Alternatives That Actually Work
Not a mayo person? I’ve got you covered:
- Vegan mayo works shockingly well here – just stick to the thicker varieties (looking at you, avocado oil mayo).
- Greek yogurt adds tang if you use half mayo, half yogurt – but go full yogurt and things get too loose.
- Sour cream gives a richer taste – perfect for when you’re feeling indulgent.
My weirdest successful substitution? Mashed avocado when I ran out of mayo during quarantine.0348932 (Pro tip: add lemon juice to prevent browning.)
Vinegar Varieties That Play Nice
Out of rice vinegar? These swaps keep the balance right:
- Apple cider vinegar – my go-to backup, adds fruity notes
- White wine vinegar – more subtle than regular white vinegar
- Lime juice – especially good if you’re using avocado mayo
Avoid balsamic unless you want purple-gray deviled eggs (ask me how I know).
The Kimchi Rulebook
This is non-negotiable: your kimchi must say “gluten-free” on the label. Many brands use wheat-based sauces in fermentation. My favorite GF brands:
- Mother-in-Law’s Kimchi (their vegan version rocks)
- Wildbrine (mild but flavorful)
- Cleveland Kitchen (great crunch)
Emergency kimchi-less situation? Mix 1 tsp gochujang (check for GF!) into 2 tbsp sauerkraut for a quick fix. Not identical, but saves your appetizer spread!
Egg-cellent Variations
Want to mix it up? Try:
- Pickled ginger instead of kimchi for a different fermented kick
- Turmeric for golden color + anti-inflammatory boost
- Sesame oil drizzle on top for extra Korean flair
Remember – the best recipes adapt to your kitchen. Just keep that kimchi gluten-free, and you’re golden!
Serving Suggestions
Okay, let’s talk about how to make these kimchi deviled eggs the star of your next gathering! I’ve served these bad boys every which way, and here are my absolute favorite pairings:
- Korean BBQ spread – These eggs disappear FAST when I put them alongside bulgogi and japchae. The tangy kimchi cuts through all that rich meat perfectly.
- Crisp veggie platter – For lighter vibes, arrange them with cucumber slices, radish coins, and snap peas. The cool crunch balances the eggs’ creaminess.
- Brunch board – My friends go nuts when I add these to a spread with smoked salmon, mini biscuits, and fruit. Unexpected but SO good.
- Party trick – Arrange them on a bed of purple cabbage leaves with sesame seeds sprinkled around. Instant Instagram moment!
Pro tip: Double the recipe if serving more than 4 people. I’m serious – these eggs vanish faster than you can say “second helping!”
Storage & Reheating
Okay, let’s talk about keeping these kimchi deviled eggs tasting fresh – because I know you might not devour all twelve halves in one sitting (though I won’t judge if you do!). Here’s the scoop from my many fridge experiments:
These babies keep best in the fridge for up to 2 days, but honestly? They’re at their absolute peak within 24 hours. Store them in an airtight container with a paper towel underneath to absorb any moisture. That kimchi magic keeps working over time, so the flavors actually deepen overnight – just be prepared for slightly softer texture on day two.
Now, the freezing question I get all the time: Don’t do it! I learned this the hard way when I tried freezing a test batch “for science.” The thawed eggs turned rubbery, and the filling separated into a weird, watery mess. Total texture tragedy.
If you must store them longer, keep just the unfilled egg whites in water in the fridge for up to 4 days (change the water daily), and make fresh filling when ready. The yolks don’t keep well, so mash those babies fresh!
Reheating? Ha! These are meant to be served chilled. But if your fridge runs cold, let them sit out for 10 minutes before serving – the flavors pop better at cool room temperature anyway.
Nutritional Information
Okay, let’s talk numbers – but remember, I’m a home cook, not a dietitian! These estimates vary based on your exact ingredients (especially which mayo and kimchi you use). Here’s the scoop per serving (that’s 2 egg halves, because who stops at just one?):
- 140 calories – Not bad for something that tastes this indulgent!
- 10g fat – Mostly the good kind from eggs and mayo
- 6g protein – Egg power to keep you full
- 320mg sodium – Mostly from the kimchi (pro tip: rinse it if you’re watching sodium)
- 2g carbs – Basically nothing unless you count the kimchi fiber
Want to lighten it up? Use Greek yogurt instead of mayo and you’ll cut about 30 calories per serving. But honestly? I say go for the full-fat version – life’s too short for sad deviled eggs!
FAQ About Fermented Kimchi Gluten-Free Deviled Eggs
I get so many questions about these kimchi deviled eggs – here are the ones that pop up most often (along with my slightly-too-honest answers after making them approximately a million times):
Can I make these ahead?
Absolutely! In fact, the flavors get better after chilling for an hour or two. Just wait to garnish with chives until right before serving. That said, don’t go more than 24 hours ahead – the kimchi makes the filling weep over time.
Is kimchi spicy?
Depends entirely on the brand! Some are mild as can be (great for kids), while others will clear your sinuses. My rule? Taste a tiny piece of your kimchi first – if it makes you go “whoa,” use less. You can always add more later!
How do I ensure these stay gluten-free?
This is CRUCIAL – check your kimchi label! Many brands use wheat-based products in fermentation. I only buy jars that clearly say “gluten-free.” When in doubt, email the company – I’ve done this at 2am during a kimchi emergency (no shame).
Can I use pickle juice instead of kimchi?
Blasphemy! Just kidding. Sort of. While pickle juice will give tang, you’ll miss the fermented complexity and spice. In a pinch, mix 1 teaspoon gochujang (GF!) into pickle relish – it’s not the same, but it works in desperate times.
Why did my filling turn pink?
Congratulations! That means your kimchi’s natural color seeped into the mayo – totally normal and actually pretty. If you want whiter filling, blend the yolks and mayo first, then gently fold in kimchi at the end. But really, embrace the pink – it’s part of the charm!
Share Your Creation!
Okay, I need to see your kimchi deviled egg masterpieces! There’s nothing I love more than seeing how you all put your own spin on this recipe. Did you add extra spice? Try it with avocado mayo? Accidentally turn the filling neon pink? (Been there!) Snap a pic and tag me @ChaoticHomeCook – I’ll probably screenshot it and show my husband like “SEE? I’m not the only kimchi-obsessed weirdo!”
Or if TOO much social media makes you sweat (no judgment), just leave a comment below telling me how it went. Did your spice-phobic cousin actually like them? Did your dog try to steal one off the counter? (Also been there.) These little stories make my day WAY more than some algorithm ever could.
Seriously, whether it’s your first time making deviled eggs or your hundredth, I wanna hear about it. Kitchen wins, kitchen fails – I celebrate them all equally. Now go forth and ferment… I mean, create!
Print
Fermented Kimchi Gluten-Free Deviled Eggs: 6 Irresistible Flavor Bombs
- Total Time: 27 mins
- Yield: 12 deviled egg halves 1x
- Diet: Gluten Free
Description
A gluten-free twist on deviled eggs, featuring fermented kimchi for a tangy and spicy kick. Perfect for appetizers or snacks.
Ingredients
- 6 large eggs
- 1/4 cup mayonnaise
- 1 tbsp mustard
- 1/4 cup finely chopped fermented kimchi
- 1 tsp rice vinegar
- 1/4 tsp salt
- 1/4 tsp black pepper
- 1 tbsp chopped chives (for garnish)
Instructions
- Hard-boil the eggs, cool, peel, and halve them lengthwise.
- Remove yolks and place them in a bowl.
- Mash yolks with mayonnaise, mustard, kimchi, rice vinegar, salt, and pepper.
- Spoon or pipe the yolk mixture back into the egg whites.
- Garnish with chopped chives before serving.
Notes
- Use gluten-free kimchi to keep the recipe gluten-free.
- Adjust kimchi quantity based on your spice preference.
- For a smoother filling, blend the yolk mixture.
- Prep Time: 15 mins
- Cook Time: 12 mins
- Category: Appetizer
- Method: Boiling, Mixing
- Cuisine: Fusion
Nutrition
- Serving Size: 2 egg halves
- Calories: 140
- Sugar: 1g
- Sodium: 320mg
- Fat: 10g
- Saturated Fat: 2.5g
- Unsaturated Fat: 6g
- Trans Fat: 0g
- Carbohydrates: 2g
- Fiber: 0.5g
- Protein: 6g
- Cholesterol: 190mg