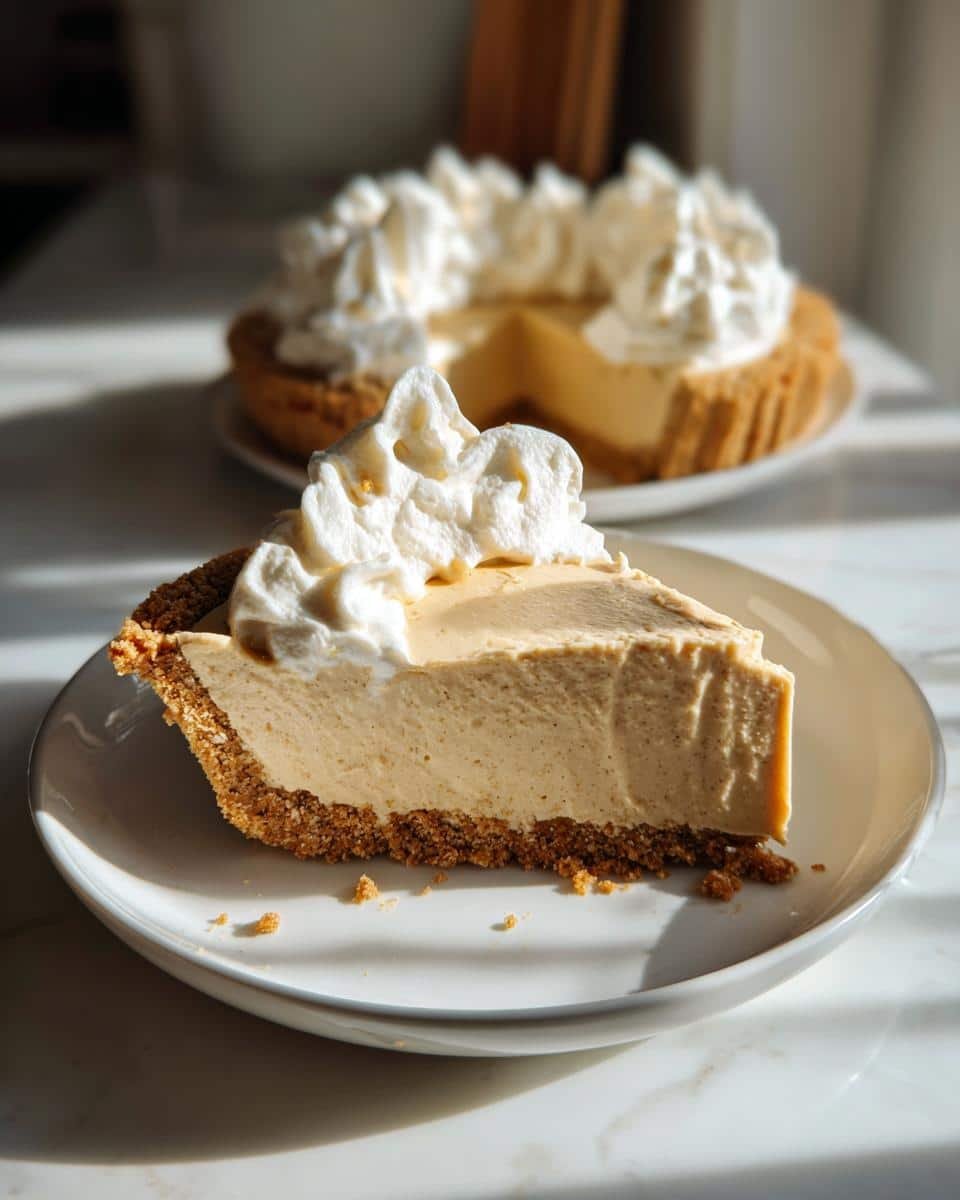
Oh my gosh, you have to try this no-bake gluten-free peanut butter pie – it’s my go-to dessert when I need something quick, decadent, and totally foolproof! I first made this for my sister’s birthday (she’s gluten-free) and now she requests it every year. The best part? No oven required, just a few simple ingredients whipped together into the creamiest, dreamiest peanut butter filling you’ll ever taste. It’s the kind of dessert that disappears fast at potlucks, with everyone begging for the recipe.
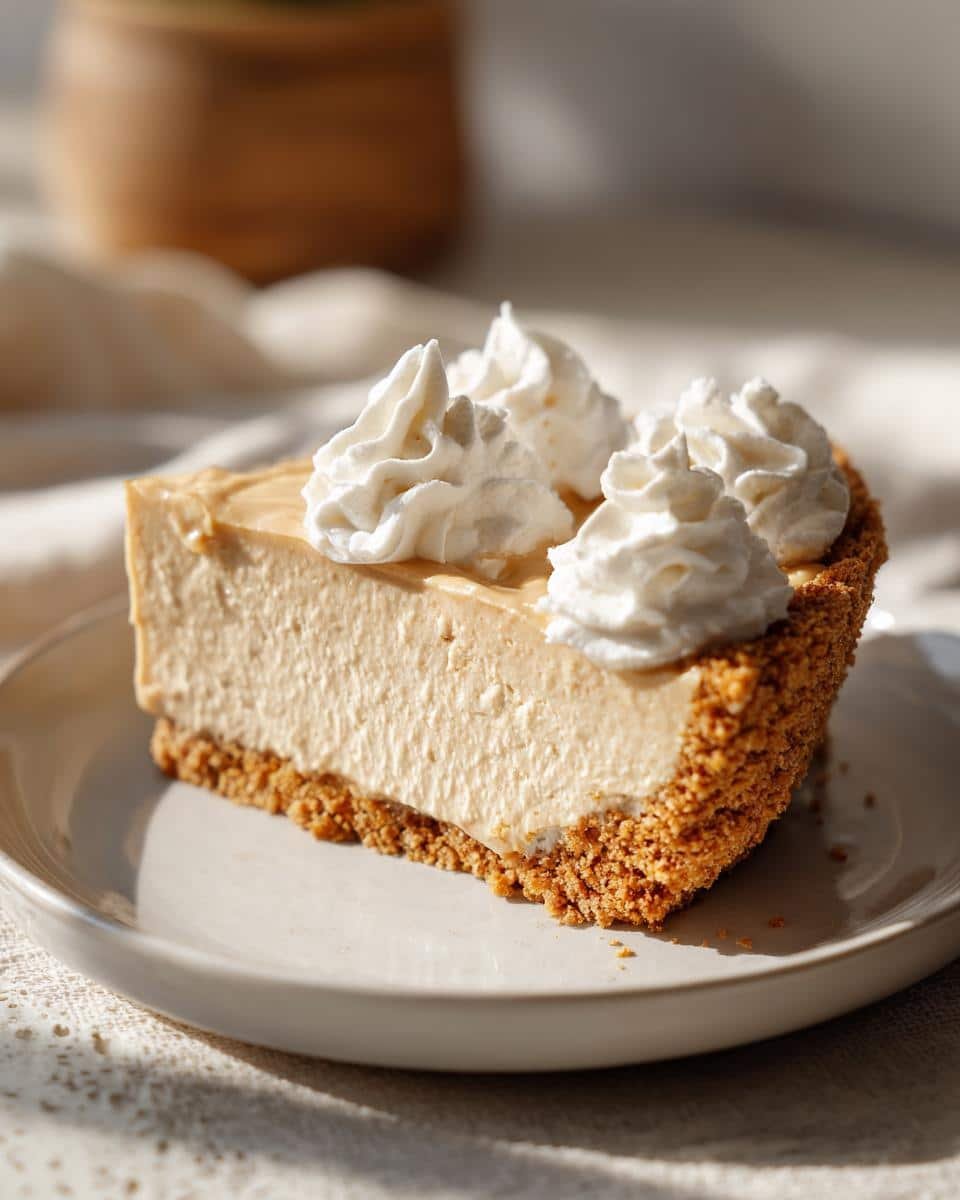
What makes this pie special is how effortlessly it comes together. You get that rich peanut butter flavor without any fuss – just mix, chill, and devour. The gluten-free graham cracker crust adds the perfect crunch, and the filling? Pure silk. Trust me, after one bite, you’ll understand why this no-bake wonder has become my signature dessert for everything from weeknight treats to fancy dinner parties.
Why You’ll Love This No-Bake Gluten-Free Peanut Butter Pie
Let me count the ways this pie will steal your heart:
- No oven required – Perfect for hot summer days or when you just can’t be bothered to turn on the stove
- Gluten-free magic – Delicious enough that no one will guess it’s allergy-friendly
- Creamy dreamy texture – Like eating a cloud of peanut butter bliss
- Quick prep – Ready to mix in about 15 minutes flat
- Crowd-pleaser – Works for kids’ parties and fancy dinners alike
Seriously, what’s not to love? It’s the dessert that keeps on giving.
Ingredients for No-Bake Gluten-Free Peanut Butter Pie
Here’s everything you’ll need to make this dreamy pie – and yes, I’ve tested every possible variation, so listen up:
- 1 1/2 cups gluten-free graham cracker crumbs (packed tight – I use Pamela’s brand, but any GF version works)
- 1/4 cup melted butter (salted gives the crust that addictive sweet-salty kick)
- 1 cup creamy peanut butter (the regular kind, not natural – trust me on this for texture)
- 8 oz cream cheese, softened (leave it out for 30 minutes – no shortcuts here!)
- 1 cup powdered sugar (sifted if you’re fancy, but I usually skip that step)
- 1 tsp vanilla extract (the good stuff makes a difference)
- 1 1/2 cups whipped cream (or thawed whipped topping if you’re pressed for time)
Pro tip: If you’re dairy-free, coconut cream works beautifully instead of whipped cream – just chill the can overnight first!
Equipment You’ll Need
Don’t worry – you probably already have everything in your kitchen! Here’s the short list:
- 9-inch pie dish (glass or ceramic works best)
- Mixing bowls (one for crust, one for filling)
- Hand mixer (or strong arms and a whisk if you’re feeling ambitious)
- Spatula (for scraping every last bit of that delicious filling)
That’s it! No fancy gadgets required – just good old-fashioned mixing and chilling.
How to Make No-Bake Gluten-Free Peanut Butter Pie
Okay, let’s get to the fun part – making this pie come together! I promise it’s easier than you think, and you’ll be amazed at how professional it looks (and tastes) with minimal effort. Just follow these simple steps, and you’ll have dessert magic in no time.
Step 1: Prepare the Crust
First things first – that buttery, crunchy crust! Mix your gluten-free graham cracker crumbs with melted butter until it resembles wet sand. Now, here’s my secret – press it firmly into your pie dish using the back of a measuring cup. This gives you that perfect, even layer that won’t crumble when you slice it. Make sure to go up the sides a bit too – we want every bite to have that delicious crunch!
Step 2: Make the Filling
Now for the star of the show – that creamy peanut butter filling! Beat the softened cream cheese first (this prevents lumps), then add the peanut butter, powdered sugar, and vanilla. Keep mixing until it’s completely smooth – no graininess allowed! I usually let my mixer run for a good 2-3 minutes here. You’ll know it’s ready when the mixture is perfectly silky and holds its shape when you lift the beaters.
Step 3: Fold in Whipped Cream
Here’s where the magic happens – gently fold in your whipped cream with a spatula. Go slow and use big, sweeping motions to keep all that air in the whipped cream. The key is to stop mixing the second everything is combined – overmixing will make your filling dense instead of light and fluffy. Trust me, it’s worth taking your time here!
Step 4: Chill and Serve
Spread your gorgeous filling into the crust, smooth the top with your spatula, and here’s the hard part – walk away! This baby needs at least 4 hours in the fridge (overnight is even better) to set properly. When you’re ready to serve, slice it cold – it holds its shape beautifully when properly chilled. Oh, and be prepared for compliments – this pie looks and tastes like you spent hours in the kitchen!
Tips for the Perfect No-Bake Gluten-Free Peanut Butter Pie
After making this pie more times than I can count, I’ve learned all the tricks for perfection. First – if you prefer less sweetness, swap regular peanut butter for natural (just stir it well first!). Don’t skip chilling time – that full 4 hours is non-negotiable for the perfect sliceable texture. For extra finesse, run your knife under hot water before slicing for clean cuts. And here’s my secret – a tiny pinch of salt on top makes all the flavors pop!
Variations and Serving Suggestions
Oh, the possibilities! While this pie is perfection on its own, here’s how I like to dress it up: For chocolate lovers, drizzle melted chocolate over the top before chilling – it sets into the most gorgeous marbled effect. Feeling fancy? Top with chopped peanuts or a sprinkle of sea salt right before serving. And my personal favorite – serve slightly frozen with a scoop of vanilla ice cream for the ultimate peanut butter and ice cream sandwich experience!
Storage and Reheating Instructions
This pie keeps beautifully in the fridge for up to 3 days – just cover it loosely with plastic wrap. Don’t freeze it though – the texture turns grainy! If it softens while serving, just pop it back in the fridge for 30 minutes to firm up again.
Nutritional Information
Just a heads up – nutrition can vary based on brands you use, but here’s the approximate breakdown per slice: 320 calories, 22g fat (8g saturated), 25g carbs, 2g fiber, 7g protein. Not bad for something this delicious!
Frequently Asked Questions
Can I use almond butter instead of peanut butter?
Absolutely! Almond butter works beautifully if you prefer its flavor – just know the pie will taste slightly different (still delicious though). The texture might be a bit thicker, so you may need to add an extra tablespoon of whipped cream.
How long does this gluten-free peanut butter pie keep in the fridge?
It stays perfect for about 3 days covered in the fridge – if it lasts that long! The crust gets softer over time, so I recommend enjoying it within 48 hours for best texture.
Can I make this dairy-free?
You bet! Swap the cream cheese for dairy-free cream cheese (I like Kite Hill brand) and use coconut whipped cream instead of regular. Just make sure your butter substitute is solid at room temperature for the crust.
Why does my filling seem runny?
Oh no! This usually happens if the cream cheese wasn’t fully softened or if you didn’t chill it long enough. Pop it back in the fridge for another hour – it should firm up. Next time, make sure your cream cheese sits out for a full 30 minutes!
Can I freeze leftovers?
I don’t recommend it – the texture turns grainy when thawed. But honestly, I’ve never had leftovers to worry about! This pie disappears fast at my house.
You can find more recipes on Pinterest.
Print
Creamy No-Bake Gluten-Free Peanut Butter Pie in 15 Minutes
- Total Time: 4 hours 15 minutes
- Yield: 8 servings 1x
- Diet: Gluten Free
Description
A creamy, no-bake peanut butter pie with a gluten-free crust. Easy to make and perfect for any occasion.
Ingredients
- 1 1/2 cups gluten-free graham cracker crumbs
- 1/4 cup melted butter
- 1 cup creamy peanut butter
- 8 oz cream cheese, softened
- 1 cup powdered sugar
- 1 tsp vanilla extract
- 1 1/2 cups whipped cream or whipped topping
Instructions
- Mix gluten-free graham cracker crumbs and melted butter. Press into a pie dish.
- Beat peanut butter, cream cheese, powdered sugar, and vanilla until smooth.
- Fold in whipped cream until fully combined.
- Spread filling over the crust and refrigerate for at least 4 hours.
- Slice and serve chilled.
Notes
- Use natural peanut butter for a less sweet taste.
- Chill the pie for at least 4 hours for best results.
- Top with chocolate drizzle or extra whipped cream if desired.
- Prep Time: 15 minutes
- Cook Time: 0 minutes
- Category: Dessert
- Method: No-Bake
- Cuisine: American
Nutrition
- Serving Size: 1 slice
- Calories: 320
- Sugar: 18g
- Sodium: 220mg
- Fat: 22g
- Saturated Fat: 8g
- Unsaturated Fat: 10g
- Trans Fat: 0g
- Carbohydrates: 25g
- Fiber: 2g
- Protein: 7g
- Cholesterol: 25mg