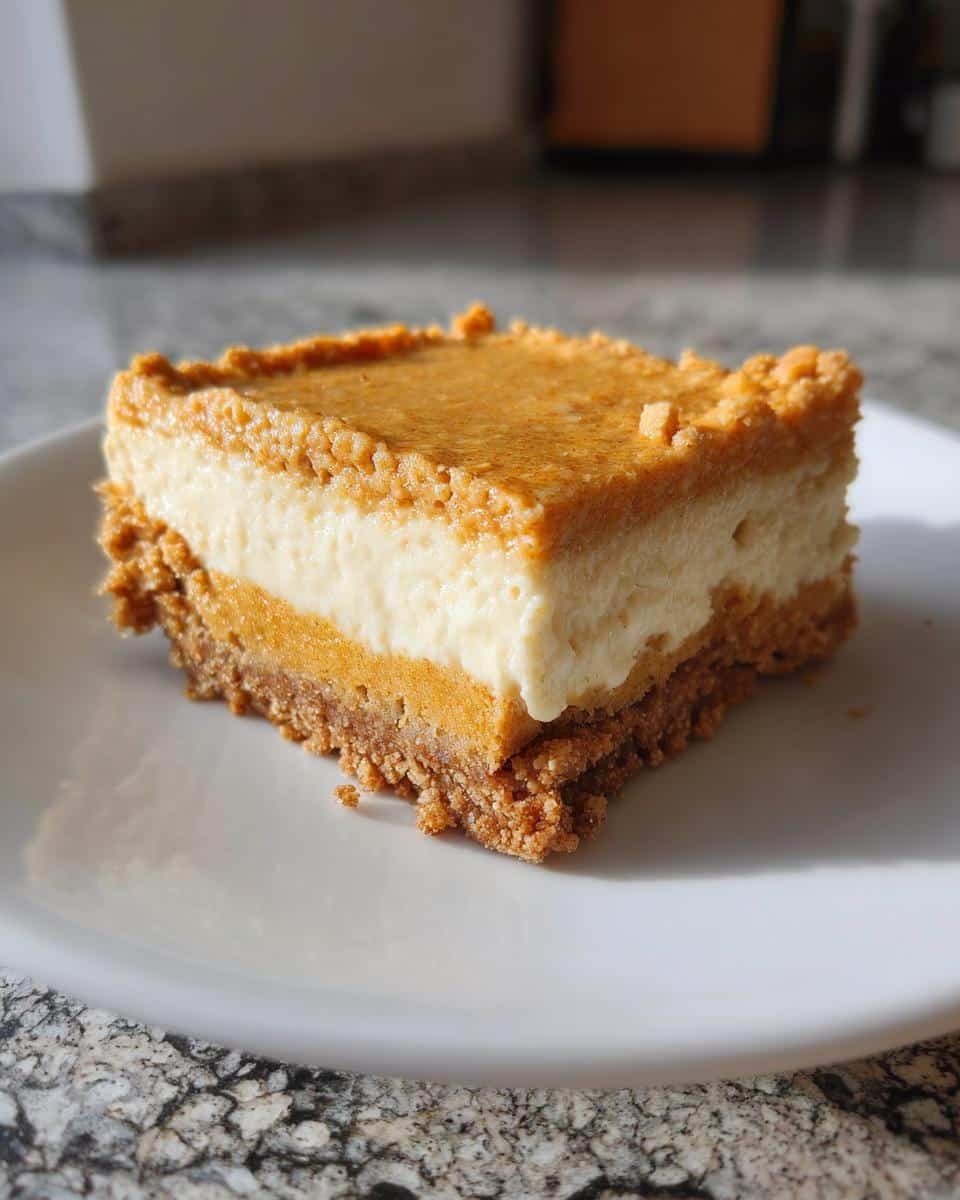
There’s something magical about the first crisp fall morning when I start craving pumpkin everything. I remember the year my sister went gluten-free—we thought we’d never enjoy our favorite seasonal desserts again. Then, after some serious kitchen experimentation (and a few hilarious fails), these Gluten-Free Pumpkin Cheesecake Bars were born. As a baker who’s spent years perfecting gluten-free recipes that don’t taste “healthy,” I can promise you these bars are the real deal—creamy, spiced just right, with a crust so good no one will guess it’s gluten-free. They’ve become our family’s must-make treat every autumn, and I’m so excited to share them with you!

Why You’ll Love These Gluten-Free Pumpkin Cheesecake Bars
Listen, I don’t blame you if you’re skeptical about gluten-free desserts – I’ve had my share of sad, crumbly attempts! But these bars? They’re different. Here’s why:
- That dreamy texture – Creamy pumpkin cheesecake meets a crisp cinnamon crust (no one will ever guess it’s gluten-free!)
- Easy as pie (but actually easier) – Just mix, bake, and chill – perfect for when you’re short on time but want something impressive
- Everyone can enjoy – Gluten-free doesn’t mean flavor-free here, and they’re easily made dairy-free with simple swaps
- Fall in every bite – Warm spices paired with pumpkin make these taste like autumn on a plate
Trust me, these disappear fast at parties – I always make a double batch!
Ingredients for Gluten-Free Pumpkin Cheesecake Bars
Gather these simple ingredients – I promise they’re all easy to find! The secret is quality matters here, especially with gluten-free baking. (P.S. Always check labels if you’re strictly GF – some “natural” spices can hide sneaky gluten.)
For the crust:
- 1 1/2 cups gluten-free graham cracker crumbs (I love Kinnikinnick brand)
- 1/4 cup melted butter (or coconut oil for dairy-free)
- 1 tsp cinnamon – the fresher the better!
For the filling:
- 16 oz cream cheese, softened (full-fat makes all the difference)
- 3/4 cup granulated sugar
- 1 cup pure pumpkin puree (not pie filling!)
- 2 large eggs, room temperature
- 1 tsp vanilla extract
- 1/2 tsp each: nutmeg and ginger
See? Nothing weird or hard-to-find – just pantry staples transformed into something magical!
Equipment You’ll Need
Don’t worry – you probably have everything already! Here’s what I grab from my kitchen:
- An 8×8-inch baking pan (metal gives the best crust, but glass works too)
- Parchment paper – lifesaver for clean slices
- Mixing bowls (one for crust, one for filling)
- A hand mixer or stand mixer to get that filling silky smooth
- Spatula for scraping every last bit of goodness into the pan
That’s it! No fancy gadgets needed for these bars.
How to Make Gluten-Free Pumpkin Cheesecake Bars
Okay, let’s get baking! I’ll walk you through each step – it’s easier than you think, and the smell while these bake? Absolute heaven. Just follow along, and you’ll have perfect bars every time.
Step 1: Prepare the Crust
First things first, preheat your oven to 350°F (175°C). Trust me, you want the oven fully heated before the crust goes in – it makes all the difference for that perfect golden crunch!
Now, take your gluten-free graham cracker crumbs (I just pulse mine in the food processor until they’re fine), melted butter, and cinnamon, and mix them together in a bowl. You’re looking for that perfect texture where it holds together when you pinch it between your fingers – if it’s too dry, add just a teaspoon more melted butter.
Line your 8×8-inch pan with parchment paper (trust me, this makes cleanup and slicing SO much easier), then press the crust mixture firmly into the bottom. I use the bottom of a measuring cup to really pack it in evenly. Pop it in the oven for 10 minutes – you’ll know it’s ready when your kitchen smells like cinnamon toast. Let it cool completely before adding the filling (about 15 minutes).
Step 2: Make the Pumpkin Cheesecake Filling
While the crust cools, let’s make the magic happen! In a large bowl, beat your softened cream cheese and sugar together until it’s completely smooth – I usually do this for about 2 minutes with my hand mixer. Scrape down the sides of the bowl (this step is crucial – you don’t want lumps of un-mixed cream cheese!).
Now add your pumpkin puree, eggs, vanilla, nutmeg, and ginger. Mix just until everything is combined – overmixing can incorporate too much air and cause cracks later. The batter should be velvety smooth and the color of a perfect pumpkin spice latte.
Pour this gorgeous mixture over your cooled crust, smoothing the top with a spatula. Tap the pan gently on the counter to release any air bubbles – you’ll see little bubbles pop up to the surface.
Step 3: Bake and Chill
Slide your pan into the preheated oven and bake for 35-40 minutes. The edges should look set, but the center will still have a slight jiggle – like jello, not liquid. That’s exactly what you want! If you overbake, the texture gets dense instead of creamy.
Let the bars cool completely at room temperature (about an hour), then refrigerate for at least 4 hours – I know it’s hard to wait, but this chilling step is what gives them that perfect cheesecake texture. Pro tip: I usually make mine the night before so they’re perfectly set by morning.
When you’re ready to serve, lift the bars out using the parchment paper and slice with a sharp knife (dip it in hot water between cuts for super clean edges). Top with whipped cream if you’re feeling fancy – but honestly, they’re amazing just as they are!
Tips for Perfect Gluten-Free Pumpkin Cheesecake Bars
After making these bars dozens of times (and learning from my mistakes!), here are my can’t-skip tips for flawless results every time:
- Room temp is key – Cold cream cheese will leave lumps, and cold eggs won’t incorporate properly. I leave mine out for 2 hours before baking.
- Don’t overmix – Once you add the eggs, mix just until combined. Too much air = cracks!
- Cool completely – Rushing the cooling process makes slicing messy. Patience pays off!
- Fresh spices matter – That jar of nutmeg from last year? Toss it. Fresh spices make the flavors pop.
Follow these simple tricks, and you’ll have bars worthy of any bakery case!
Ingredient Substitutions & Notes
Need to tweak this recipe? No problem! Here’s how I’ve adapted it over the years (because trust me, I’ve tried every variation!):
- Dairy-free? Swap the butter for coconut oil in the crust and use dairy-free cream cheese (I like Kite Hill brand). The texture stays perfect!
- Lower sugar? Coconut sugar works 1:1, though the bars will be slightly darker. Just don’t use liquid sweeteners – they throw off the texture.
- Egg-free? I’ve had luck with flax eggs (1 tbsp ground flax + 3 tbsp water per egg), but the bars won’t rise quite as much.
Gluten-free note: Double-check every ingredient, especially spices and vanilla extract – some brands aren’t GF. When in doubt, look for certified gluten-free labels!
Serving and Storing Gluten-Free Pumpkin Cheesecake Bars
Oh, the fun part – eating these beauties! I love serving them chilled straight from the fridge with a dollop of fresh whipped cream and a sprinkle of cinnamon. For a fancy touch, drizzle with caramel sauce or top with toasted pecans – it’s like autumn in every bite! Store leftovers (if you have any!) in an airtight container in the fridge for up to 5 days. They actually get more flavorful by day two – if they last that long!
Nutritional Information
Okay, let’s talk numbers – but remember, these are just estimates since brands vary (especially with gluten-free products). I calculate nutrition based on the exact ingredients I use, so your bars might be slightly different. Here’s the breakdown per bar when sliced into 9 generous squares:
- Calories: 280
- Fat: 18g (10g saturated)
- Carbs: 26g (2g fiber, 20g sugar)
- Protein: 5g
Now, before you stress about numbers – these are rich, satisfying bars meant to be enjoyed in moderation. I usually cut them smaller (12 pieces) when serving at parties. Pro tip: The fat content comes mostly from that luscious cream cheese filling – that’s what makes them so decadently creamy!
Important: Always calculate your own nutrition if you have specific dietary needs or use different brands. The gluten-free graham crackers I recommend (Kinnikinnick) have slightly different numbers than conventional ones!
FAQs About Gluten-Free Pumpkin Cheesecake Bars
Q1: Can I freeze these cheesecake bars?
Absolutely! They freeze beautifully for up to 2 months. I wrap individual bars tightly in plastic wrap, then pop them in a freezer bag. Thaw overnight in the fridge before serving. Pro tip: Freeze mk4e them before slicing – it’s way easier to cut frozen!
Q2: Help! My filling cracked – what did I do wrong?
Don’t panic! Cracks usually mean the cheesecake cooled too fast. Next time, try leaving it in the turned-off oven with the door slightly open for an hour after baking. But honestly? The taste is still amazing – just cover any cracks with whipped cream!
Q3: Can I make these completely dairy-free?
Yes! Use coconut oil instead of butter in the crust and swap in your favorite dairy-free cream cheese (I’ve had great results with Kite Hill). The texture stays wonderfully creamy – my dairy-free friends go crazy for this version!
Share Your Experience!
Okay, now it’s your turn! I’d absolutely love to hear how your Gluten-Free Pumpkin Cheesecake Bars turned out. Did you add any fun twists? Maybe some chocolate chips or a sprinkle of sea salt on top? (Ooh, now I want to try that!) Drop a comment below and tell me all about your baking adventure – the triumphs, the “oops” moments, everything!
And hey, if you snapped a photo of your gorgeous bars (because let’s be real, they’re Instagram-worthy), tag me @[YourHandle] so I can see your masterpiece! Nothing makes me happier than seeing these recipes come to life in your kitchens. Happy baking, friends – can’t wait to hear your stories!
Print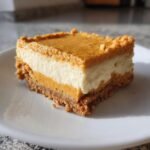
Irresistible Gluten-Free Pumpkin Cheesecake Bars in 7 Easy Steps
- Total Time: 55 mins + chilling
- Yield: 9 bars 1x
- Diet: Gluten Free
Description
Delicious gluten-free pumpkin cheesecake bars with a creamy filling and a spiced crust.
Ingredients
- 1 1/2 cups gluten-free graham cracker crumbs
- 1/4 cup melted butter
- 1 tsp cinnamon
- 16 oz cream cheese, softened
- 3/4 cup sugar
- 1 cup pumpkin puree
- 2 eggs
- 1 tsp vanilla extract
- 1/2 tsp nutmeg
- 1/2 tsp ginger
Instructions
- Preheat oven to 350°F (175°C).
- Mix graham cracker crumbs, butter, and cinnamon. Press into a lined 8×8-inch pan.
- Bake crust for 10 minutes, then let cool.
- Beat cream cheese and sugar until smooth.
- Add pumpkin, eggs, vanilla, nutmeg, and ginger. Mix well.
- Pour filling over crust and bake for 35-40 minutes until set.
- Cool, then refrigerate for 4 hours before slicing.
Notes
- Use full-fat cream cheese for best texture.
- Ensure all ingredients are gluten-free.
- Store leftovers in the fridge for up to 5 days.
- Prep Time: 15 mins
- Cook Time: 40 mins
- Category: Dessert
- Method: Baking
- Cuisine: American
Nutrition
- Serving Size: 1 bar
- Calories: 280
- Sugar: 20g
- Sodium: 220mg
- Fat: 18g
- Saturated Fat: 10g
- Unsaturated Fat: 6g
- Trans Fat: 0g
- Carbohydrates: 26g
- Fiber: 2g
- Protein: 5g
- Cholesterol: 85mg