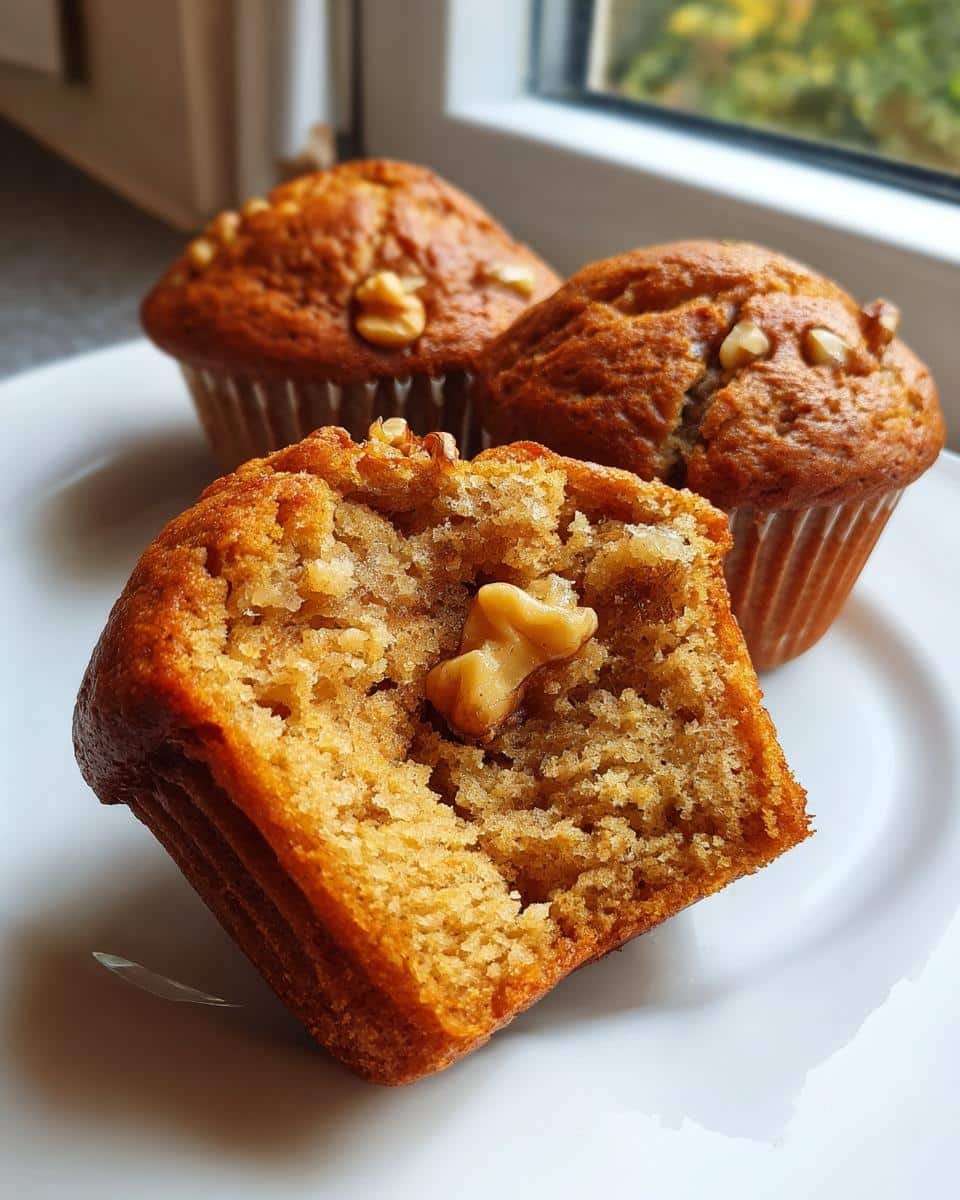
Oh my gosh, let me tell you about these gluten-free banana nut muffins – they’ve become my absolute go-to breakfast lifesaver! Picture this: It’s 6:45am, you’re half-asleep, but you NEED something filling and delicious before rushing out the door. That’s where these little miracles come in.
I started making them when my niece (who’s celiac) came to stay last summer. After three disastrous batches (we won’t talk about the hockey puck incident), I finally nailed it. The secret? Those bananas need to be so ripe they’re practically begging to be mashed – you know, the kind with black spots all over.
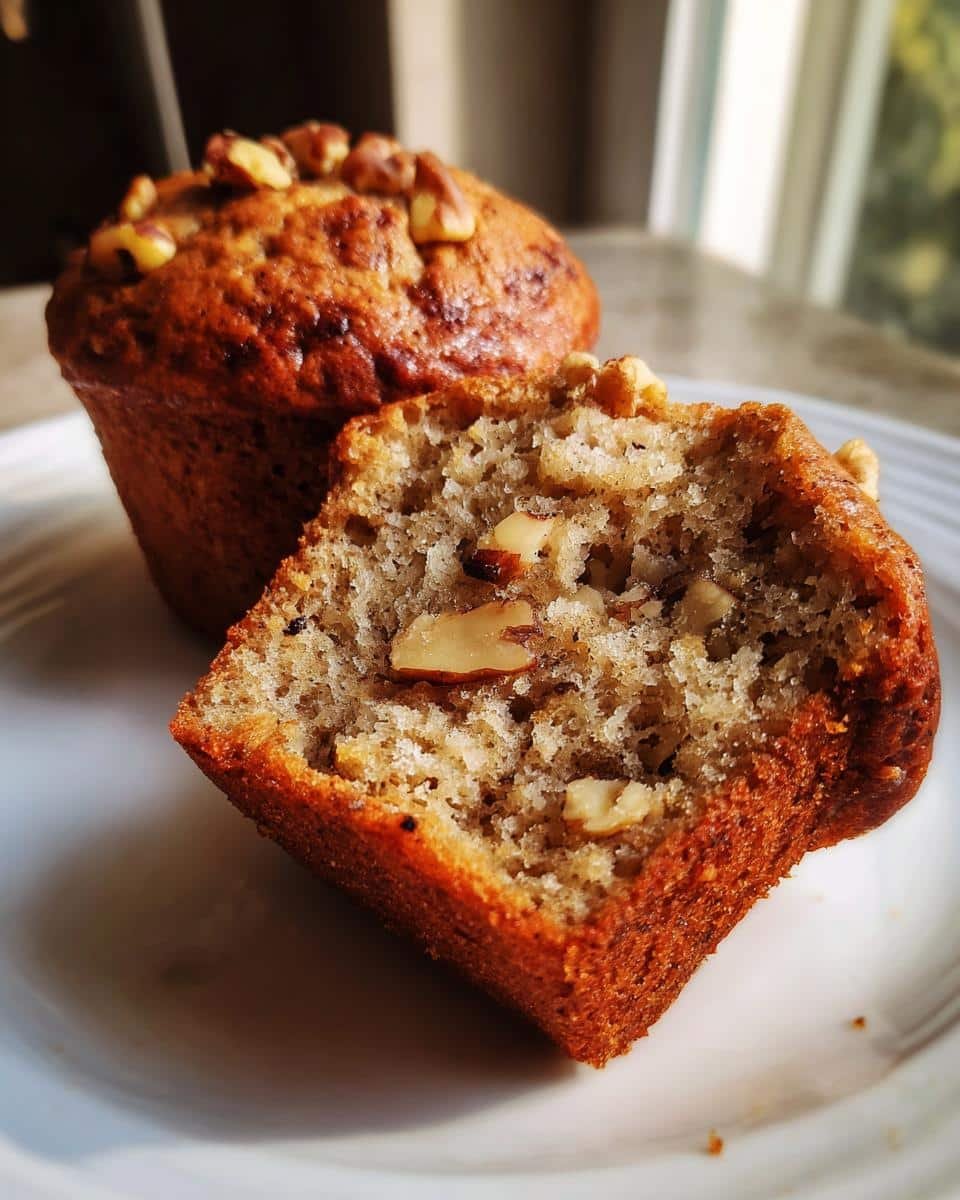
What I love most is how these gluten-free banana nut muffins balance being wholesome enough for breakfast but sweet enough to feel like a treat. The walnuts give this satisfying crunch that makes you forget you’re eating gluten-free. And trust me, nobody will guess these moist little guys came from your oven in under 35 minutes!
Why You’ll Love These Gluten-Free Banana Nut Muffins for Breakfast
Let me count the ways these muffins will become your new morning best friend:
- They’re crazy easy – I whip these up while my coffee’s brewing. Just mash, mix, and bake. No fancy techniques or waiting around.
- Perfectly sweet without the sugar crash – The bananas do most of the work, and walnuts add that satisfying crunch. My kids don’t even realize they’re eating something good for them!
- Actually stay moist (unlike most gluten-free baked goods). The supermarket versions always dry out by lunchtime – these stay tender for days.
- Customizable for allergies – Swap walnuts for pecans if you prefer, or use coconut oil instead of butter. The recipe’s flexible like that.
Seriously, these muffins solve every “I-need-breakfast-now” panic. I stash half the batch in the freezer, and boom – instant breakfast all week.
Ingredients for Gluten-Free Banana Nut Muffins for Breakfast
Okay, let’s talk ingredients! The magic of these muffins comes from just a few simple things you probably already have in your kitchen. Here’s what you’ll need:
- 2 cups gluten-free flour – My go-to is Bob’s Red Mill 1-to-1 blend, but any good quality GF flour mix works. Just don’t use almond or coconut flour alone – they behave differently.
- 1 teaspoon baking soda – This is what makes our muffins rise beautifully. Make sure yours isn’t expired!
- 1/4 teaspoon salt – Trust me, it makes all the flavors pop. I once forgot it and the muffins tasted so… blah.
- 1/2 cup chopped walnuts – Toast them first if you’ve got an extra minute – it brings out this amazing nutty aroma.
- 3 ripe bananas, mashed – When I say ripe, I mean those black-speckled bananas you’d normally toss in the freezer. The darker, the sweeter!
- 1/2 cup sugar – You can reduce this slightly if your bananas are super ripe. I sometimes use coconut sugar for a deeper flavor.
- 1/4 cup melted butter – Real butter please! Though coconut oil works great too if you’re dairy-free.
- 1 egg – Room temperature if you remember to take it out early. If not, no big deal.
- 1 teaspoon vanilla extract – The good stuff makes all the difference here.
See? Nothing weird or hard-to-find. Just real ingredients that come together to make magic in your muffin tin!
How to Make Gluten-Free Banana Nut Muffins for Breakfast
Alright, let’s get baking! I promise these gluten-free banana nut muffins come together faster than you can say “where’s my coffee?” Just follow these simple steps and you’ll have warm, nutty goodness in no time.
Prep the Dry Ingredients
First, grab your biggest mixing bowl – we’re starting with the dry stuff. Measure out that gluten-free flour carefully (I like to spoon it into the measuring cup rather than scooping – helps avoid packing too much). Add the baking soda and salt right on top. Now here’s my little trick: whisk everything together really well for about 30 seconds. This does double duty – it mixes everything evenly AND gives the flour a nice little aerating boost.
Once that’s combined, stir in those chopped walnuts. If you remembered to toast them first (gold star for you!), let them cool a bit so they don’t melt your butter later. Set this bowl aside – we’ll come back to it after we create some wet magic.
Mix the Wet Ingredients
Time to deal with those bananas! I mash mine right in the second mixing bowl – no need to dirty extra dishes. Use a fork or potato masher and go to town until you’ve got a chunky puree with just a few small lumps. Don’t overdo it though – a little texture makes the muffins more interesting!
Now pour in the sugar and give it a good stir. The sugar crystals help break down the bananas even more – you’ll see the mixture get slightly liquidy. Next comes the melted butter (careful, it shouldn’t be piping hot or it’ll cook the egg), egg, and that glorious vanilla. Stir just until everything looks evenly combined. At this point, my kitchen smells like banana bread heaven already!
Combine and Bake
Here’s where things get exciting! Make a well in your dry ingredients and pour in the banana mixture. Grab a rubber spatula and gently fold everything together. This is crucial – stop mixing the second you don’t see dry flour patches. A few lumps are totally fine! Overmixing is the enemy of tender muffins.
Scoop the batter into your prepared muffin tin, filling each cup about 2/3 full. I use an ice cream scoop for this – makes it neater and keeps the sizes even. Pop them in the oven and set your timer for 20 minutes. At the 15-minute mark, start peeking – they’re done when golden brown and a toothpick comes out clean (a couple moist crumbs are okay). Let them cool in the pan for 5 minutes before transferring to a rack – this prevents sticking and lets them set up perfectly. Now try not to eat three at once!
Tips for Perfect Gluten-Free Banana Nut Muffins for Breakfast
After burning through more bananas than I’d like to admit (and a few muffin disasters), here are my absolute must-know tips for nailing these gluten-free banana nut muffins every single time:
Banana ripeness is EVERYTHING
Those barely-yellow bananas in your fruit bowl? Put ’em back! Wait until they develop black speckles all over – that’s when they’re sweetest and easiest to mash. I actually keep overripe bananas in my freezer specifically for muffin emergencies. Just thaw them overnight and you’ve got perfect banana mush ready to go!
The golden rule: Don’t overmix!
Gluten-free batters are more delicate than regular muffin mixes. Stir just until the wet and dry ingredients combine – lumps are your friend here! I always tell my kids “fold it like you’re turning pages in a book.” Overmixing leads to dense, tough muffins that could double as doorstops.
Test doneness like a pro
The toothpick test works, but here’s my grandma’s trick: Gently press the muffin top with your finger. If it springs back immediately, they’re done. If it leaves an indent, give them a few more minutes. Also, the muffins should pull slightly away from the pan edges when fully baked.
Let them rest (if you can!)
I know it’s tempting to eat them piping hot, but letting gluten-free muffins cool for at least 10 minutes helps them set properly. They firm up beautifully without losing that signature moistness. Though I won’t judge if you “taste test” one straight from the pan – quality control is important!
Pan prep matters
Gluten-free baked goods stick more easily. I swear by greasing the muffin tin well with butter (up the sides too!) or using paper liners sprayed lightly with oil. Nothing worse than beautiful muffins losing their tops because they stuck!
Variations for Your Gluten-Free Banana Nut Muffins
One of the best things about these muffins? They’re like a blank canvas waiting for your personal touch! Here are my favorite ways to mix things up when I’m feeling adventurous:
Chocolate chip happiness
Who can resist chocolate for breakfast? Swap out half the walnuts for 1/2 cup chocolate chips (I like mini ones because they distribute better). The chips melt into little pockets of joy that make these muffins feel downright decadent. My kids call these “dessert muffins,” but shhh – we know they’re still wholesome!
Nutty alternatives
Not a walnut fan? No problem! Pecans give a wonderfully buttery flavor, while toasted almonds add delightful crunch. For nut-free versions, try sunflower seeds or pumpkin seeds – they give that same satisfying texture without the allergens. Just toast whatever you use first to amp up the flavor.
Spice it up
A teaspoon of cinnamon transforms these into cozy comfort muffins. Feeling fancy? Add 1/4 teaspoon each of nutmeg and cardamom for depth. My winter favorite is adding a pinch of ginger and clove – tastes like banana bread crossed with gingerbread!
The beauty of this recipe is how forgiving it is. Once you’ve got the basic method down, you can play around endlessly. Just keep your total add-ins to about 3/4 cup max, or the muffins might not hold together properly. Now go forth and customize – your perfect muffin is waiting to be invented!
Storing and Reheating Gluten-Free Banana Nut Muffins
Here’s the best part – these muffins actually keep their moisture better than most gluten-free baked goods! But you’ve got to store them right. After years of trial and error (and a few tragic dried-out muffins), here’s exactly what works:
Room temperature storage
Let your muffins cool completely first – trapping heat creates condensation that makes them soggy. I transfer mine to an airtight container with a paper towel at the bottom (absorbs extra moisture) and another one lightly draped on top. They stay perfect for 2-3 days this way. Just don’t refrigerate them – gluten-free goods get weirdly dense and dry in the fridge!
Freezing for later
This is my secret weapon! I always make a double batch and freeze half. Wrap each muffin individually in plastic wrap, then pop them all in a freezer bag. They’ll keep for up to 3 months this way. When the morning rush hits, just grab one and either:
- Let it thaw overnight on the counter (perfect texture by morning)
- Microwave for 20-30 seconds straight from frozen (emergency breakfast!)
- Toast lightly for that just-baked crispness
Reviving day-old muffins
If your muffins do dry out (it happens!), don’t toss them! Sprinkle with a few drops of water and microwave for 10 seconds – they’ll soften right up. For extra luxury, split one in half, butter both sides, and toast it like English muffin. Absolute heaven with your morning coffee!
Pro tip: Label your freezer bags with the date – even though these disappear fast in my house, it helps keep track of older batches. Now you’re set with grab-and-go breakfasts whenever the craving strikes!
Nutritional Information
Okay, let’s talk numbers – but remember these are estimates that can change based on your exact ingredients! (My walnuts might be bigger than yours, your bananas might be sweeter, you get the idea.) Here’s the general breakdown per muffin when made exactly as written:
- Calories: About 180
- Sugar: 10g (mostly from the bananas and that little bit of added sugar)
- Fat: 8g (good fats from walnuts and butter!)
- Carbs: 25g
- Fiber: 2g (thank you, walnuts and gluten-free flour!)
- Protein: 3g
A few important notes: If you use coconut sugar instead of regular, the numbers shift slightly. Same if you swap butter for coconut oil – the saturated fat changes. Gluten-free flours vary too – some have more protein than others. Basically, don’t stress if your counts aren’t exact!
What I love most? These muffins give you sustained energy without that mid-morning crash. The combo of healthy fats, fiber, and natural sugars keeps you going better than any store-bought “health” muffin loaded with weird preservatives. And let’s be real – homemade always wins on taste!
Disclaimer: These nutrition estimates are calculated using generic ingredient data. Values may vary based on specific brands and measurements. This is not intended as medical dietary advice.
Frequently Asked Questions
I get questions about these gluten-free banana nut muffins all the time – here are the ones that pop up most often!
Can I use almond flour instead of gluten-free flour mix?
Oh boy, I learned this one the hard way! Straight almond flour makes these muffins way too dense and oily. If you want to go the almond route, try using half almond flour and half gluten-free blend. Or better yet – use almond meal for just 1/4 of the total flour. It adds lovely texture without compromising the rise!
How can I make these dairy-free?
Easy peasy! Just swap the butter for coconut oil (melted and cooled slightly) or your favorite dairy-free margarine. I’ve even used applesauce in a pinch – though the texture gets a bit cakier. For extra richness, try adding a tablespoon of nut butter to the wet ingredients!
My muffins came out gummy – what went wrong?
Ah, the dreaded gumminess! This usually means either: 1) Your bananas were TOO ripe (yes, there is such a thing!), 2) You overmixed the batter (those gluten-free flours need gentle treatment), or 3) Your oven runs cold so they baked too slowly. Next time, try reducing liquid slightly and checking your oven temp with a thermometer!
Can I make these egg-free?
Absolutely! For each egg, you can use: 1 tablespoon ground flaxseed + 3 tablespoons water (let it gel first), or 1/4 cup applesauce. The texture changes slightly – they’re more delicate – but still delicious. My vegan friend swears by using mashed banana as the egg replacer, but you’ll need to reduce the other bananas slightly.
Why do mine sink in the middle?
This breaks my baker’s heart! Sinking usually means either: 1) Too much leavener (check your baking soda is fresh!), 2) Opened the oven door too early (wait until at least minute 15!), or 3) Underbaked. Try reducing oven temp by 25°F and baking a few minutes longer next time. And whatever you do – no peeking for the first 15 minutes!
Got more questions? Hit me up in the comments – I’ve probably tested every variation under the sun with these muffins!
Ready to Bake?
Alright, you’ve got all my secrets now – it’s your turn to make these gluten-free banana nut muffins magic happen! I can practically smell them from here.
Don’t be nervous if it’s your first time baking gluten-free. Just remember: super ripe bananas, gentle mixing, and trust the toothpick test. Even my hockey puck phase taught me something (mostly that my dog will eat anything).
When you pull that first batch out of the oven all golden and fragrant, take a pic before they disappear – I’d love to see your masterpiece! Tag me if you’re sharing online so I can cheer you on.
Now grab those speckled bananas and get baking – your future self will thank you when you’ve got warm muffins ready on a sleepy Monday morning. Happy mixing!
For more recipes and baking inspiration, follow me on Pinterest!
Print
Gluten-Free Banana Nut Muffins: 3 Secrets for Perfect Breakfast Bliss
- Total Time: 35 mins
- Yield: 12 muffins 1x
- Diet: Gluten Free
Description
Gluten-free banana nut muffins perfect for a quick breakfast.
Ingredients
- 2 cups gluten-free flour
- 1 tsp baking soda
- 1/4 tsp salt
- 1/2 cup chopped walnuts
- 3 ripe bananas, mashed
- 1/2 cup sugar
- 1/4 cup melted butter
- 1 egg
- 1 tsp vanilla extract
Instructions
- Preheat oven to 350°F (175°C). Grease a muffin tin.
- Mix gluten-free flour, baking soda, and salt in a bowl.
- Stir in walnuts.
- In another bowl, mix mashed bananas, sugar, melted butter, egg, and vanilla.
- Combine wet and dry ingredients. Stir until just blended.
- Pour batter into muffin tin, filling each cup 2/3 full.
- Bake for 20–25 minutes or until a toothpick comes out clean.
- Cool for 5 minutes before serving.
Notes
- Use very ripe bananas for best flavor.
- Store in an airtight container for up to 3 days.
- Freeze extra muffins for later use.
- Prep Time: 10 mins
- Cook Time: 25 mins
- Category: Breakfast
- Method: Baking
- Cuisine: American
Nutrition
- Serving Size: 1 muffin
- Calories: 180
- Sugar: 10g
- Sodium: 120mg
- Fat: 8g
- Saturated Fat: 3g
- Unsaturated Fat: 4g
- Trans Fat: 0g
- Carbohydrates: 25g
- Fiber: 2g
- Protein: 3g
- Cholesterol: 25mg