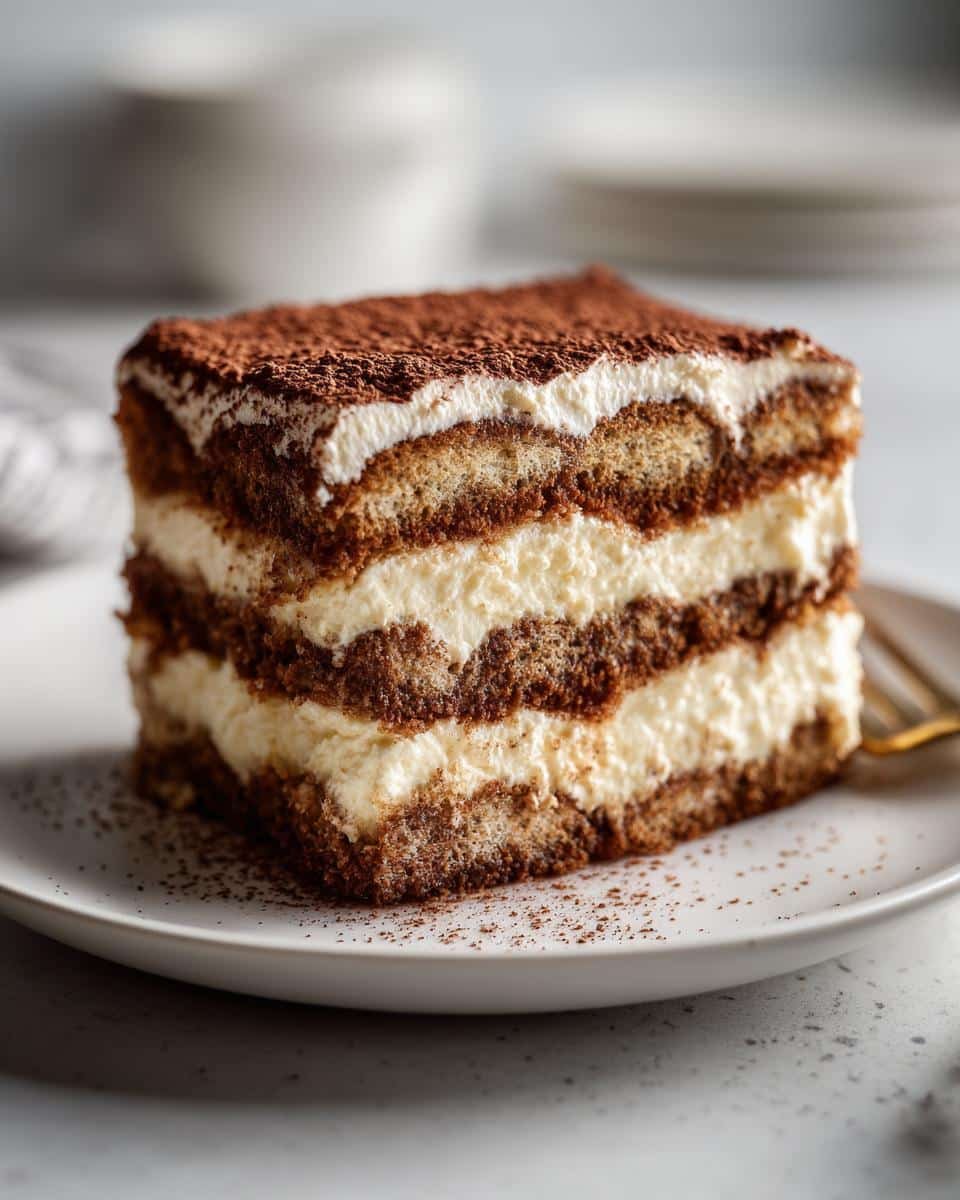
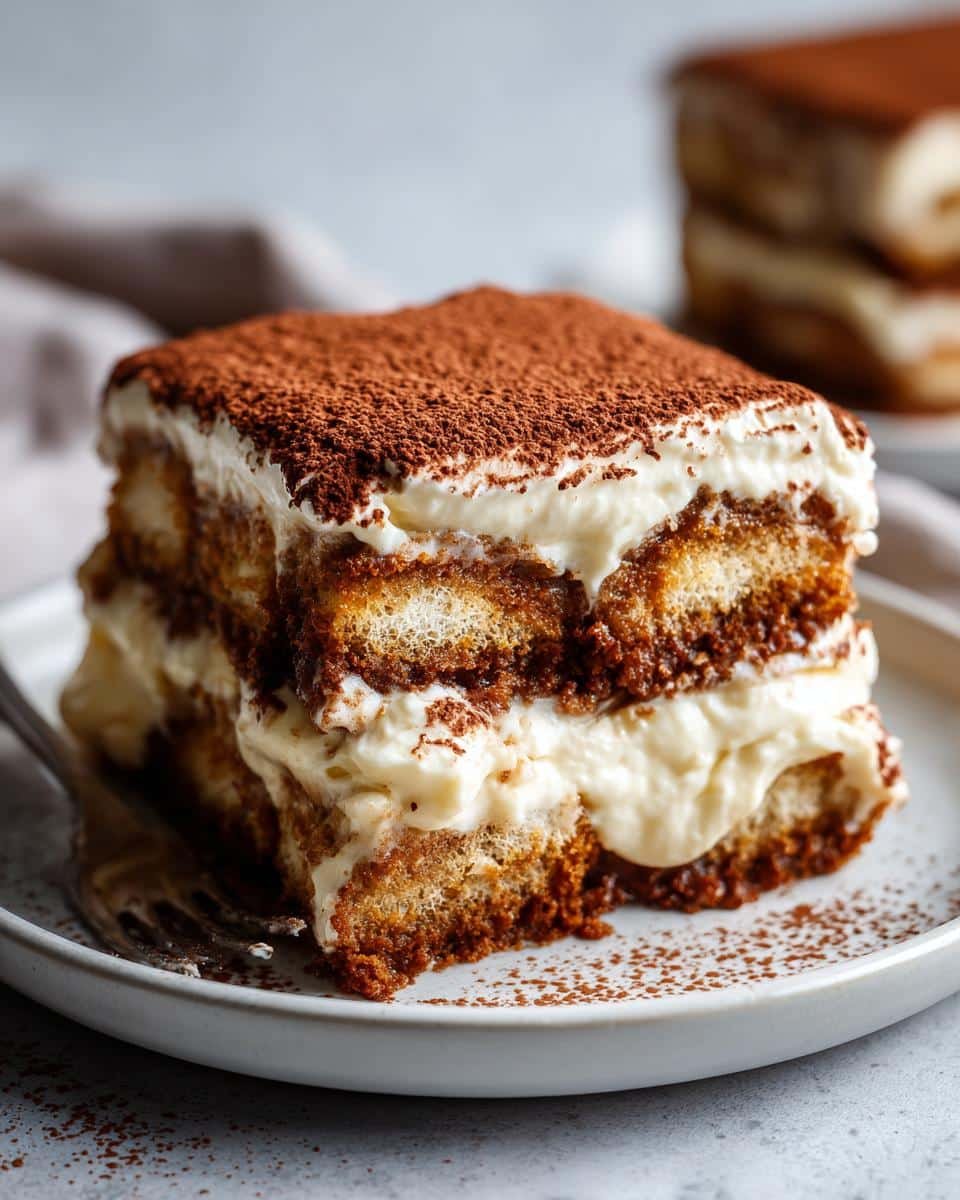
You wouldn’t believe the look on my Italian grandmother’s face when I told her I was making gluten-free tiramisu. “Impossible!” she declared—until she took that first bite. Turns out, classic gluten-free tiramisu is not only possible, it’s downright magical. I discovered this when my best friend went gluten-free and I stubbornly refused to let her miss out on our favorite dessert. After testing dozens of gluten-free ladyfingers (some tragic, some terrific), I finally cracked the code to a version that’s every bit as creamy, coffee-kissed, and indulgent as the original. No oven required—just layers of dreamy mascarpone and espresso-dipped cookies that’ll make everyone forget they’re eating gluten-free.
Why You’ll Love This Classic Gluten-Free Tiramisu
Trust me, this isn’t your average “good for gluten-free” dessert—it’s downright irresistible. Here’s why:
- Creamy perfection: That velvety mascarpone filling? Just like Nonna used to make, only without the gluten tummy ache
- Authentic coffee kick: Every bite delivers that signature espresso punch—no compromises
- No-bake magic: Whisk, layer, chill… done! Perfect for summer when oven heat is the enemy
- Gluten-free win: Finally, a dessert where nobody feels left out at the table
- Better overnight: The flavors meld beautifully—if you can wait that long!
I’ve served this to gluten-lovers who swore they’d taste the difference… until they didn’t. That’s the real magic here.
Ingredients for Classic Gluten-Free Tiramisu
Gather these simple ingredients—quality matters here! I learned the hard way that skimping on the mascarpone leads to sad, runny tiramisu. You’ll need:
- 6 large egg yolks (room temperature blends smoother)
- 3/4 cup granulated sugar (don’t pack it!)
- 2/3 cup whole milk (trust me, low-fat won’t give the same richness)
- 1 1/4 cups heavy cream (chill the bowl first for best whipping)
- 1/2 tsp vanilla extract (the real stuff, please)
- 1 lb mascarpone cheese (softened but still cool)
- 1 1/2 cups strong brewed coffee, cooled (I use two shots espresso + hot water)
- 2 tbsp coffee liqueur (optional but oh-so-good)
- 24 gluten-free ladyfingers (Schär brand works beautifully)
- 2 tbsp cocoa powder for dusting (Dutch-processed tastes richest)
Ingredient Notes & Substitutions
When I first went gluten-free, I didn’t realize soy sauce could hide in coffee liqueur! Here’s what to watch for:
- Gluten-free is non-negotiable: Check every label—even vanilla extract sometimes contains gluten
- Dairy-free option: Swap mascarpone for coconut cream cheese and use coconut cream instead of heavy cream
- Caffeine-free: Decaf works fine—just brew it extra strong
- Alcohol-free: Skip the liqueur and add 1/2 tsp extra vanilla
- Egg-free warning: This recipe relies on eggs for structure—I haven’t found a good vegan substitute yet
Pro tip: Buy extra ladyfingers—they’re fragile! I always grab an extra package just in case.
Equipment You’ll Need
Good news – you probably already have everything! Here’s what I grab from my kitchen:
- Heatproof mixing bowl (for that crucial egg tempering)
- Hand mixer or whisk (elbow grease works too!)
- 9×13 inch baking dish (glass shows off those beautiful layers)
- Small shallow dish (for quick coffee dipping)
- Fine mesh sieve (for that Instagram-worthy cocoa dusting)
See? No fancy gadgets needed – just basic tools that make the magic happen.
How to Make Classic Gluten-Free Tiramisu
Okay, let’s get messy! I promise this is easier than it looks—just follow these steps and you’ll have restaurant-worthy tiramisu in no time. The secret? Take it slow and enjoy the process. There’s something magical about watching those layers come together!
Preparing the Mascarpone Filling
First, let’s tackle that dreamy filling. Grab your egg yolks and sugar—this is where the arm workout begins! Whisk them together in your heatproof bowl until pale and creamy. Now comes the fun part: place the bowl over simmering water (don’t let it touch!) and whisk like your life depends on it for about 10 minutes. You’ll know it’s ready when it ribbons off the whisk. Remove from heat, whisk in the milk, and let it cool slightly. Meanwhile, beat that chilled heavy cream with vanilla until stiff peaks form—but don’t overdo it or you’ll get butter! Now gently fold the mascarpone into the egg mixture, then carefully fold in the whipped cream. The key here? Gentle hands—we want clouds, not concrete!
Assembling the Layers
Time for the best part! Mix your cooled coffee with liqueur if using—I like to pour mine into a pie plate for easy dipping. Now the golden rule: quick dips only! Dunk each gluten-free ladyfinger for about 1 second per side—any longer and they’ll turn to mush. Arrange them snugly in your dish, then spread half the mascarpone mixture over top. Repeat with another layer of dipped cookies and the remaining cream. Now the finishing touch: dust generously with cocoa powder through your sieve for that perfect, velvety top. Pop it in the fridge and try to resist peeking for at least 4 hours—I know, torture!
Tips for Perfect Classic Gluten-Free Tiramisu
After making this dessert more times than I can count (and eating even more!), I’ve learned all the tricks for flawless gluten-free tiramisu:
- Chill everything cold: Pop your mixing bowl and beaters in the freezer for 10 minutes before whipping the cream—it makes all the difference!
- Mascarpone magic: Let it sit out just until softened but still cool—too warm and your filling will weep
- Patience pays: Resist cutting in before 4 hours—overnight chilling lets the flavors marry beautifully
- Ladyfinger lifeline: Keep extras handy—gluten-free versions break easier than traditional ones
- Cocoa pro tip: Dust right before serving so it stays velvety, not soggy
My biggest lesson? Always make two—one to share and one to “test” while it chills!
Serving and Storing Classic Gluten-Free Tiramisu
Here’s the hardest part—waiting! That 4-hour chill time isn’t just a suggestion—it’s what transforms good tiramisu into great tiramisu. The layers need time to set properly and let all those gorgeous flavors mingle. When you’re ready to serve, I love adding chocolate shavings or fresh berries on top for extra pizzazz. Leftovers? Ha! Just kidding—if you somehow have any, store them airtight in the fridge for up to 3 days (though it’s best by day 2). Pro tip: The cocoa powder absorbs moisture, so give it a fresh dusting before serving leftovers!
Classic Gluten-Free Tiramisu Nutritional Info
Now, let’s be real—we’re not eating tiramisu for the health benefits! But since you asked, here’s the scoop per serving (based on my favorite brands):
- Calories: 380 (worth every one!)
- Sugar: 25g (mostly from those happy little ladyfingers)
- Fat: 28g (that’s where all the creamy magic lives)
- Protein: 7g (thank you, eggs and mascarpone!)
Remember—these numbers dance around depending on your exact ingredients. My gluten-free ladyfingers might differ slightly from yours, but the indulgence factor stays gloriously consistent!
FAQs About Classic Gluten-Free Tiramisu
You’ve got questions? I’ve got answers—straight from my many (delicious) trial runs!
Can I make it alcohol-free? Absolutely! Just skip the coffee liqueur and add an extra 1/2 teaspoon of vanilla. The flavor will still be amazing—I’ve served this version at kids’ birthdays and nobody noticed the difference.
How to ensure ladyfingers stay crisp? The magic is in the dip—1 second per side max! Gluten-free ladyfingers absorb liquid faster than traditional ones. If they start feeling soggy while assembling, pop them in the freezer for 5 minutes to firm up.
Can I freeze tiramisu? Technically yes, but I don’t recommend it. The texture changes when thawed—the creamy layers can separate and the ladyfingers turn mushy. If you must freeze, do it before adding cocoa powder and consume within 2 weeks. But really, fresh is best!
Find more recipes on Pinterest!
Print
Irresistible Classic Gluten-Free Tiramisu That Will Fool Everyone
- Total Time: 4 hours 40 minutes
- Yield: 8 servings 1x
- Diet: Gluten Free
Description
A gluten-free version of the classic Italian dessert, featuring layers of coffee-soaked gluten-free ladyfingers and creamy mascarpone filling.
Ingredients
- 6 large egg yolks
- 3/4 cup granulated sugar
- 2/3 cup milk
- 1 1/4 cups heavy cream
- 1/2 tsp vanilla extract
- 1 lb mascarpone cheese
- 1 1/2 cups strong brewed coffee, cooled
- 2 tbsp coffee liqueur (optional)
- 24 gluten-free ladyfingers
- 2 tbsp cocoa powder
Instructions
- Whisk egg yolks and sugar in a heatproof bowl until smooth.
- Place the bowl over a pot of simmering water and whisk constantly for 10 minutes until thick. Remove from heat.
- Add milk and mix well. Let cool.
- In a separate bowl, beat heavy cream and vanilla until stiff peaks form.
- Fold mascarpone into the cooled egg mixture, then gently fold in the whipped cream.
- Combine coffee and coffee liqueur in a shallow dish.
- Quickly dip each gluten-free ladyfinger into the coffee mixture and layer in a dish.
- Spread half the mascarpone mixture over the ladyfingers.
- Repeat with another layer of dipped ladyfingers and mascarpone.
- Dust the top with cocoa powder.
- Refrigerate for at least 4 hours before serving.
Notes
- Ensure all ingredients are gluten-free.
- Chill the dessert overnight for best texture.
- Use decaf coffee if preferred.
- Prep Time: 30 minutes
- Cook Time: 10 minutes
- Category: Dessert
- Method: No-Bake
- Cuisine: Italian
Nutrition
- Serving Size: 1 slice
- Calories: 380
- Sugar: 25g
- Sodium: 80mg
- Fat: 28g
- Saturated Fat: 16g
- Unsaturated Fat: 9g
- Trans Fat: 0g
- Carbohydrates: 30g
- Fiber: 1g
- Protein: 7g
- Cholesterol: 210mg