Oh my gosh, you guys – these witch finger pretzels are my absolute favorite thing to make for Halloween! Every year when October rolls around, my kitchen turns into a mad scientist’s lab filled with creepy edible creations, but these spooky fingers always steal the show. I still remember the first time I made them for my daughter’s school party – the kids went wild, squealing with delight (and maybe just a little pretend horror) as they nibbled on these ghoulish treats. The best part? They’re ridiculously easy to whip up with just a few simple ingredients you probably already have in your pantry. No fancy equipment needed, just some pretzel rods, chocolate, and a whole lot of Halloween spirit!
Why You’ll Love These Witch Finger Pretzels
Let me tell you why these creepy little fingers have become my go-to Halloween treat year after year:
- Super quick – You can whip up a batch in under 20 minutes flat, even during the craziest party prep
- Maximum spook factor – The almond nails and bloody details make people do a double-take every single time
- Kid-approved magic – Little ones go nuts for these (and they love helping make them too!)
- Pantry staples – Just pretzels, chocolate, and a few almonds – no fancy ingredients required
- No-bake bliss – Keep your oven free for other Halloween goodies while you make these
Trust me, once you make these once, they’ll become your Halloween tradition too!
Witch Finger Pretzels Ingredients
Here’s the beautiful thing about these creepy treats – you only need a handful of simple ingredients to work some Halloween magic in your kitchen! I always double check my pantry before starting because these come together so fast. Let me walk you through exactly what you’ll need:
- 1 package (16 oz) pretzel rods – The thick, sturdy ones work best. We’ll break them into finger-length pieces later (the rough edges actually make them look more realistic!)
- 1 cup white chocolate chips – I’ve tried all the brands, and Ghirardelli melts the smoothest, but any good quality chips will do
- 1 tbsp vegetable oil – This little trick helps the chocolate stay silky for dipping – don’t skip it!
- 1/4 cup sliced almonds – These become our witch fingernails – make sure they’re sliced, not whole, or they won’t lay flat (learned that the hard way one messy Halloween!)
- Red food coloring gel – The gel works better than liquid for making those creepy blood effects under the nails
See? I told you it was simple! Now let me show you how to turn these basic ingredients into the spookiest party snack ever.
How to Make Witch Finger Pretzels
Alright, let’s get our hands dirty (well, chocolaty) and turn these simple ingredients into the creepiest party snack ever! I’ve made these dozens of times, and I’ll walk you through every step so yours turn out perfectly ghoulish.
Preparing the Pretzel Rods
First things first – grab those pretzel rods and snap them in half right down the middle. Don’t worry about making perfect breaks – those jagged edges actually make them look more like real broken witch fingers! I like to do this over a clean kitchen towel so the little pretzel bits don’t go flying everywhere. Aim for pieces about 3 inches long – roughly the size of a child’s finger.
Melting the Chocolate Coating
Here’s where I learned my lesson the hard way – microwave chocolate can go from perfect to ruined in seconds! Toss your white chocolate chips and vegetable oil into a microwave-safe bowl and heat in 30-second bursts, stirring well after each interval. Trust me, it’s better to take an extra minute than end up with seized chocolate. You’ll know it’s ready when it’s smooth as silk and drips nicely off a spoon.
Assembling the Witch Fingers
Now the fun part! Dip each pretzel piece about three-quarters of the way into the melted chocolate, leaving one end bare (that’s where we’ll add our creepy details). Immediately press a sliced almond onto the chocolate-dipped end to create a fingernail – work quickly before the chocolate sets! Then take your toothpick and dab just a tiny bit of red food coloring gel under each almond nail for that perfect “freshly dug up” bloody effect. Lay them on parchment paper to set, and try not to eat them all before your guests arrive!
Expert Tips for Perfect Witch Finger Pretzels
After making these witch fingers more times than I can count (and learning from all my mistakes!), here are my best tips to guarantee your creepy creations turn out perfectly:
Glove up! I always keep food-safe gloves handy when dipping – melted chocolate gets everywhere, and this keeps your fingers clean while pressing on those almond nails. Storage is key – pop them in an airtight container at room temperature for up to 3 days (if they last that long!). For extra spooky variety, try mixing brown food coloring into your white chocolate for decayed-looking fingers, or green for zombie versions. Pro tip: If your chocolate starts to thicken while working, just zap it for 5 more seconds – it’ll be good as new!
Witch Finger Pretzels Variations
Oh, the fun you can have playing mad scientist with these spooky snacks! My favorite twist? Melt some semi-sweet chocolate instead of white for a “fresh from the grave” decayed look – so gross but so good! For little zombie lovers, mix in a few drops of green food coloring with your white chocolate before dipping. And get this – roll some in crushed chocolate cookies right after dipping for a “dirt-covered” graveyard effect that’ll have everyone screaming for more!
Serving Your Witch Finger Pretzels
Now comes the best part – watching everyone’s reactions when you unveil these creepy creations! I love arranging my witch fingers crawling out of a “graveyard” made from crushed Oreo dirt on a black serving tray. Pro tip: Angle them so they look like they’re trying to escape – it makes for such a fun, dramatic presentation!
These pair perfectly with a bubbling cauldron of Halloween punch (extra points if you make it green or red!). One batch makes about 32 finger pieces, which is perfect for a party of 15-20 guests if you’re serving other treats too. Though fair warning – at last year’s party, my neighbor’s kids ate about a dozen each! They’re just that addictive.
For extra Halloween magic, I sometimes scatter plastic spiders around the tray or add a little dry ice to the punch bowl nearby. The fingers look especially spooky poking out from between other treats on a dessert table – try nestling them among cupcakes decorated like eyeballs or cookies shaped like tombstones!
Witch Finger Pretzels FAQs
I get asked these questions every Halloween when I make my witch finger pretzels, so let me share all the tricks I’ve learned over the years!
Can I use milk chocolate instead of white chocolate?
Absolutely! While white chocolate gives that classic “witchy” pale look, milk or dark chocolate works great if you want a more decayed or mummified appearance. Just keep in mind that darker chocolates set faster, so you’ll need to work quickly when adding the almond nails. I sometimes do half white and half dark for a creepy variety platter!
How far in advance can I make these spooky treats?
These hold up beautifully for 2-3 days when stored in an airtight container at room temperature. I actually think they look even creepier after a day when the chocolate sets completely firm. Just don’t refrigerate them – that makes the pretzels go stale faster. For big parties, I always make them the night before to save time!
Are there nut-free alternatives for the almond nails?
Yes! If you’re dealing with nut allergies, try using white candy melts shaped into little nail crescents, or even sunflower seeds (the shelled kind) for a similar look. Another fun option is to pipe on white icing nails – they won’t be as crisp, but they’ll still give that creepy finger effect!
My chocolate keeps getting too thick – help!
Oh honey, I’ve been there! If your coating starts to thicken, just pop it back in the microwave for 5-10 seconds and give it a good stir. Adding a tiny bit more oil (like 1/4 teaspoon at a time) can help too. The key is keeping it warm enough to stay dippable but not so hot it burns – it’s a delicate Halloween dance!
Can kids help make these?
You bet! My little monsters love breaking the pretzels and pressing on the almond nails (with clean hands, of course). I handle the hot chocolate dipping and let them do the decorating – it’s become our favorite Halloween tradition. Just watch out for sneaky fingers sampling the goods before they’re done!
Nutritional Information
Now, I’m no nutritionist (just a Halloween-obsessed home cook!), but I know some folks like to keep track of what they’re nibbling on – even when it’s creepy witch fingers! Here’s the scoop on what you’re getting in these spooky snacks.
Each serving (about 2 witch fingers) contains roughly:
- 120 calories – Perfect for a little Halloween treat!
- 8g sugar – Mostly from that delicious chocolate coating
- 5g fat – The good kind from almonds and chocolate
- 18g carbs – Pretzel power!
- 2g protein – Who knew witch fingers could be kinda healthy?
Remember, these numbers are just estimates – your exact counts might vary depending on how thick you coat those fingers in chocolate (no judgment if you go extra thick – I do too!). And hey, it’s Halloween – if there was ever a time to indulge in some spooky sweets, this is it!
One quick note: If you’re watching sodium, you might want to go easy – those pretzel rods do pack some salt. But honestly? When you’re eating witch fingers, nutrition facts should probably be the last thing on your mind. Just enjoy the magic!
Share Your Creepy Creations
Okay, I absolutely need to see how your witch finger pretzels turn out – the crazier, the better! Snap a photo of your spooky creations and tag me with #WitchFingerPretzels so I can admire your handiwork. Some of my favorite Halloween memories come from seeing all the creative twists you guys come up with – last year someone made theirs glow-in-the-dark with edible glitter, and I still haven’t recovered from how cool that looked!
Don’t be shy – tell me what you think of the recipe too! Did your kids go nuts for them? Did you come up with an even creepier variation? Leave a quick rating if you get a chance – it helps other Halloween bakers know this recipe is worth trying. Most importantly, have fun with it! After all, the whole point of these ghoulish goodies is to bring some spooky joy to your kitchen.
Now go forth and create some edible mayhem – I can’t wait to see what terrifying treats you whip up this Halloween season!
For more spooky ideas, check out our Pinterest page!
Print
Spooky Witch Finger Pretzels That Will Haunt Your Tastebuds
- Total Time: 20 minutes
- Yield: 32 pieces 1x
- Diet: Vegetarian
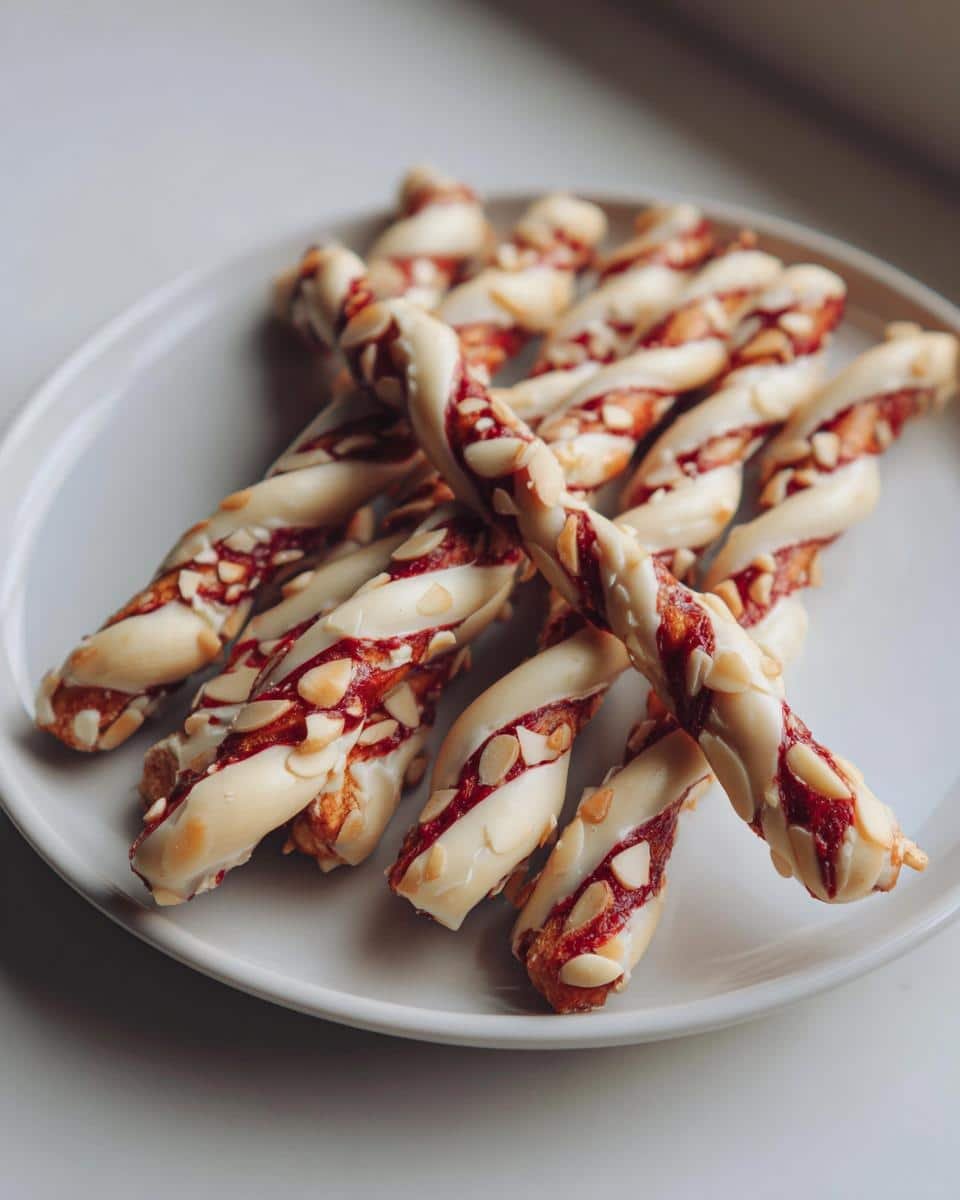
Description
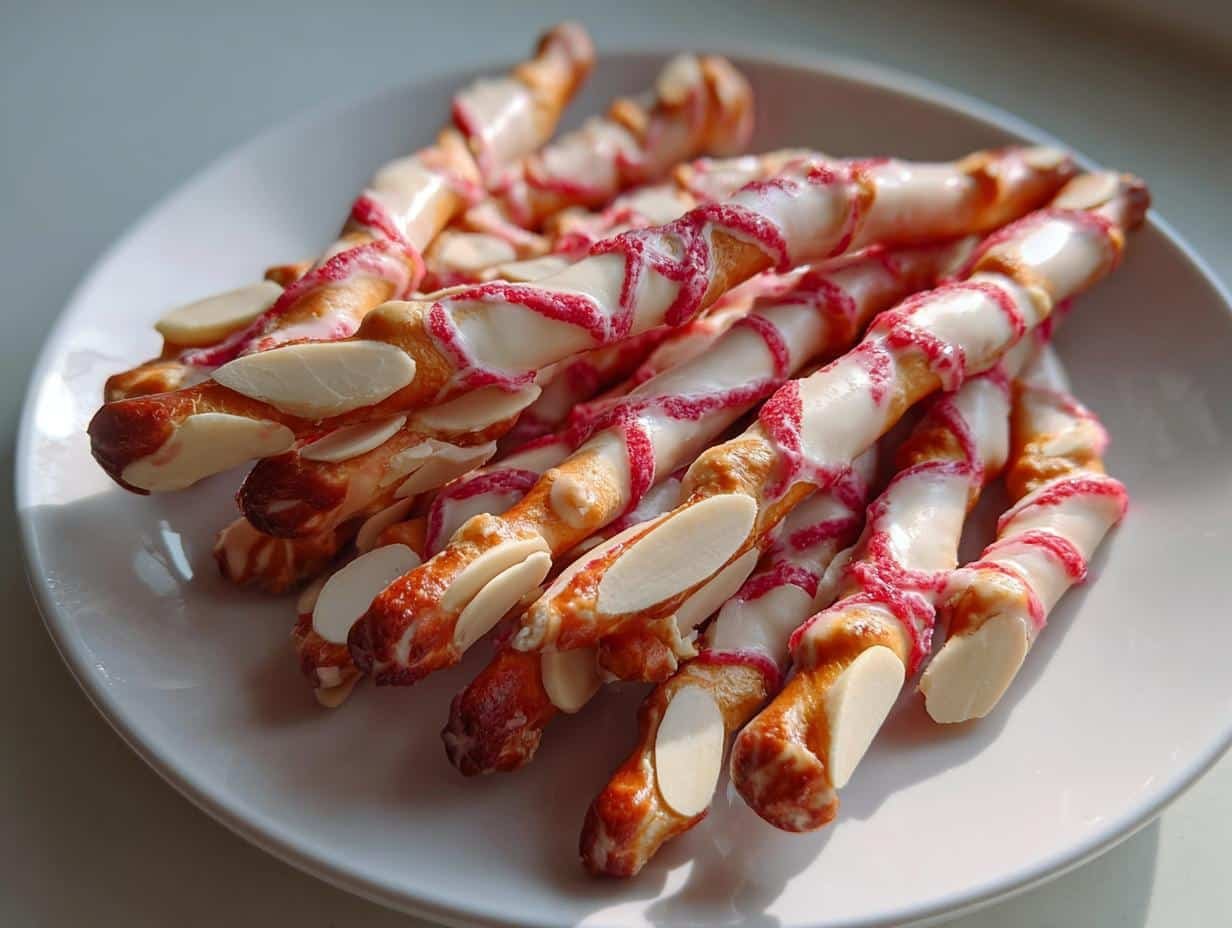
Witch Finger Pretzels are a fun and spooky Halloween treat. These twisted pretzel sticks look like creepy witch fingers, perfect for parties.
Ingredients
- 1 package (16 oz) pretzel rods
- 1 cup white chocolate chips
- 1 tbsp vegetable oil
- 1/4 cup sliced almonds
- Red food coloring gel
Instructions
- Break pretzel rods in half to create finger-sized pieces.
- Melt white chocolate chips with vegetable oil in microwave in 30-second intervals, stirring until smooth.
- Dip each pretzel piece into melted chocolate, leaving one end uncovered.
- Place on parchment paper and immediately press a sliced almond onto the dipped end to create a fingernail.
- Use a toothpick to add red food coloring under the almond nail for a bloody effect.
- Let cool completely before serving.
Notes
- Store in airtight container for up to 3 days.
- For darker fingers, mix brown food coloring into melted chocolate.
- Use food-safe gloves for mess-free dipping.
- Prep Time: 15 minutes
- Cook Time: 5 minutes
- Category: Dessert
- Method: No-Bake
- Cuisine: American
Nutrition
- Serving Size: 2 pieces
- Calories: 120
- Sugar: 8g
- Sodium: 180mg
- Fat: 5g
- Saturated Fat: 2g
- Unsaturated Fat: 2g
- Trans Fat: 0g
- Carbohydrates: 18g
- Fiber: 1g
- Protein: 2g
- Cholesterol: 5mg