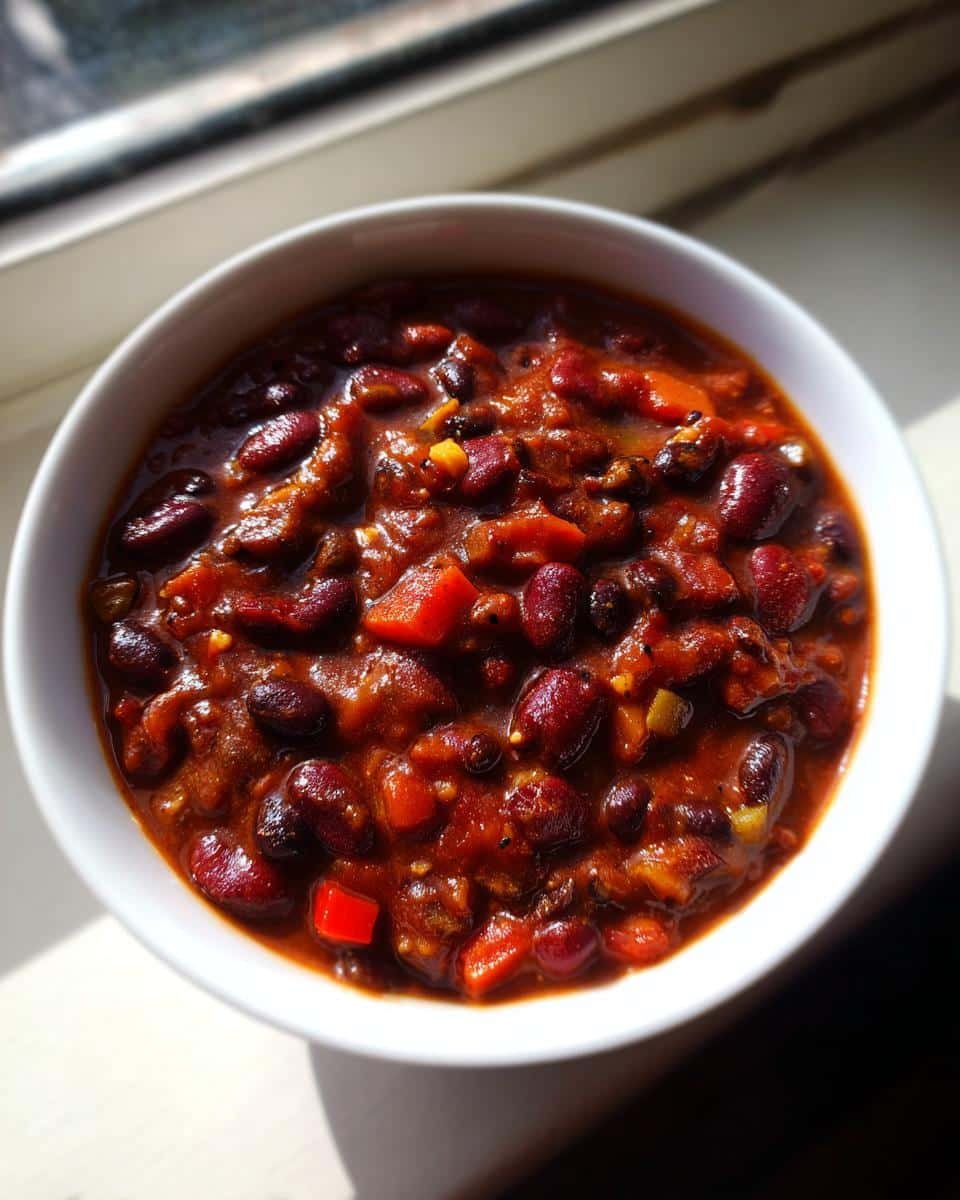
You know those nights when you need dinner to be hearty, healthy, and on the table fast? That’s exactly why this three-bean chili became my family’s weeknight hero. I first whipped it up during one of those crazy soccer-practice evenings when time was tight but hungry mouths needed real food. What I love most is how this chili packs in protein and fiber from three kinds of beans, yet comes together in about 30 minutes with just pantry staples. The best part? It’s one of those magical recipes that actually tastes better the next day. Whether you serve it over rice, with cornbread, or topped with avocado, this vegetarian chili satisfies even my meat-loving husband every single time.
Why You’ll Love This Three Bean Chili Easy Family Dinner
This chili isn’t just dinner—it’s your new weeknight superhero. Here’s why:
- Speedy satisfaction: From chopping to serving in under 35 minutes (yes, I’ve timed it!)
- Wallet-friendly: Canned beans and basic spices mean big flavor without breaking the bank
- Protein powerhouse: Three types of beans keep everyone full and energized
- Totally flexible: Swap beans, adjust spice, or toss in extra veggies—it always works
- Leftover magic: Tastes even better tomorrow (if it lasts that long!)
Trust me, this pot of cozy will become your go-to when hunger strikes fast.
Ingredients for Three Bean Chili Easy Family Dinner
Here’s the beautiful thing about this chili – it’s made with ingredients you probably already have in your pantry! I’ve made this recipe so many times that I can practically assemble it with my eyes closed (though I don’t recommend trying that with the onion). Let me walk you through exactly what you’ll need:
- The aromatic base:
- 1 tablespoon olive oil (or whatever oil you’ve got – I’ve used avocado oil in a pinch)
- 1 medium onion, diced (about 1 cup – no need to be perfect here)
- 2 cloves garlic, minced (or 1 tablespoon from the jar when I’m really lazy)
- 1 bell pepper, diced (any color works – my kids love the red ones)
- The bean bonanza:
- 1 can (15 oz) black beans, drained and rinsed (this step matters – no one wants bean slime!)
- 1 can (15 oz) kidney beans, drained and rinsed
- 1 can (15 oz) pinto beans, drained and rinsed
- The flavor makers:
- 1 can (14.5 oz) diced tomatoes (don’t drain – that juice is liquid gold)
- 1 cup vegetable broth (chicken broth works too if that’s what’s in your fridge)
- 2 tablespoons chili powder (this is where the magic happens!)
- 1 teaspoon cumin (my secret weapon for depth)
- 1/2 teaspoon paprika (smoked or sweet – your call)
- Salt and pepper to taste (I start with 1/2 teaspoon salt and go from there)
See? Nothing fancy, just simple ingredients that come together to create something truly special. Pro tip from my many chili-making adventures: measure your spices before you start cooking – it makes the process so much smoother when everything’s ready to go!
How to Make Three Bean Chili Easy Family Dinner
This is where the magic happens! I’ve made this chili more times than I can count, and I’ve learned a few tricks along the way to make it foolproof. The key is taking it step by step – don’t rush the process, and you’ll be rewarded with the most flavorful pot of comfort food. Let me walk you through exactly how I do it:
Step 1: Sauté Aromatics
First things first – get your biggest pot out (I use my trusty Dutch oven) and heat that olive oil over medium heat. You’ll know it’s ready when the oil shimmers slightly. Now toss in your diced onions – that sizzle sound is music to my ears! Stir them around until they start turning translucent, about 2 minutes.
Next comes the garlic – be careful not to burn it! I add mine when the onions are about halfway done. The second you smell that amazing garlicky aroma (usually after about 30 seconds), toss in the bell pepper. Now just keep stirring occasionally until everything’s softened and smelling incredible – about 5 minutes total. This step builds the flavor foundation, so don’t skip it!
Step 2: Add Beans and Liquids
Time for the bean bonanza! Dump in all three cans of beans (remember – drained and rinsed!), the tomatoes with all their juices, and the vegetable broth. I like to give everything a good stir at this point to distribute the aromatics evenly throughout the pot.
Pro tip from my many chili nights: use a wooden spoon to scrape up any tasty browned bits from the bottom of the pot – that’s where extra flavor lives! The mixture will look a bit watery at first, but don’t worry – it’ll thicken up beautifully as it simmers.
Step 3: Season and Simmer
Now for the spice magic! Sprinkle in the chili powder, cumin, and paprika. I like to add about 1/2 teaspoon salt at this stage too – you can always add more later. Give everything another good stir to make sure those spices are evenly distributed.
Bring the chili to a gentle simmer (that’s when you see small bubbles breaking the surface), then reduce the heat to medium-low. Let it bubble away uncovered for 20-25 minutes, stirring occasionally. This is when the flavors really get to know each other! You’ll know it’s done when the liquid has reduced slightly and the chili has thickened to your liking. Give it a taste and adjust the salt or spices if needed.
Here’s my little secret: I usually turn off the heat and let it sit for 5-10 minutes before serving. This lets the flavors mellow and blend even more. Try it – you’ll notice the difference!
Tips for the Best Three Bean Chili Easy Family Dinner
After making this chili more times than I can count, I’ve picked up some tricks that take it from good to “wow, can I get this recipe?” Here are my can’t-live-without tips for chili perfection:
Spice it your way
Chili should suit your taste buds, not mine! For a mild version that even my spice-averse niece loves, I cut the chili powder to 1 tablespoon. Want some heat? Add a pinch of cayenne or chopped jalapeños with the bell peppers. My husband’s favorite trick? Stirring in a chipotle pepper in adobo sauce – just one gives incredible smoky heat (remove the seeds if you’re nervous).
The great bean debate
While canned beans are my weeknight lifesavers (no soaking required!), I’ve used dried beans too. If you go this route, cook 1/2 cup each of dried black, kidney, and pinto beans separately first. You’ll need about 4 1/2 cups cooked beans total. Pro tip: freeze cooked beans in recipe-ready portions for future chili emergencies!
Double batch magic
This chili freezes so well that I almost always make a double batch. Just cool it completely, then portion into freezer bags (I do 2-cup servings) or containers. Lay the bags flat to freeze – they’ll stack like books in your freezer! Thaw overnight in the fridge or reheat straight from frozen (add a splash of water when reheating).
Texture tweaks
If your family prefers a thicker chili like mine does, try mashing about 1/4 of the beans before adding them. For a chunkier version, add an extra bell pepper or some diced zucchini. And if the kids are suspicious of “green things,” I pulse the bell peppers in the food processor first – they disappear into the sauce but still add flavor and nutrients.
The secret ingredient no one expects
Here’s my sneaky trick for depth of flavor: a square of dark chocolate or 1 teaspoon cocoa powder stirred in during the last 5 minutes of cooking. It doesn’t make the chili sweet – just gives it this rich, complex background note that has everyone asking, “What’s in this?” I’ll never tell!
Serving Suggestions for Three Bean Chili Easy Family Dinner
Now comes the fun part – dressing up your chili to make it a full meal! I’ve learned that half the joy of this dish is letting everyone customize their bowl just how they like it. Here’s how we do it in my house:
The topping bar is where the magic happens! I set out small bowls with:
- Shredded cheddar or Monterey Jack cheese (the melty factor is key)
- Diced avocado or a quick guacamole (my kids fight over the last bits)
- Sour cream or Greek yogurt (cool creaminess balances the spice)
- Chopped green onions or cilantro (for that fresh pop of color)
- Crushed tortilla chips (because everything’s better with crunch)
- Lime wedges (a squeeze brightens all the flavors)
Don’t forget the sides! My family’s favorite pairings:
- Skillet cornbread (nothing beats the crispy edges)
- Fluffy white rice (perfect for soaking up the sauce)
- Warm flour tortillas (for scooping and wrapping)
- Simple green salad (when I’m feeling virtuous)
- Roasted sweet potatoes (unexpected but delicious)
Here’s my little secret: on crazy nights, I turn this chili into a DIY nacho bar! Just spread tortilla chips on a baking sheet, top with chili and cheese, then broil until bubbly. Let everyone add their favorite toppings – instant party that feels special but took barely any extra work.
Storage and Reheating
One of my favorite things about this three-bean chili? It practically gets better with age! Here’s how I store and reheat it to keep that delicious flavor and texture perfect every time:
Fridge storage (for when you can’t wait to eat it again)
Let the chili cool completely before transferring it to an airtight container – I learned the hard way that putting hot chili directly in the fridge makes everything else taste like beans for days! It’ll keep beautifully for 3-4 days in the refrigerator. Pro tip: I like to portion it into individual containers for grab-and-go lunches – just add toppings when you’re ready to eat!
Freezer magic (for future-you’s busy nights)
This chili freezes like a dream! I’ve successfully kept it for up to 3 months with no loss of flavor. My go-to method is ladling cooled chili into freezer bags (I do 2-cup portions), pressing out all the air, and laying them flat to freeze. They stack perfectly and thaw quickly. For extra convenience, freeze single servings in microwave-safe containers – dinner is ready in minutes!
Reheating like a pro
Stovetop method: My preferred way because it brings back that fresh-cooked texture. Just pour the chili into a pot with a splash of water or broth, cover, and heat over medium-low, stirring occasionally. Takes about 10 minutes from fridge temp, 15-20 from frozen.
Microwave method: For when hunger strikes NOW! Transfer to a microwave-safe bowl, cover loosely (I use a damp paper towel), and heat in 1-minute bursts, stirring between each. Frozen portions might need 3-4 minutes total. If it looks thick, stir in a tablespoon of water before reheating.
Here’s my golden rule: never let chili boil when reheating – it makes the beans mushy. Gentle heat keeps everything perfect. And if it seems a bit thick after storage? Just stir in a little broth or water until it reaches your ideal consistency. The flavors will still be amazing!
Three Bean Chili Easy Family Dinner Variations
One of my favorite things about this chili is how easily it adapts to whatever I’ve got in the fridge or pantry! Over the years, I’ve tried countless variations – some became family favorites, others… well, let’s just say we don’t talk about the lima bean experiment. Here are my tried-and-true twists that always work:
Meat lover’s version
When my brother-in-law insists chili isn’t chili without meat, I brown 1 pound of ground beef or turkey with the onions. Drain the fat before adding other ingredients. For extra richness, stir in cooked bacon or chorizo at the end!
Bean swaps
The “three bean” is just a suggestion! I’ve used chickpeas for extra texture, white beans when I wanted a milder flavor, and even black-eyed peas for New Year’s luck. Just keep the total amount about the same (around 4 1/2 cups cooked beans).
Veggie boost
This chili hides vegetables beautifully! My sneaky additions:
- 1 cup corn (frozen works great)
- Diced zucchini or mushrooms sautéed with the onions
- A handful of spinach stirred in at the end
- Roasted sweet potatoes for unexpected sweetness
Heat adjustments
For smoky depth, add 1 teaspoon smoked paprika. Want Texas-style heat? Throw in a diced jalapeño (seeds removed for less fire). My kids love when I stir in a tablespoon of honey to balance the spice – our secret compromise!
The beauty of this recipe? It forgives almost any variation. Just taste as you go and adjust seasonings – that’s how all the best family recipes evolve!
Nutritional Information
Now, I’m no nutritionist, but I do love knowing what’s going into my family’s bellies! Keep in mind these estimates can vary based on your exact ingredients (like how much cheese you pile on top – no judgment here!). Here’s the breakdown for one serving (about 1 cup) of this three-bean chili:
- Calories: Around 250 – filling without weighing you down
- Protein: A whopping 12g per serving – those beans really deliver!
- Fiber: 12g (that’s nearly half your daily need – happy digestion!)
- Sugar: Just 5g (all natural from the tomatoes and beans)
- Fat: 4g (mostly the good kind from the olive oil)
What really makes me happy is that this chili packs in so much nutrition while tasting like pure comfort. It’s got 40g of complex carbs for lasting energy, and get this – zero cholesterol! My doctor actually complimented me when I told her this was our weekly meatless meal. Just remember – these numbers don’t include any toppings (we all know the cheese adds up, but life’s too short to skip it!).
Frequently Asked Questions
Q1. Can I use dried beans instead of canned?
Absolutely! I’ve done it both ways. For dried beans, you’ll need about 1/2 cup each of black, kidney, and pinto beans (soaked and cooked) which equals roughly 4 1/2 cups cooked total. Pro tip: cook a big batch of beans on Sunday and freeze them in recipe-ready portions – future you will thank you on busy weeknights!
Q2. How can I make this chili spicier?
Oh, I love this question! My favorite ways to turn up the heat:
- Add a diced jalapeño (seeds in for maximum fire!) with the bell peppers
- Stir in 1/2 teaspoon cayenne pepper with the other spices
- Toss in a chipotle pepper in adobo sauce – just one gives incredible smoky heat
- Top with sliced fresh chilies or hot sauce at serving
Start small – you can always add more spice but can’t take it out!
Q3. Is this chili really freezer-friendly?
Honey, this chili practically begs to be frozen! It keeps beautifully for up to 3 months. My freezer hack: pour cooled chili into gallon bags, press out the air, and freeze flat – they stack like books and thaw in no time. The texture holds up perfectly, and the flavors actually deepen. Just add a splash of broth when reheating if it seems thick.
Q4. What if I only have two types of beans?
No stress! The beauty of this recipe is its flexibility. Use whatever beans you’ve got – just keep the total amount about the same (around 4 1/2 cups cooked beans). I’ve made killer chili with just black beans and chickpeas when that’s all I had. The spices and technique matter more than the exact bean combo!
Q5. Can I make this in a slow cooker?
You bet! I do this all the time in winter. Just sauté the veggies first (trust me, it makes a difference), then dump everything in the crockpot and cook on low for 6-8 hours or high for 3-4. The longer cook time makes the flavors even richer. Perfect for coming home to a house that smells like a cozy hug!

3 Instant Pot Three Bean Chili Easy Family Dinner – Heavenly Comfort
- Total Time: 35 minutes
- Yield: 6 servings 1x
- Diet: Vegetarian
Description
A hearty and easy three-bean chili that’s perfect for a family dinner, packed with protein and flavor.
Ingredients
- 1 tablespoon olive oil
- 1 onion, diced
- 2 cloves garlic, minced
- 1 bell pepper, diced
- 1 can (15 oz) black beans, drained and rinsed
- 1 can (15 oz) kidney beans, drained and rinsed
- 1 can (15 oz) pinto beans, drained and rinsed
- 1 can (14.5 oz) diced tomatoes
- 1 cup vegetable broth
- 2 tablespoons chili powder
- 1 teaspoon cumin
- 1/2 teaspoon paprika
- Salt and pepper to taste
Instructions
- Heat olive oil in a large pot over medium heat.
- Add onion, garlic, and bell pepper. Cook until softened, about 5 minutes.
- Add black beans, kidney beans, pinto beans, diced tomatoes, and vegetable broth.
- Stir in chili powder, cumin, paprika, salt, and pepper.
- Bring to a simmer and cook for 20-25 minutes, stirring occasionally.
- Serve hot with your favorite toppings.
Notes
- You can substitute any beans you prefer.
- For extra heat, add a pinch of cayenne pepper.
- This chili freezes well for later meals.
- Prep Time: 10 minutes
- Cook Time: 25 minutes
- Category: Main Course
- Method: Stovetop
- Cuisine: American
Nutrition
- Serving Size: 1 cup
- Calories: 250
- Sugar: 5g
- Sodium: 400mg
- Fat: 4g
- Saturated Fat: 0.5g
- Unsaturated Fat: 3g
- Trans Fat: 0g
- Carbohydrates: 40g
- Fiber: 12g
- Protein: 12g
- Cholesterol: 0mg