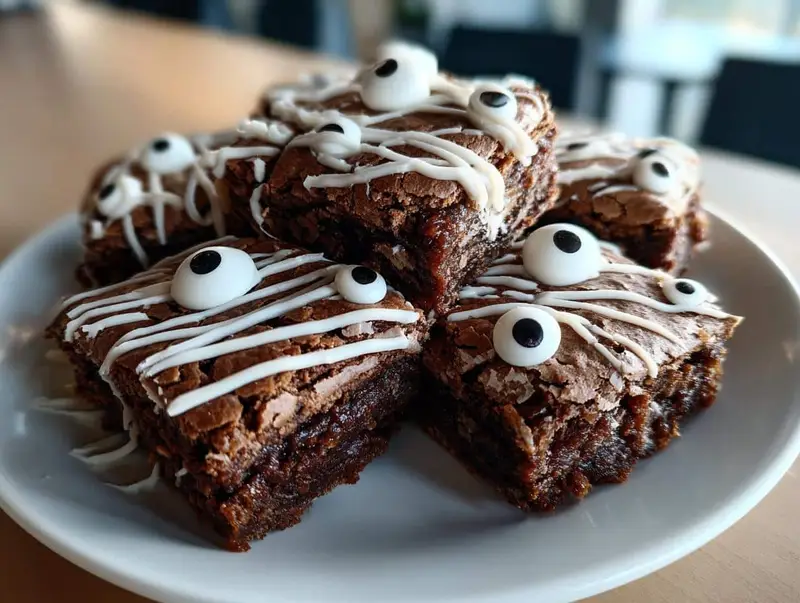
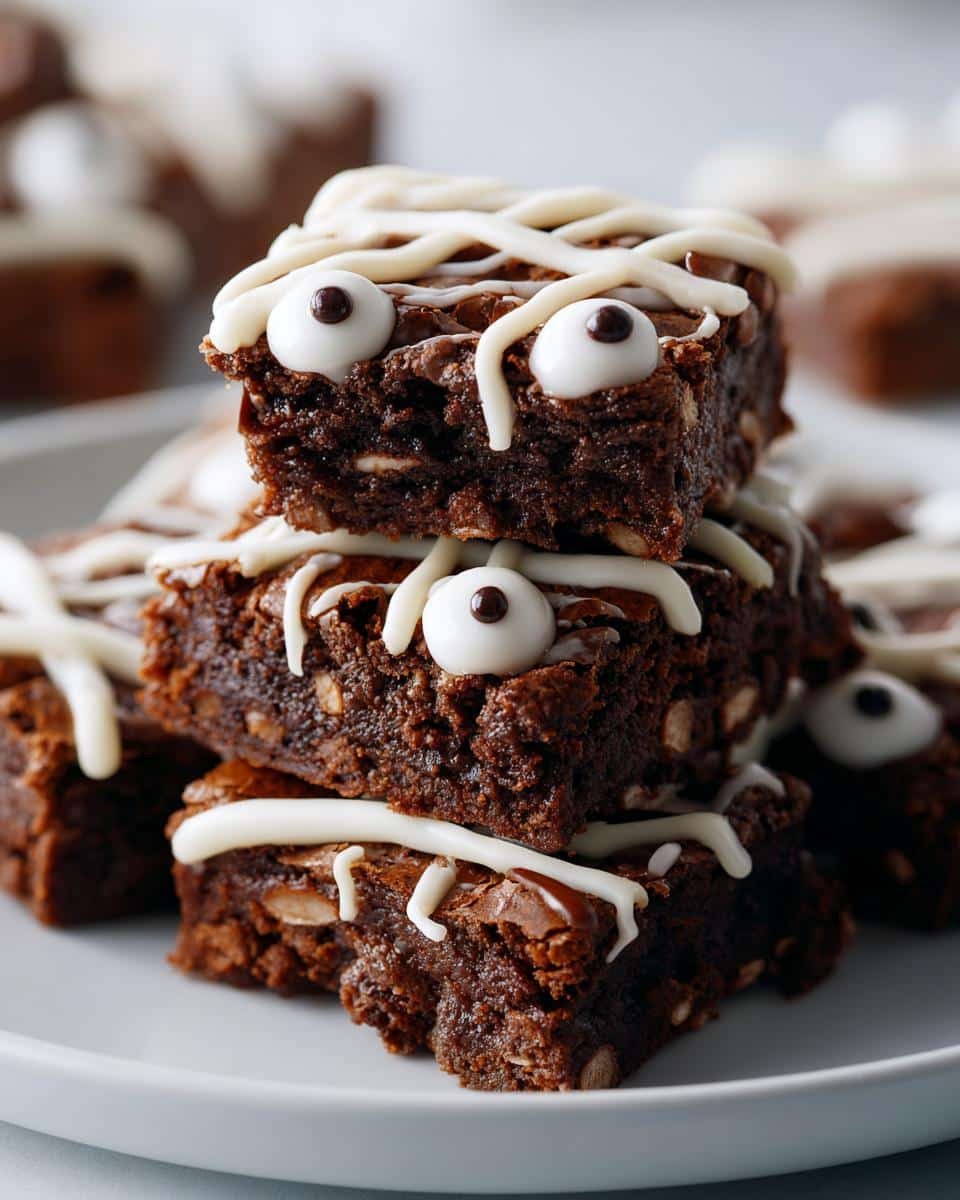
Nothing screams Halloween more than a batch of Spooky Mummy Brownies sitting on your dessert table. I still remember the first time I made these for my nephew’s costume party – the kids went wild for those googly-eyed treats peeking through their chocolate “bandages!” The best part? They’re ridiculously easy to whip up using a simple brownie mix, yet look like you spent hours decorating. That messy white chocolate drizzle is actually perfect – the more haphazard, the more they look like real unraveling mummies. Trust me, these disappear faster than ghosts at sunrise at any Halloween gathering!
Why You’ll Love These Spooky Mummy Brownies
These mummy brownies are my go-to Halloween treat for so many reasons:
- Super quick: Start with a boxed mix (our little secret!) and you’re halfway done already
- Kid-approved magic: Those candy eyes peeking through the “bandages” make everyone giggle
- Impressively easy: The messier your white chocolate drizzle, the more authentic the mummy look
- Crowd pleaser: Fudgy brownies + sweet white chocolate = a combo nobody can resist
- Memory maker: My kids still talk about last year’s batch months after Halloween
Honestly? The hardest part is not eating all the candy eyeballs before they make it onto the brownies!
Ingredients for Spooky Mummy Brownies
Gather these simple ingredients – most are probably already in your pantry! The magic happens when they come together:
- 1 box (18.3 oz) fudge brownie mix – I swear by Betty Crocker’s fudge style for that perfect chewy texture
- 2 large eggs – Let them sit out for 10 minutes to take the chill off
- 1/2 cup vegetable oil – I always use the liquid measuring cup for this – no guessing!
- 1/4 cup water – Room temp works best
- 1 cup white chocolate chips – For those perfect “bandage” drizzles (Ghirardelli melts like a dream)
- 2 tsp coconut oil – This helps the chocolate drizzle smoothly without seizing up
- 16 candy eyeballs – The bigger ones (about 1/4 inch) show up best
Ingredient Substitutions
Don’t stress if you’re missing something – here’s how to improvise:
- Out of vegetable oil? Melted butter works beautifully (just use 1/2 cup)
- No white chocolate chips? Almond bark or vanilla candy melts make great stand-ins
- Coconut oil alternatives? Try shortening or even a tiny bit of heavy cream
- Can’t find candy eyeballs? Pipe little dots with black icing gel
See? No Halloween treat emergencies here – just delicious solutions!
How to Make Spooky Mummy Brownies
Alright, let’s get spooky! Here’s my foolproof method for making mummy brownies that’ll have your whole neighborhood talking:
- Fire up that oven: Preheat to 350°F (175°C) and grease your 9×9 pan really well. I like to use the butter wrapper for this – zero waste!
- Mix it up: In a big bowl, stir together the brownie mix, eggs, oil, and water until just combined. Don’t overmix – a few lumps are totally fine.
- Bake to perfection: Pour that chocolatey goodness into your pan and bake for 25-30 minutes. You’ll know they’re done when the edges pull away slightly from the pan.
- The hardest part: Let them cool COMPLETELY. I know it’s tempting, but warm brownies make melty messes with the drizzle!
- Mummy makeover time: Melt white chocolate chips with coconut oil in 30-second bursts in the microwave, stirring between each. When smooth, it’s drizzle time!
- Eyeball placement: While the chocolate’s still wet, press those candy eyes into place. I do about 2 per brownie square.
- Chill out: Pop them in the fridge for 10 minutes to set the chocolate before cutting. Makes for super clean slices!
Tips for Perfect Mummy Drizzle
Here’s where the real magic happens – those perfect “bandages” that make these Spooky Mummy Brownies so adorable:
- Piping bag hack: No piping bag? No problem! Snip a tiny corner off a ziplock bag for perfect control.
- Temperature matters: If your chocolate starts thickening, just microwave for 5 more seconds. Too runny? Let it sit for a minute.
- Go freeform: The messier the better! Criss-cross haphazardly for authentic unraveled mummy vibes.
- Eye timing: Press those candy eyes in immediately after drizzling – they’ll stay put as the chocolate sets.
- Double dip: For extra “bandages,” let first layer set then add another drizzle pattern.
Pro tip: Do a test drizzle on wax paper first to get your technique down. And don’t stress – even “messy” drizzles look intentionally spooky!
Storage and Serving Suggestions for Spooky Mummy Brownies
These Spooky Mummy Brownies actually taste even better the next day – if they last that long! Here’s how to keep them fresh and serve them up like a Halloween pro:
Storage secrets:
- Room temp is fine for 1-2 days in an airtight container – layer with parchment between brownies if stacking
- For longer storage (up to 5 days!), pop them in the fridge – the chocolate drizzle stays perfect
- Freeze undecorated brownies for up to 3 months – just add the drizzle and eyes after thawing
Serving tricks that wow:
- Arrange on a black platter with candy corn “bones” for a graveyard scene
- Pair with pumpkin spice lattes or my famous “Witch’s Brew” punch (just lime sherbet in ginger ale!)
- For parties, cut into smaller squares – they’re rich and a little goes a long way
- Dust with edible gold powder for an elegant yet spooky adult version
Pro tip: If your kitchen’s warm, serve these Spooky Mummy Brownies straight from the fridge – the chilled chocolate drizzle gives the perfect “snap” when you bite into them!
Nutritional Information
Okay, let’s be real – we’re not eating these Spooky Mummy Brownies for their health benefits! But since you asked, here’s the scoop on what’s in each deliciously spooky square. Remember, these numbers are just estimates – your exact ingredients might change things slightly.
- Serving Size: 1 brownie (about 2×2 inch square)
- Calories: 220 (Worth every single one!)
- Sugar: 18g (Mostly from that irresistible white chocolate drizzle)
- Sodium: 110mg
- Fat: 12g (4g saturated – blame the chocolate chips!)
- Carbohydrates: 28g
- Fiber: 1g
- Protein: 2g
- Cholesterol: 25mg
Important note: These values can vary based on the specific brands you use – especially the brownie mix and chocolate chips. I calculated based on the ingredients I typically grab at my local grocery store. The candy eyeballs barely register nutritionally, so I didn’t even count them – consider them pure Halloween magic!
Frequently Asked Questions
I get so many questions about these Spooky Mummy Brownies every Halloween – let me answer the most common ones so you can bake with confidence!
Can I use homemade brownie batter instead of a mix?
Absolutely! My from-scratch brownie recipe works beautifully here. Just make sure it’s a fudgy style rather than cakey – you want that dense texture to hold the drizzle. Bake in the same 9×9 pan and adjust the time if needed.
How far in advance can I make these Halloween treats?
The brownies themselves keep wonderfully! Bake them up to 2 days ahead, then add the mummy decorations the day of serving for freshest results. Undecorated brownies freeze like a dream for last-minute Halloween parties too.
Why did my white chocolate drizzle turn lumpy?
This happens if the chocolate gets too hot! Microwave in short bursts and stir well between each. If it seizes up, add a tiny bit more coconut oil (1/4 tsp at a time) and stir vigorously. Works like magic!
Where do you find those perfect candy eyeballs?
I grab mine at craft stores (Michael’s always has them) or the baking aisle at Walmart. Online works too – search for “large candy eyeballs.” Pro tip: Buy extra – they mysteriously disappear when kids are around!
Can I make these gluten-free?
Yes! Simply use your favorite gluten-free brownie mix. The decorations are naturally GF (just check your white chocolate brand). I’ve made them for my niece’s class party – nobody could tell the difference!
Share Your Creations
Nothing makes me happier than seeing your versions of these Spooky Mummy Brownies come to life! Every Halloween, my kitchen fills with photos of creative twists – some with googly-eyed mummies peeking through chocolate “bandages,” others with whole mummy families on a platter. One reader even made a mummy brownie pizza with the drizzles forming a silly face – pure genius!
If you snap pictures of your Halloween creations (especially the inevitable “oops” moments where the eyes go rogue!), I’d absolutely love to see them. Tag me on Instagram @SpookyBakerExtraordinaire or use #MummyBrownieMagic so I can cheer you on. Some of my favorite reader photos end up in my annual Halloween roundup – complete with shoutouts to the brilliant bakers behind them! You can find more inspiration on our Pinterest page.
Pro tip: Snap pics quickly – these cuties tend to vanish faster than a ghost in the night once hungry trick-or-treaters spot them. Last year, my neighbor’s kids demolished an entire batch before I could even reach for my phone. Now that’s what I call the ultimate Halloween compliment!
Print
Spooky Mummy Brownies: 16 Irresistible Halloween Treats
- Total Time: 55 mins
- Yield: 16 brownies 1x
- Diet: Vegetarian
Description
Spooky Mummy Brownies are a fun and easy Halloween treat. These fudgy brownies are topped with white chocolate drizzle to resemble mummy bandages, making them perfect for parties.
Ingredients
- 1 box (18.3 oz) fudge brownie mix
- 2 large eggs
- 1/2 cup vegetable oil
- 1/4 cup water
- 1 cup white chocolate chips
- 2 tsp coconut oil
- 16 candy eyeballs
Instructions
- Preheat oven to 350°F. Grease a 9×9 baking pan.
- Mix brownie mix, eggs, oil, and water in a bowl until combined.
- Pour batter into the pan and bake for 25-30 minutes. Let cool completely.
- Melt white chocolate chips and coconut oil in a microwave-safe bowl, stirring every 30 seconds.
- Drizzle melted chocolate over brownies in a criss-cross pattern to resemble bandages.
- Press candy eyeballs onto the chocolate before it sets.
- Chill for 10 minutes to set the chocolate. Cut into squares and serve.
Notes
- For cleaner cuts, chill brownies before slicing.
- Use a piping bag for more precise chocolate drizzle.
- Store in an airtight container for up to 3 days.
- Prep Time: 15 mins
- Cook Time: 30 mins
- Category: Dessert
- Method: Baking
- Cuisine: American
Nutrition
- Serving Size: 1 brownie
- Calories: 220
- Sugar: 18g
- Sodium: 110mg
- Fat: 12g
- Saturated Fat: 4g
- Unsaturated Fat: 7g
- Trans Fat: 0g
- Carbohydrates: 28g
- Fiber: 1g
- Protein: 2g
- Cholesterol: 25mg