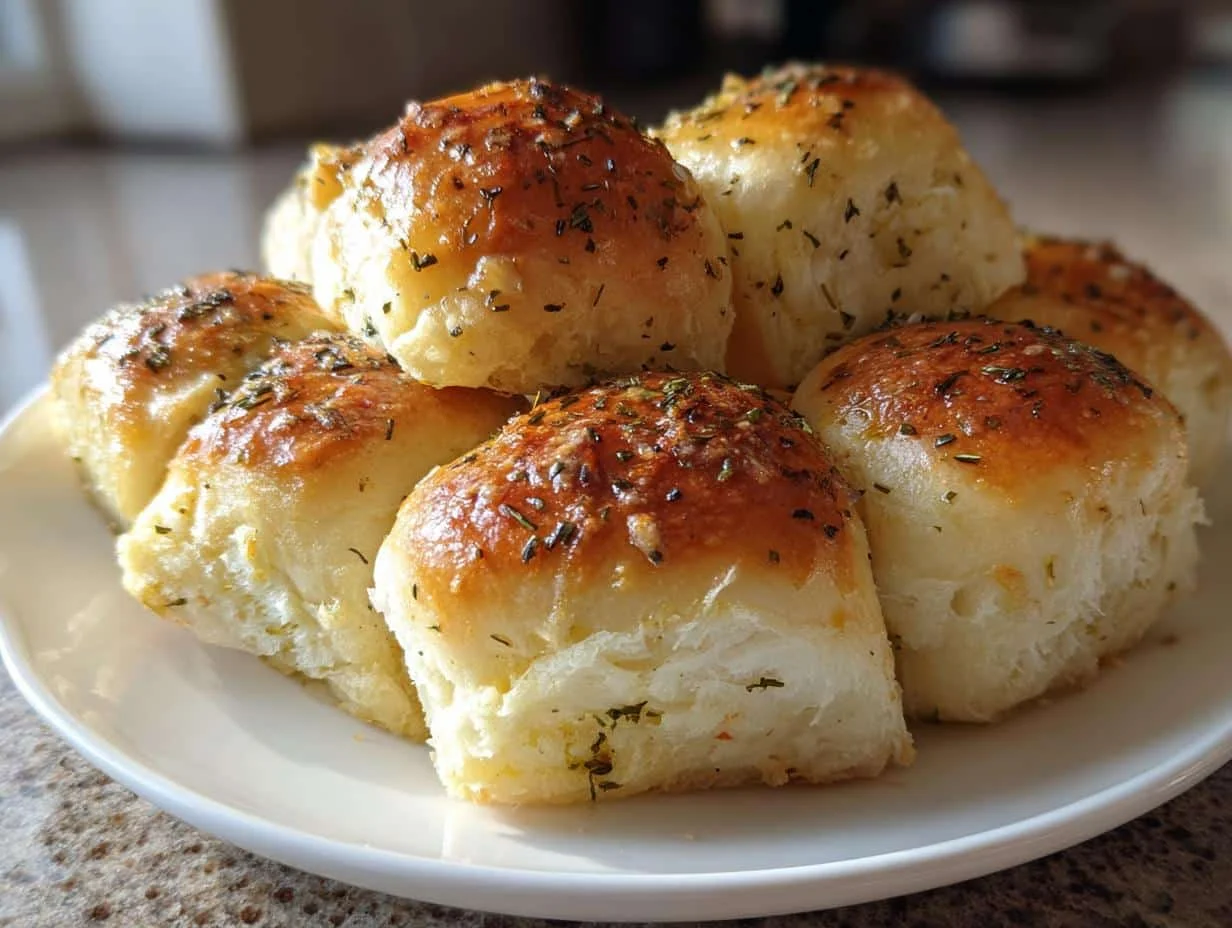
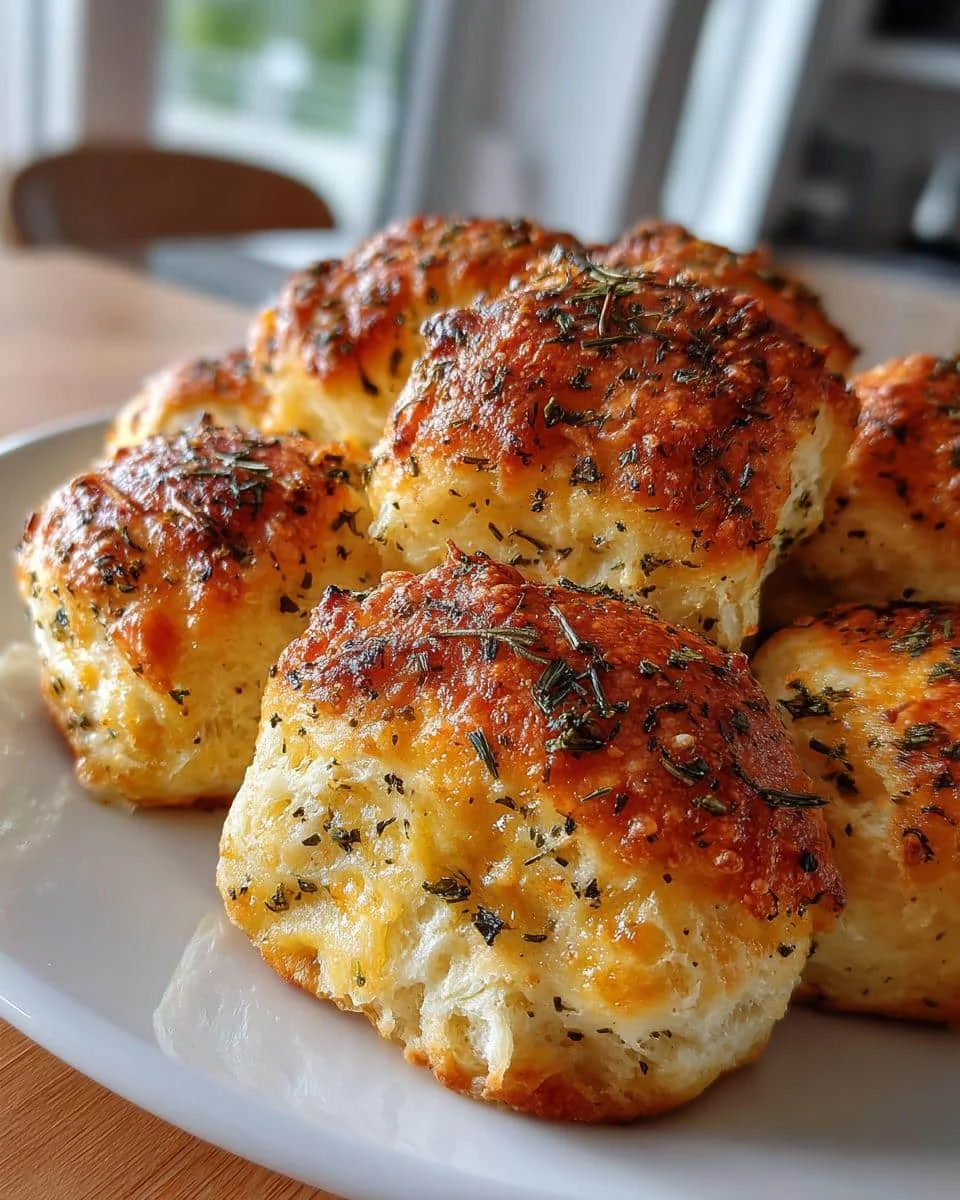
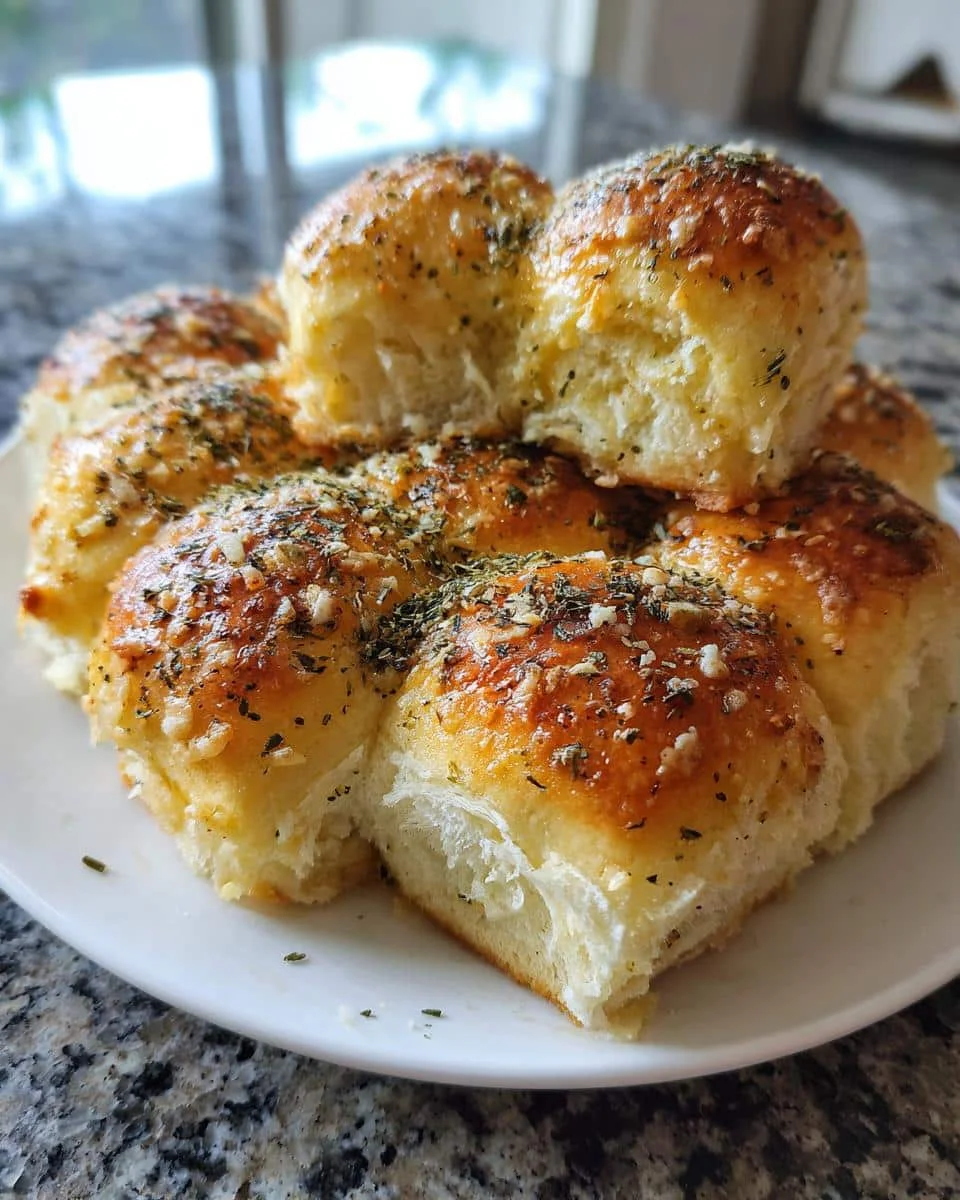
There’s something magical about pulling a tray of golden, buttery Parmesan Herb Dinner Rolls out of the oven—the way the aroma of garlic, herbs, and melted cheese fills the kitchen is downright intoxicating. I first made these for a chaotic family dinner last Thanksgiving, and let’s just say they disappeared faster than the turkey! Soft, fluffy, and packed with savory Parmesan and herbs, these rolls are the ultimate sidekick for soups, salads, or just slathered with extra butter (no judgment here). Trust me, once you try them, you’ll want to bake a double batch—they’re that good.
Why You’ll Love These Parmesan Herb Dinner Rolls
These Parmesan Herb Dinner Rolls are a game-changer for any meal. Here’s why they’ll become your new favorite:
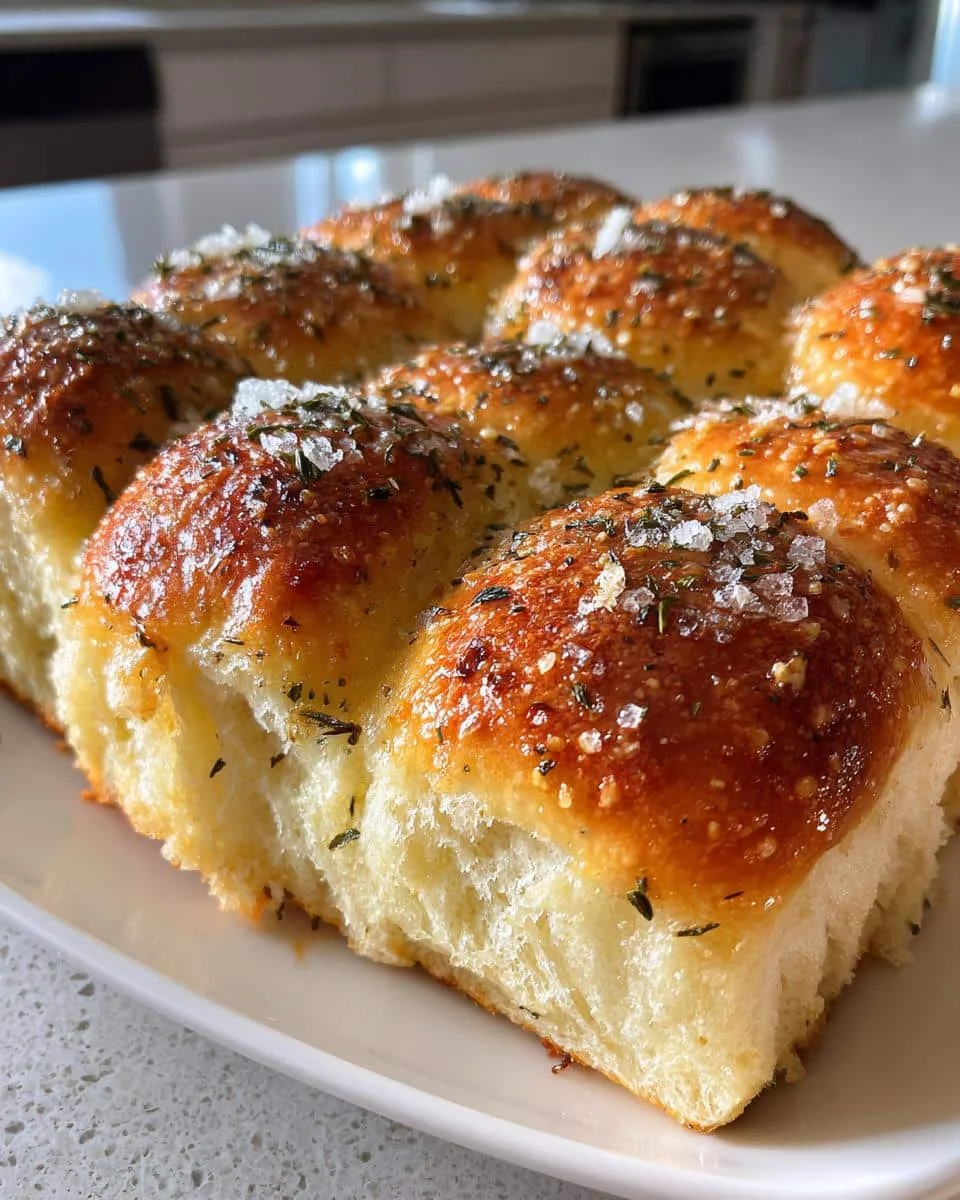
- Soft and fluffy: Every bite is like a warm, pillowy hug—perfectly tender on the inside with a golden crust.
- Cheesy goodness: Grated Parmesan cheese melts into the dough, giving it a rich, savory flavor you can’t resist.
- Quick and easy: With just a few simple steps, you’ll have fresh rolls ready in no time.
- Versatile: Pair them with soups, salads, or holiday feasts—they’re the ultimate crowd-pleaser.
Once you try these rolls, you’ll wonder how you ever ate dinner without them!
Ingredients for Parmesan Herb Dinner Rolls
Here’s everything you’ll need to make these irresistible rolls. I always double-check my ingredients before starting—trust me, there’s nothing worse than realizing you’re out of Parmesan halfway through! (Been there, done that.)
- 3 cups all-purpose flour: The base of our fluffy rolls. If you want to experiment, you can substitute 1 cup with bread flour for extra chewiness.
- 1 tablespoon sugar: Just enough to help the yeast do its magic without making the rolls sweet.
- 1 teaspoon salt: Essential for balancing all those delicious flavors.
- 1 packet (2¼ teaspoons) instant yeast: The little powerhouse that makes our rolls rise beautifully. Keep it fresh for best results!
- 1 cup warm milk (about 110°F): Whole milk gives the richest flavor, but 2% works fine too. For dairy-free, almond milk is a great substitute.
- 1/4 cup melted butter, slightly cooled: Unsalted is best so you control the salt level. That buttery richness is non-negotiable!
- 1/2 cup grated Parmesan cheese: Freshly grated melts and distributes better than pre-shredded. For extra punch, swap in Pecorino Romano.
- 1 tablespoon mixed dried herbs: My go-to blend is oregano, basil, and thyme. In summer, I’ll use 2 tablespoons of fresh herbs instead—just chop them fine.
See? Nothing fancy—just simple ingredients that create something extraordinary. Now let’s get mixing!
How to Make Parmesan Herb Dinner Rolls
Okay, let’s get to the fun part—making these heavenly rolls! Don’t let the yeast scare you; I promise it’s easier than you think. Just follow these steps, and you’ll have golden, cheesy perfection in no time.
Step 1: Mix the Dough
First, grab your biggest mixing bowl—trust me, you’ll need the space. Whisk together the flour, sugar, salt, and yeast. (Pro tip: If your yeast is older than a few months, test it in warm water first to make sure it’s still active.) Now, pour in the warm milk and melted butter. Stir with a wooden spoon until a shaggy dough forms. It’ll look messy at first, but that’s totally normal! Toss in the Parmesan and herbs, then keep mixing until everything comes together. The dough should be slightly sticky but manageable—not too wet, not too dry. If it’s sticking to your hands like glue, add a tablespoon of flour. Too stiff? A splash more milk.
Step 2: Knead and Rise
Flour your counter (or just use the bowl if you’re lazy like me sometimes), and knead the dough for about 5-7 minutes. You’re looking for it to become smooth and elastic—like a baby’s cheek, as my grandma used to say. If you poke it, the dough should bounce back slowly. Pop it back into the bowl, cover it with a damp towel or plastic wrap, and let it rise in a warm spot for 1 hour. No warm spot? No problem! Just turn your oven on for 30 seconds, turn it off, and let the dough rise in there. It should double in size—when it does, give it a proud little pat. You’ve just made magic happen.
Step 3: Shape and Bake
Punch down the dough (so satisfying!) and turn it out onto a lightly floured surface. Divide it into 12 equal pieces—I use a bench scraper, but a sharp knife works too. Roll each piece into a smooth ball and arrange them on a parchment-lined baking sheet, leaving about an inch between them. Cover them loosely and let them rise again for 30 minutes while you preheat the oven to 375°F (190°C). They’ll puff up and start cozying up to each other—that’s exactly what you want. Bake for 15-20 minutes until they’re golden brown on top and sound hollow when tapped. Oh, and that smell? Pure happiness.
Tips for Perfect Parmesan Herb Dinner Rolls
Want to make sure your Parmesan Herb Dinner Rolls turn out flawless every time? Here are my tried-and-true tips to nail this recipe:
- Use fresh herbs when you can: While dried herbs work just fine, fresh herbs like basil, oregano, and thyme add a vibrant flavor that’s hard to beat. Just double the amount—1 tablespoon dried equals about 2 tablespoons fresh.
- Check dough elasticity: When kneading, the dough should feel smooth and springy. If it’s too sticky, add a sprinkle of flour. Too stiff? A splash of warm milk will do the trick. Trust your hands—they’ll tell you when it’s just right.
- Don’t rush the rise: Let the dough rise in a warm, draft-free spot until it’s doubled in size. If it’s too cold, the yeast won’t work its magic. I like to use my (turned-off) oven for a cozy environment.
- Avoid overbaking: Keep an eye on the rolls during the last few minutes of baking. They’re done when they’re golden brown and sound hollow when tapped. Overbaking can dry them out, and we don’t want that!
- Brush with butter: For an extra glossy finish, brush the warm rolls with melted butter right after they come out of the oven. It adds flavor and keeps them soft.
Follow these tips, and you’ll have rolls that’ll steal the show at any meal. Happy baking!
Ingredient Substitutions
Look, I get it—sometimes you’re halfway through a recipe and realize you’re out of Parmesan or only have almond milk in the fridge. No panic needed! These Parmesan Herb Dinner Rolls are surprisingly forgiving. Here are my favorite swaps that still deliver amazing results:
- Fresh herbs for dried: If you’ve got a garden or some fresh herbs hanging around, use them! Swap 1 tablespoon dried herbs for 2 tablespoons finely chopped fresh ones. The flavor will be brighter, almost peppery—especially with fresh basil or oregano. Just avoid delicate herbs like parsley; they don’t hold up as well in baking.
- Plant-based milk: Almond milk or oat milk work beautifully as a 1:1 substitute for cow’s milk. The rolls might be slightly less rich, but they’ll still rise perfectly. (Pro tip: Warm the milk to the same 110°F—yeast loves consistency.)
- Different cheeses: No Parmesan? Pecorino Romano adds a sharper bite, while Asiago brings a nutty depth. Even sharp cheddar works in a pinch, though the flavor profile changes completely. Just avoid pre-shredded cheese—the anti-caking agents can make the dough gummy.
- Butter alternatives: Vegan butter or olive oil can replace melted butter, though the texture will be a tad less tender. If using oil, reduce it to 3 tablespoons since it’s 100% fat (vs. butter’s 80%).
- Gluten-free flour: A 1:1 gluten-free blend can work, but add 1 extra tablespoon of milk and let the dough rest for 10 minutes before shaping—it helps the flour hydrate. The rolls will be denser but still tasty.
The key? Stick to one substitution at a time if possible. Too many swaps, and you’re basically inventing a new recipe (which, hey, could be fun—but maybe not when you’re craving these specific rolls!).
Serving Suggestions for Parmesan Herb Dinner Rolls
These rolls are the ultimate sidekick—warm, cheesy, and ready to elevate any meal! Serve them fresh from the oven alongside creamy tomato soup, a crisp garden salad, or as the star of your holiday bread basket. My personal favorite? Tearing one open and slathering it with garlic butter while it’s still steaming. Trust me, nobody will leave leftovers!
Storage and Reheating
Okay, let’s talk about keeping these Parmesan Herb Dinner Rolls as delicious as the day you baked them—because let’s be real, they’re too good to waste! First, make sure they’re completely cooled before storing (trapping steam leads to soggy rolls—yuck). Pop them in an airtight container or a resealable bag at room temperature for up to 2 days. Need longer? Freeze them! Just wrap each roll tightly in foil, then stash in a freezer bag for up to 3 months. They’ll stay as cozy as a snowman in a scarf.
Now, for reheating: skip the microwave (unless you enjoy rubbery bread). Instead, revive them in a 350°F (175°C) oven for 5-8 minutes if room temp, or 10-12 minutes straight from frozen. Want that just-baked magic? Spritz frozen rolls lightly with water before reheating—it’s my secret trick for restoring that fresh-from-the-oven crispness. And if you’re feeling fancy, brush them with melted butter post-reheat. You’re welcome.
Parmesan Herb Dinner Rolls Nutritional Information
Just so you know, these rolls are pure comfort food—not exactly health food, but oh-so-worth-it! The nutritional values below are estimates per roll and can vary depending on the specific ingredients you use (like full-fat milk vs. almond milk or extra Parmesan because, let’s be honest, who measures cheese perfectly?). If you’re tracking closely, always calculate based on your exact brands and measurements. That said, life’s too short to stress over a warm, herby, cheesy roll fresh from the oven. Enjoy every bite!
Frequently Asked Questions
Got questions about making these Parmesan Herb Dinner Rolls? I’ve got answers! Here are the most common queries I hear, along with my tried-and-true tips to help you bake with confidence.
Can I freeze these rolls?
Absolutely! These rolls freeze like a dream. Just let them cool completely, wrap each one tightly in foil, and pop them in a freezer bag. They’ll keep for up to 3 months. When you’re ready to enjoy, reheat them straight from the freezer in a 350°F (175°C) oven for 10-12 minutes. Spritz them with a little water before reheating for that fresh-baked crispness.
Can I use fresh Parmesan instead of grated?
Yes, and I highly recommend it! Freshly grated Parmesan melts better and distributes more evenly in the dough compared to pre-shredded. Plus, it has a richer flavor. Just grab a block of Parmesan and grate it yourself—it’s worth the extra effort.
What if I don’t have instant yeast?
No problem! You can use active dry yeast instead. Just activate it in the warm milk with a pinch of sugar first and let it sit for 5-10 minutes until it gets frothy. Then proceed with the recipe as usual. The dough might take a little longer to rise, but the results will be just as delicious.
Can I make these rolls ahead of time?
Definitely! You can prepare the dough the night before and let it rise in the fridge overnight. Just take it out about 30 minutes before shaping the rolls to let it come to room temperature. This slow rise actually deepens the flavor—win-win!
Can I use a stand mixer for kneading?
Of course! A stand mixer with a dough hook makes kneading a breeze. Just mix on low speed for about 5-7 minutes until the dough is smooth and elastic. If you’re doing it by hand, no worries—it’s a great arm workout!
Try this recipe and share your results in the comments! I’d love to hear how your Parmesan Herb Dinner Rolls turned out. For more delicious recipes, check out our Pinterest page!
Print
Irresistible 12-Piece Parmesan Herb Dinner Rolls Recipe
- Total Time: 1 hour 50 minutes
- Yield: 12 rolls 1x
- Diet: Vegetarian
Description
Soft and fluffy dinner rolls infused with Parmesan cheese and aromatic herbs, perfect for any meal.
Ingredients
- 3 cups all-purpose flour
- 1 tablespoon sugar
- 1 teaspoon salt
- 1 packet instant yeast
- 1 cup warm milk
- 1/4 cup melted butter
- 1/2 cup grated Parmesan cheese
- 1 tablespoon mixed dried herbs (such as oregano, basil, and thyme)
Instructions
- In a large bowl, mix flour, sugar, salt, and yeast.
- Add warm milk and melted butter, then knead until a dough forms.
- Mix in Parmesan cheese and herbs until evenly distributed.
- Cover the dough and let it rise for 1 hour.
- Divide the dough into 12 equal pieces and shape them into rolls.
- Place the rolls on a baking sheet and let them rise for another 30 minutes.
- Preheat the oven to 375°F (190°C).
- Bake the rolls for 15-20 minutes or until golden brown.
- Serve warm.
Notes
- Use fresh herbs for a stronger flavor.
- Store leftovers in an airtight container for up to 2 days.
- Reheat in the oven for best results.
- Prep Time: 1 hour 30 minutes
- Cook Time: 20 minutes
- Category: Bread
- Method: Baking
- Cuisine: American
Nutrition
- Serving Size: 1 roll
- Calories: 150
- Sugar: 2g
- Sodium: 200mg
- Fat: 6g
- Saturated Fat: 3.5g
- Unsaturated Fat: 2g
- Trans Fat: 0g
- Carbohydrates: 20g
- Fiber: 1g
- Protein: 5g
- Cholesterol: 15mg