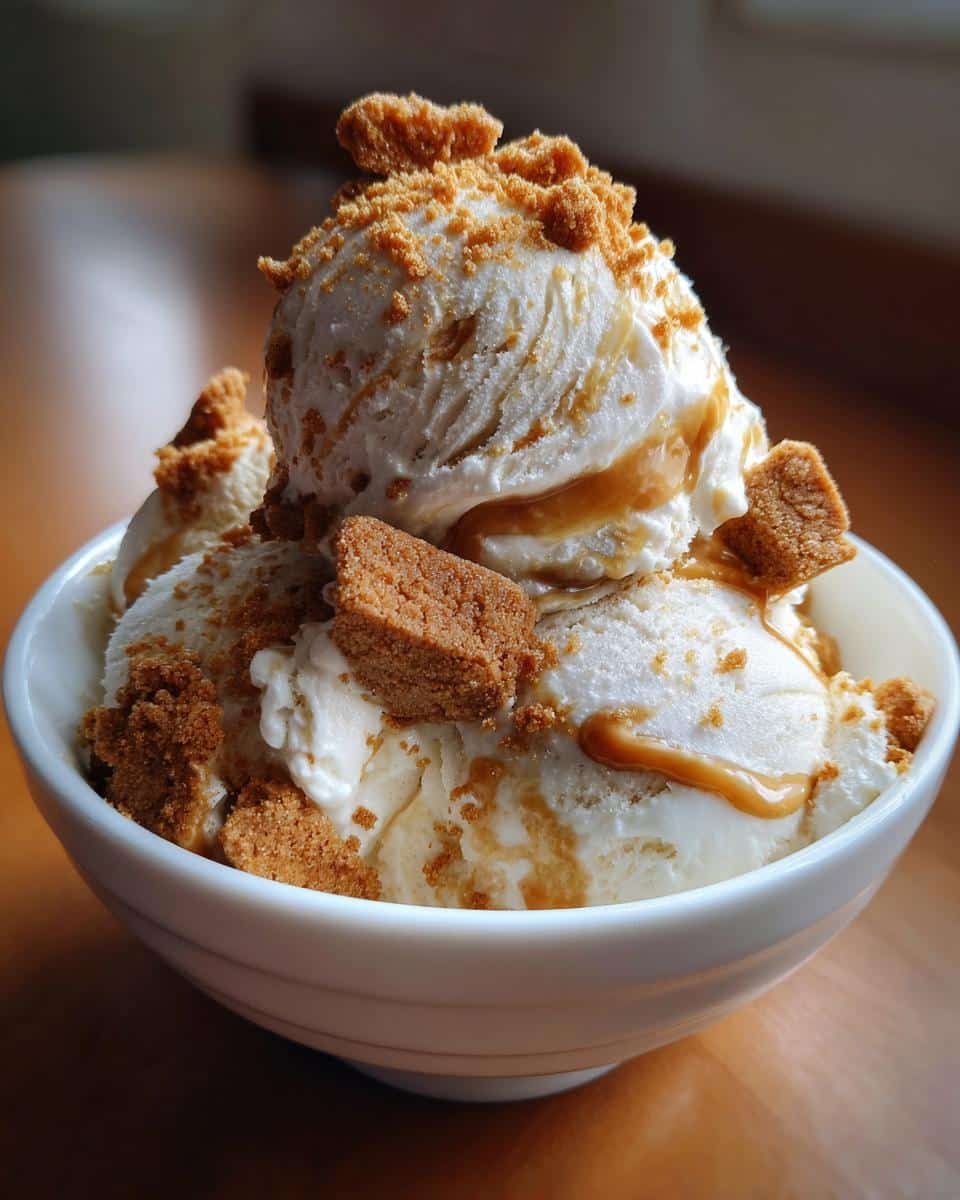
You won’t believe how crazy simple it is to make this No-Churn Biscoff Ice Cream – no fancy machines, just pure cookie butter magic! I discovered this recipe during one of those sweltering summer afternoons when my ice cream maker broke (typical, right?). Desperate for something cold and sweet, I threw together what I had – heavy cream, condensed milk, and those addictive Biscoff cookies we always have stashed in the pantry. The result? Creamy, dreamy perfection with that signature caramelized cookie flavor in every bite. Now it’s my go-to whenever friends pop by unexpectedly or when I need a little pick-me-up. The best part? You probably have most ingredients sitting in your kitchen already!
Table of Contents
Table of Contents
Why You’ll Love This No-Churn Biscoff Ice Cream
This recipe is my absolute favorite for so many reasons, and I know you’ll fall in love with it too. Here’s why:
- No fancy equipment needed – Forget about ice cream makers! Just a bowl, a whisk (or electric mixer), and a loaf pan are all you need to whip up this creamy dream.
- That addicting Biscoff flavor – Every spoonful is packed with the warm, spiced caramel taste of those delicious cookies we all can’t resist.
- Unbelievably creamy texture – The magic combo of whipped cream and sweetened condensed milk creates the smoothest ice cream you’ve ever tasted.
- Ready in just 15 minutes (plus freezing) – It’s perfect for last-minute dessert cravings or surprise guests!
Ingredients for No-Churn Biscoff Ice Cream
Okay, let’s gather our goodies! Here’s everything you’ll need to make this dreamy Biscoff ice cream happen. I promise it’s all simple stuff – I bet you’ve got most of it already. Just make sure everything’s cold when you start (trust me, it makes a difference!).
- 2 cups heavy cream – Cold, cold, cold! This is the secret to getting those perfect stiff peaks when whipping. Don’t try to shortcut with half-and-half – we need all that glorious fat for creaminess.
- 1 can (14 oz) sweetened condensed milk – That magical thick, sweet stuff in the blue can. It’s our sweetener and gives the ice cream that irresistible smooth texture.
- 1 tsp vanilla extract – Just a splash to round out all those warm Biscoff flavors. Use the real stuff if you’ve got it!
- 1 cup Biscoff cookie crumbs – Here’s where the magic happens! I crush mine super fine (I use a rolling pin or food processor) so they distribute evenly through the ice cream.
- 1/2 cup Biscoff cookie pieces – Save some cookies to roughly chop for topping – these little nuggets give amazing texture contrast!
Psst…wanna make it extra special? Keep some extra Biscoff spread handy for swirling in – I’ll show you how later!
Equipment You’ll Need
No fancy gadgets required here – just grab these everyday kitchen tools and you’re golden! I always use:
- A large mixing bowl – Big enough to whip that cream without splattering everywhere (been there, done that!)
- Electric mixer or whisk – I’ll be honest – I use my hand mixer because my arms get tired after 30 seconds of whisking
- Rubber spatula – For gentle folding (no heavy mixing allowed!)
- 9×5 inch loaf pan – Or any freezer-safe container you’ve got – this size makes perfect scoopable portions
See? Told you it was simple! Now let’s make some magic.
How to Make No-Churn Biscoff Ice Cream
Alright, let’s dive into the fun part! Making this ice cream is seriously foolproof – just follow these simple steps and you’ll be scooping heaven in no time. I’ve made this dozens of times, and these little tricks make all the difference between good and “OMG-where-has-this-been-all-my-life” amazing.
Step 1: Whip the Cream
First things first – take your chilled heavy cream and pour it into your mixing bowl. Now, here’s my secret: I like to chill my bowl and beaters in the freezer for 10 minutes beforehand. Trust me, it helps! Whip on medium-high speed until stiff peaks form – that means when you lift the beaters, the cream should stand straight up without flopping over. Don’t walk away though – it can go from perfect to over-whipped (and buttery) faster than you’d think! Should take about 3-4 minutes with an electric mixer.
Step 2: Fold in Condensed Milk and Vanilla
Okay, now pour in that glorious sweetened condensed milk and vanilla extract. Here’s where you need to channel your inner gentle-folding ninja. Use a rubber spatula to carefully fold (not stir!) the mixtures together. Imagine you’re turning pages of a precious book – that’s the motion you want. We’re trying to keep all that lovely air in the whipped cream while getting everything evenly combined. It’ll look like a cloud of deliciousness!
Step 3: Add Biscoff Crumb
Time for the star ingredient! Sprinkle in those finely crushed Biscoff crumbs. Again, fold gently – I do this in 2-3 batches to make sure they distribute evenly without clumping. The batter will take on this beautiful speckled look, with little caramel-colored flecks throughout. Resist the urge to lick the spatula just yet…we’re almost there!
Step 4: Layer and Freeze
Pour your mixture into your prepared loaf pan (mine’s 9×5 inches – perfect size!). Smooth the top with your spatula, then sprinkle those reserved Biscoff cookie pieces over the top – they’ll give the most amazing crunchy contrast. Now the hard part: patience! Pop it in the freezer for at least 6 hours, but overnight is even better. I know it’s tempting, but don’t peek too soon – that undisturbed freezing time is what gives us that dreamy, scoopable texture.
Pro tip: If you’re feeling extra indulgent, after pouring half the mixture into the pan, drizzle some melted Biscoff spread on top, then add the remaining ice cream mixture. Swirl with a knife before freezing for a marbled effect that’ll make your guests swoon!
Tips for the Best No-Churn Biscoff Ice Cream
After making this recipe more times than I can count (no regrets!), I’ve picked up some foolproof tricks to guarantee perfect results every time. These are my must-know tips:
- Full-fat is non-negotiable – Skim milk or low-fat cream just won’t give you that luscious, creamy texture we’re after. Trust me, this is the time to indulge!
- Fold, don’t stir – Overmixing deflates all that beautiful air we whipped into the cream. Gentle folding keeps it light and dreamy.
- Freeze your bowl first – 10 minutes in the freezer before whipping makes the cream whip up faster and hold its shape better.
- Go for the swirl – Melt 1/4 cup Biscoff spread and drizzle it over the ice cream before freezing, then use a knife to marble it through.
- Patience pays off – That 6-hour freeze is crucial! Cutting it short means soft, melty ice cream instead of perfect scoopable texture.
Follow these simple tricks, and you’ll have ice cream that rivals any fancy scoop shop – pinky promise!
Variations for No-Churn Biscoff Ice Cream
Oh, the possibilities! Once you’ve mastered the basic recipe (which is heavenly as-is), try these fun twists to mix things up. My friends beg me to bring different versions to every gathering!
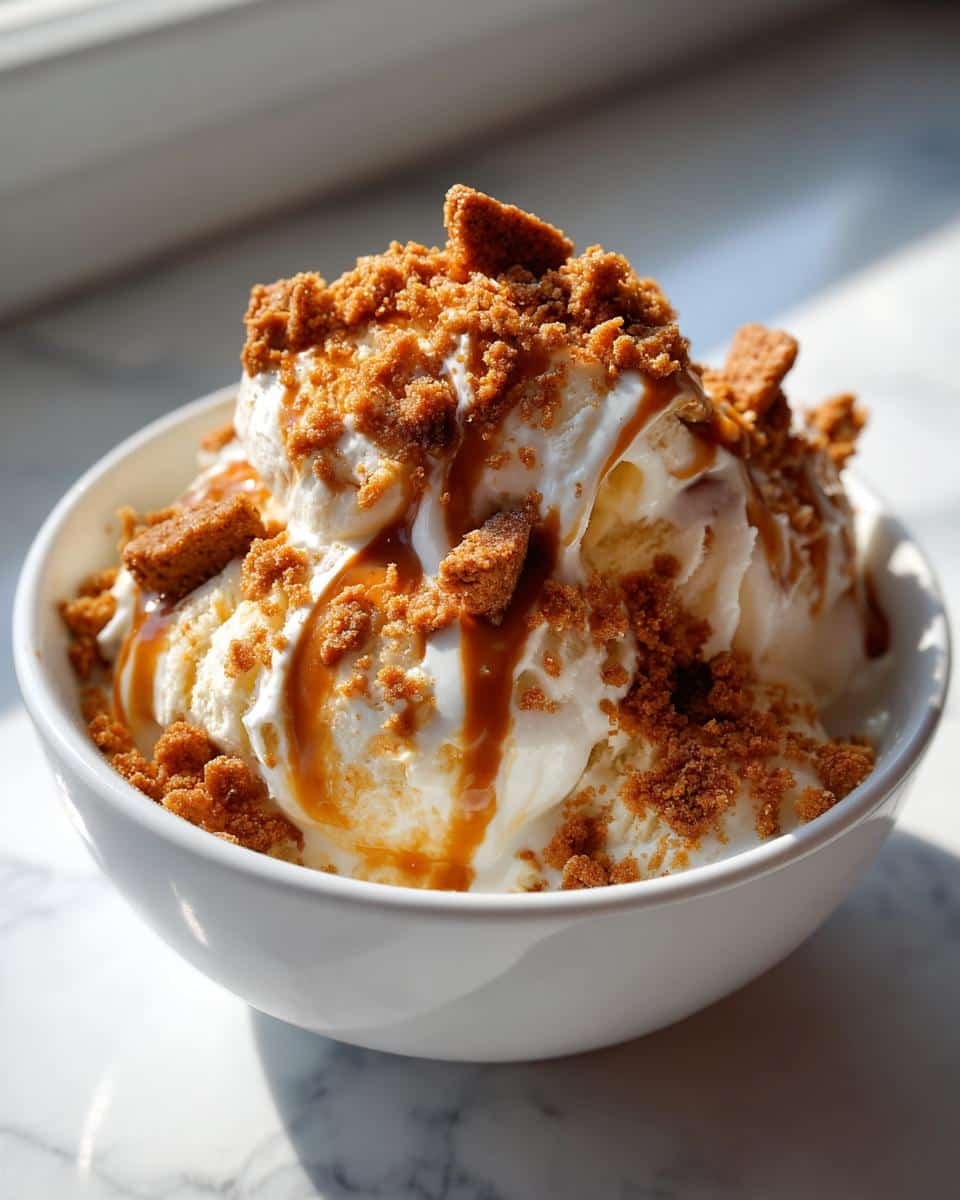
- Caramel Swirl – Drizzle in store-bought or homemade caramel sauce before freezing for a sweet-salty kick that pairs perfectly with Biscoff.
- Chocolate Chunk – Fold in chopped dark chocolate or mini chocolate chips for that classic cookie-and-chocolate combo.
- Speculoos Spread – Can’t find Biscoff cookies? The spread works beautifully too – swirl it in or use it to make cookie crumbs.
- Coffee Kick – Add 1 tbsp instant espresso powder to the cream mixture for a mocha-Biscoff fusion that’s downright addictive.
The best part? You can’t mess it up – every variation turns out delicious!
Serving and Storing No-Churn Biscoff Ice Cream
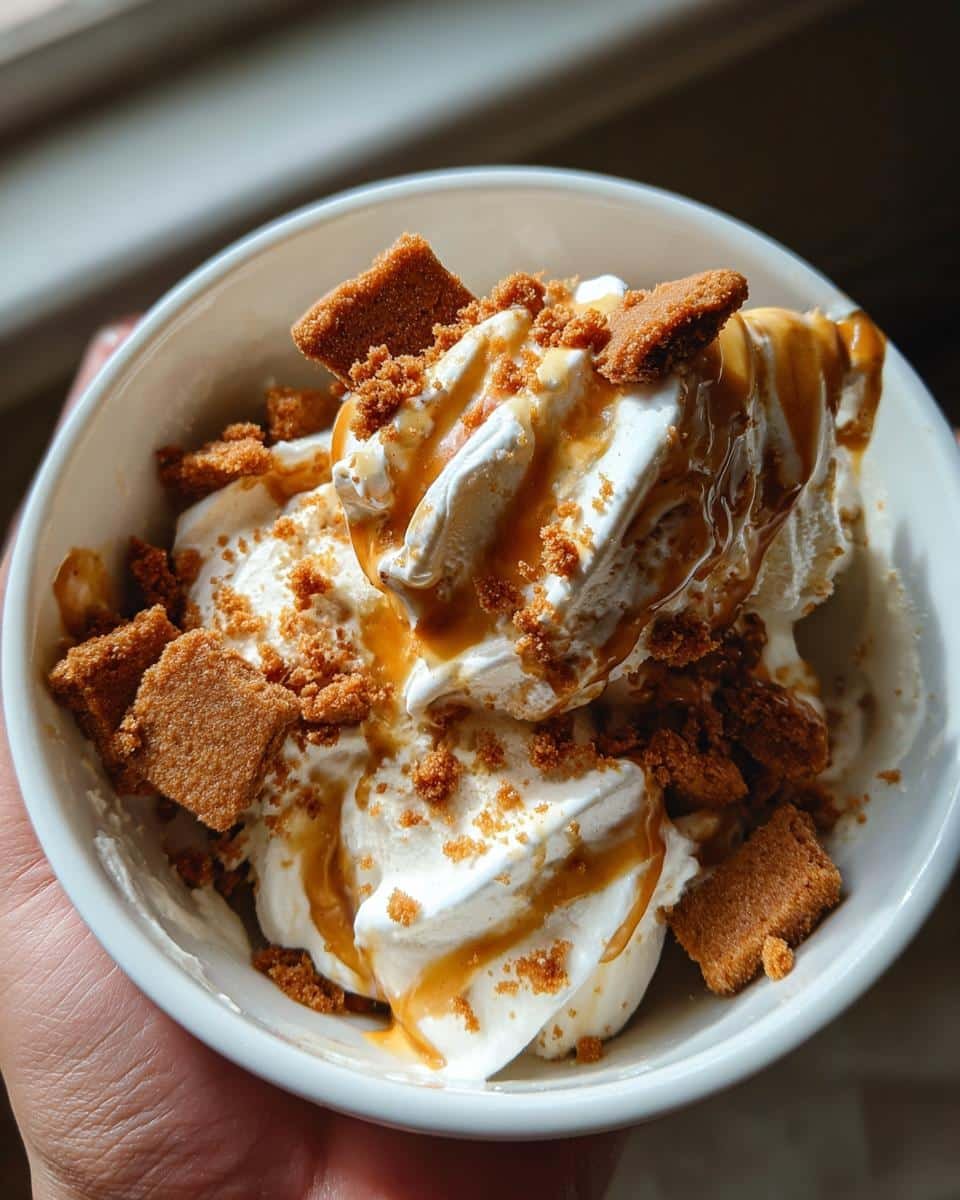
Alright, the hardest part is over (that wait is torture, I know!) – now for the fun! When you’re ready to serve, let the ice cream sit at room temperature for about 5 minutes first. This makes scooping way easier – no broken spoons here! I like to garnish each bowl with extra Biscoff crumbs and maybe even a whole cookie on top for that wow factor.
Leftovers? Just press a piece of parchment paper directly onto the surface before sealing with a lid. This little trick prevents ice crystals and keeps it creamy for up to 2 weeks in the freezer. Not that it ever lasts that long in my house!
Nutritional Information
Here’s the scoop on nutrition – remember these values are estimates since ingredients can vary. A typical 1/2 cup serving of this heavenly No-Churn Biscoff Ice Cream contains:
- Calories: About 320 – totally worth every bite!
- Fat: 18g (10g saturated) – that’s what makes it so creamy
- Sugar: 24g – mainly from the condensed milk and cookies
- Protein: 4g – surprise! There’s actually some protein in there
- Sodium: 120mg – not bad for a dessert this indulgent
Remember, nutritional values can change based on specific brands or if you tweak the recipe (like adding extra Biscoff swirls – no judgment here!). This is meant to be a treat, after all. My philosophy? Enjoy every spoonful without guilt – life’s too short not to!
FAQs About No-Churn Biscoff Ice Cream
I get so many questions about this recipe – here are the ones I hear most often with all my best answers! (And yes, these all come from real experiences – I’ve tried every variation so you don’t have to!)
Can I use low-fat cream instead of heavy cream?
Oh honey, I wish! But no – the full-fat heavy cream is what gives this ice cream its magical texture. Low-fat versions just won’t whip up properly and you’ll end up with icy, grainy results. This is one time where the extra fat is absolutely necessary for that creamy dreamy consistency we’re after.
How long can I store this in the freezer?
Technically it keeps for about 2 weeks if stored properly (in an airtight container with parchment pressed on the surface). But let’s be real – in my house it’s lucky to last 2 days! The texture is best in the first week though – after that it can start getting a bit icy.
Can I make this without an electric mixer?
Absolutely! I’ve done it both ways – an electric mixer is faster, but a good old-fashioned whisk and some elbow grease works too. Just make sure your cream is super cold, and be prepared for a bit of an arm workout. Pro tip: Use a large balloon whisk and really go for it – you’ll know you’re done when the cream holds stiff peaks that don’t droop.
Why did my ice cream come out icy instead of creamy?
Ahhh, this usually happens for one of three reasons: 1) You didn’t whip the cream enough (needs those stiff peaks!), 2) You overmixed after adding the condensed milk (be gentle!), or 3) Your freezer is too cold (try wrapping the container in a towel to slow the freezing). Next time, make sure to follow the whipping and folding steps exactly – it makes all the difference!
Can I use other cookies instead of Biscoff?
Of course! This method works great with graham crackers, Oreos, or even gingersnaps. But (and this is a big but) – you’ll lose that signature caramel-spiced Biscoff flavor that makes this recipe so special. If you do substitute, I’d recommend adding a teaspoon of cinnamon to mimic those warm spice notes.
Final Thoughts
Well friends, now you’ve got all my secrets for making this ridiculously easy No-Churn Biscoff Ice Cream! I can’t wait for you to try it – trust me, one bite and you’ll be hooked. Tag me if you make it so I can see your creations! Nothing makes me happier than seeing others fall in love with this recipe too. Now go forth and make ice cream magic! You can find more delicious recipes on our Pinterest page.
Print
3-Ingredient No-Churn Biscoff Ice Cream Magic
- Total Time: 6 hours 15 minutes
- Yield: 6 servings 1x
- Diet: Vegetarian
Description
Creamy no-churn ice cream with Biscoff cookies, requiring no ice cream maker. Simple and quick to prepare.
Ingredients
- 2 cups heavy cream
- 1 can (14 oz) sweetened condensed milk
- 1 tsp vanilla extract
- 1 cup Biscoff cookie crumbs
- 1/2 cup Biscoff cookie pieces
Instructions
- Whip heavy cream until stiff peaks form.
- Fold in sweetened condensed milk and vanilla extract.
- Gently mix in Biscoff cookie crumbs.
- Transfer mixture to a loaf pan.
- Sprinkle Biscoff cookie pieces on top.
- Freeze for at least 6 hours or overnight.
- Serve and enjoy.
Notes
- Use full-fat ingredients for best texture.
- For extra flavor, swirl in melted Biscoff spread.
- Store in an airtight container to prevent freezer burn.
- Prep Time: 15 minutes
- Cook Time: 0 minutes
- Category: Dessert
- Method: No-Churn
- Cuisine: International
Nutrition
- Serving Size: 1/2 cup
- Calories: 320
- Sugar: 24g
- Sodium: 120mg
- Fat: 18g
- Saturated Fat: 10g
- Unsaturated Fat: 6g
- Trans Fat: 0g
- Carbohydrates: 35g
- Fiber: 1g
- Protein: 4g
- Cholesterol: 55mg