Nothing says Halloween like a table full of spooky sweets that make both kids and adults go “Wow!” I still remember the year my sister and I stayed up way too late decorating cupcakes with neon-green frosting and candy eyeballs—the result was a deliciously creepy mess, but it instantly became our favorite Halloween tradition. That’s the magic of a Halloween Diaries: Dessert Table. It’s not just about the treats—though, trust me, the chocolate cake recipe I’m sharing is dangerously good—it’s about the fun of turning ordinary desserts into something ghoulishly delightful. Whether you’re hosting a party or just indulging your sweet tooth, this is your ticket to a hauntingly good time.
Why You’ll Love This Halloween Diaries: Dessert Table
Listen, I’ve thrown enough Halloween parties to know what makes a dessert table truly special—and this setup? It’s a total game-changer. Here’s why:
- Effortlessly spooky: The base recipe is so simple (one bowl, no mixer needed!), leaving you plenty of time to get creative with the fun part—decorating!
- Guaranteed crowd-pleaser: Rich chocolate cake + cream cheese frosting? Even picky little ghosts will beg for seconds.
- Customizable creepiness: Swap in gummy worms for spiders, turn cupcakes into mini tombstones—this Halloween Diaries: Dessert Table adapts to whatever vibes you’re feeling.
- Secretly stress-free: Bake the cakes a day ahead, then go wild with decorations while sipping cider (or something stronger—no judgment here).
Seriously, the only scary thing about this dessert table? How fast the treats disappear.
Ingredients for Your Halloween Diaries: Dessert Table
Here’s everything you’ll need to create your spooky sweet spread—I’ve even included my favorite swaps for when you’re in a pinch (or just feeling lazy). Pro tip: raid the Halloween candy aisle early—those gummy eyeballs sell out fast!
- 2 cups all-purpose flour (or gluten-free 1-to-1 blend—I like Bob’s Red Mill)
- 1 cup granulated sugar (pack it lightly—no need to press down hard)
- 1/2 cup cocoa powder (the darker, the spookier!)
- 1 tsp baking soda (check the date—old soda means flat cake)
- 1/2 tsp salt (just regular table salt works fine)
- 1 cup water (hot tap water helps bloom the cocoa)
- 1/3 cup vegetable oil (or melted coconut oil for subtle flavor)
- 1 tsp vanilla extract (the real stuff—imitation tastes like plastic)
- 1 tbsp white vinegar (yes, really! It reacts with the soda for lift)
- 1 batch cream cheese frosting (store-bought works if you’re short on time)
- Assorted Halloween candies (gummy worms, candy eyes, orange sprinkles—go wild!)
See? Nothing too scary here—just pantry staples ready for a Halloween makeover!
Equipment You’ll Need
Here’s what I always grab from my kitchen—don’t stress if you don’t have fancy stuff! A large mixing bowl (or just a big soup pot in a pinch), whisk, 8-inch round cake pans (or a 9×13″ baking dish works too), and a spatula for frosting. That’s it—spooky simplicity!
How to Prepare Your Halloween Diaries: Dessert Table
Okay, let’s get spooky! This is where the magic happens—turning simple ingredients into a showstopping Halloween Diaries: Dessert Table. I’ll walk you through each step like I’m right there in the kitchen with you (maybe pretend I’m a friendly ghost hovering over your shoulder?).
Step 1: Mixing the Batter
First things first—preheat that oven to 350°F (175°C). While it’s heating up, grab your biggest bowl and whisk together all the dry ingredients: flour, sugar, cocoa powder, baking soda, and salt. Give it a good whisk—you want everything evenly distributed so no one gets a mouthful of baking soda later!
Now for the wet stuff: pour in the water, oil, vanilla, and vinegar all at once. Here’s where things get fun—watch how the vinegar reacts with the baking soda! You’ll see little bubbles forming immediately. Stir just until everything comes together—about 30 seconds max. Some small lumps are fine; overmixing makes tough cake. The batter will be thin, like chocolate milk, and that’s perfect!
Step 2: Baking and Cooling
Pour that gorgeous dark batter into your greased pans (I use the wrapper from the butter to grease mine—zero waste!). Bake for 25-30 minutes. Around the 20-minute mark, start checking with a toothpick—it should come out with just a few moist crumbs, not wet batter.
Here’s my golden rule: let the cakes cool COMPLETELY before even thinking about frosting. I know it’s tempting, but warm cake + frosting = melty mess. About 1 hour should do it. Pro tip: pop them in the fridge for 15 minutes if you’re impatient like me!
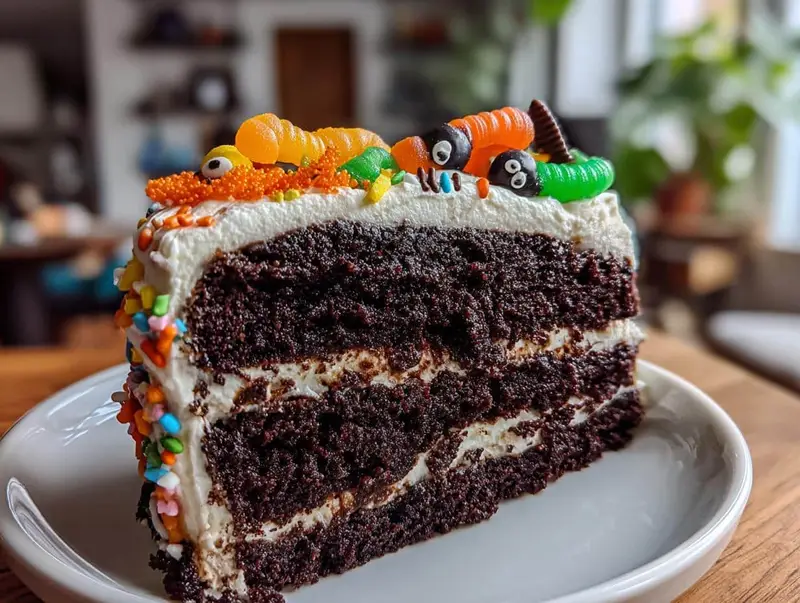
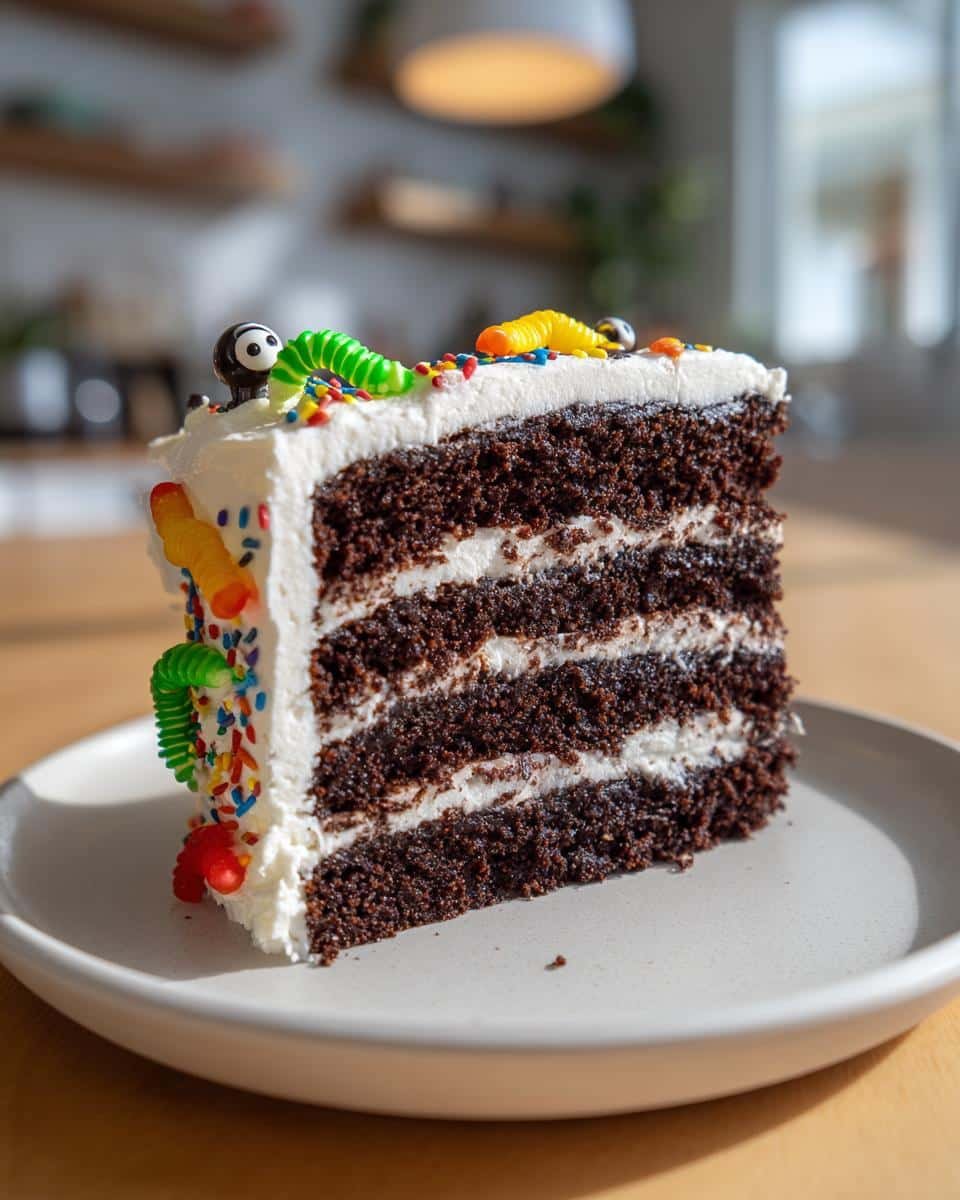
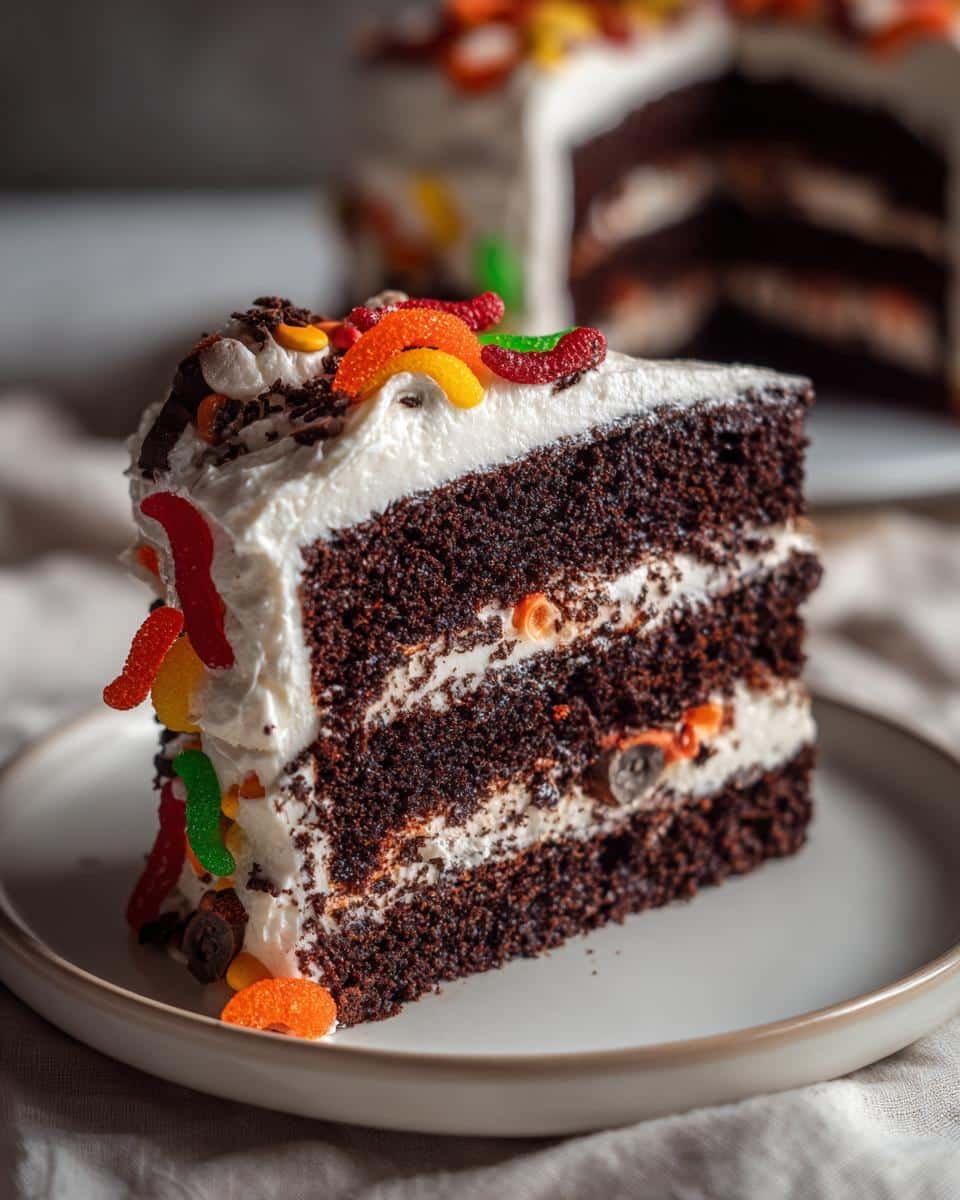
Step 3: Decorating Your Halloween Diaries: Dessert Table
Now for the best part—making it look terrifyingly tasty! Spread your cream cheese frosting generously (no skimping!). Then raid your candy stash: press gummy worms halfway into the frosting so they look like they’re crawling out, scatter candy eyeballs randomly for maximum creep factor, and dust with orange sprinkles for that classic Halloween vibe.
Arrange your decorated cakes on a table with other treats—maybe some “witches’ fingers” (pretzel rods with almond nails) or “poison apples” (caramel-dipped marshmallows). The more mismatched and chaotic, the better—this is Halloween, not a royal tea party!
Tips for a Spooktacular Halloween Diaries: Dessert Table
After years of trial and (hilarious) error, I’ve learned a few tricks to make your Halloween Diaries: Dessert Table truly legendary. These are my go-to secrets:
- Black frosting hack: Mix black gel food coloring into white frosting—it’s way more vibrant than liquid drops. Warning: it stains lips (and countertops!) wonderfully.
- Freshness saver: Press plastic wrap directly onto cut cake surfaces before refrigerating—no dry edges by party time!
- Elevated creepiness: Stack cake stands at different heights using overturned bowls—gives that “haunted house” vibe.
- Candy placement: Add some treats last-minute so they don’t bleed color (looking at you, gummy worms!).
- The ultimate shortcut: Bake cupcakes instead of a full cake—decorating is faster and kids love individual portions.
Remember: imperfections make it spookier. A lopsided witch hat cake? Call it “authentically haunted”!
Variations for Your Halloween Diaries: Dessert Table
Oh, the possibilities! One of my favorite things about this Halloween Diaries: Dessert Table is how easily it transforms to match your spooky vision. Swap regular frosting for vegan cream cheese (Miyoko’s brand works magic) and use flax eggs for a plant-based crowd. Mini cupcakes become adorable “mouse heads” with sliced almond ears. Or go full gothic with a spiderweb design—pipe white frosting in spirals, then drag a toothpick outward. Last year, I turned the cake into a “graveyard” with cookie tombstones—complete with Oreo “dirt” crumbs. Whatever you choose, remember: in Halloween baking, weirder is always better!
Serving and Storing Your Halloween Desserts
Here’s the good news—these treats stay fresh at room temperature for up to 2 days (just cover loosely with foil to keep dust bunnies away). Cream cheese frosting means you could refrigerate, but cold cake loses its magic—serve at room temp for maximum fudgy goodness. No reheating needed—unless you count midnight snack runs to the kitchen!
Nutritional Information
Okay, let’s be real—when you’re elbow-deep in Halloween candy and chocolate cake, nutritional info is probably the last thing on your mind (and that’s totally fine by me!). But just in case you’re curious, here’s the deal: these numbers are ballpark estimates that’ll vary based on your specific ingredients and how generously you apply that frosting (no judgment—I’ve been known to frost with a trowel). The main thing to know? This Halloween Diaries: Dessert Table is all about joy, creativity, and maybe a tiny sugar rush—nutrition labels can sit this spooky season out!
Frequently Asked Questions
Can I make this gluten-free? Absolutely! Just swap the all-purpose flour for a 1:1 gluten-free baking blend (I love Bob’s Red Mill). The texture might be slightly denser, but it’ll still taste delicious—promise! Just double-check that your candy toppings are gluten-free too.
How far in advance can I decorate the desserts? For the best results, frost and decorate your Halloween Diaries: Dessert Table treats the day of your party. But if you’re pressed for time, you can bake the cakes 1-2 days ahead—just wrap them tightly in plastic wrap. Store frosting separately in the fridge, then assemble everything 3-4 hours before serving so candies stay fresh-looking.
What’s the best way to transport these to a party? Oh boy, learned this the hard way—use a non-slip mat in your car trunk! For cakes, chill them for 30 minutes first so the frosting firms up. Cupcakes travel best in muffin tins with plastic wrap “tents” over them. Pro tip: pack extra candies in baggies for on-site touch-ups!
Can I use buttercream instead of cream cheese frosting? You sure can! The tang of cream cheese balances the chocolate’s sweetness, but classic buttercream works in a pinch. For extra Halloween flair, tint it orange or purple—just remember gel food coloring gives the boldest colors without thinning your frosting.
Share Your Halloween Diaries: Dessert Table Creations
I LIVE for seeing how you bring this Halloween Diaries: Dessert Table to life in your own kitchen! Did you turn the cake into a haunted mansion? Make vampire bite cupcakes? Go full mad scientist with test-tube candy displays? Snap those photos—I want to see all the creepy creativity! Tag me @SpookySweetsBlog or use #HalloweenDiariesDessertTable so I can ooh and aah over your creations (and maybe steal a few genius ideas for next year). Bonus points if you caught your kid sneaking candy eyeballs—those candid shots are my absolute favorite. Let’s make this a spooky social media party! Check out more Halloween ideas.
Print
Spooky Halloween Diaries Dessert Table in Just 5 Easy Steps
- Total Time: 50 minutes
- Yield: 12 servings 1x
- Diet: Vegetarian
Description
A festive dessert table setup for Halloween with sweet treats and spooky decorations.
Ingredients
- 2 cups all-purpose flour
- 1 cup sugar
- 1/2 cup cocoa powder
- 1 tsp baking soda
- 1/2 tsp salt
- 1 cup water
- 1/3 cup vegetable oil
- 1 tsp vanilla extract
- 1 tbsp vinegar
- 1 batch cream cheese frosting
- Assorted Halloween-themed candies
Instructions
- Preheat oven to 350°F (175°C).
- Mix dry ingredients in a bowl.
- Add wet ingredients and stir until smooth.
- Pour batter into prepared cake pans.
- Bake for 25-30 minutes or until a toothpick comes out clean.
- Let cakes cool before frosting.
- Decorate with Halloween-themed candies.
- Arrange desserts on a table with spooky decorations.
Notes
- Use black and orange food coloring for a Halloween theme.
- Add gummy worms or eyeball candies for extra creepiness.
- Keep desserts covered until serving to prevent drying.
- Prep Time: 20 minutes
- Cook Time: 30 minutes
- Category: Dessert
- Method: Baking
- Cuisine: American
Nutrition
- Serving Size: 1 slice
- Calories: 250
- Sugar: 20g
- Sodium: 200mg
- Fat: 10g
- Saturated Fat: 3g
- Unsaturated Fat: 6g
- Trans Fat: 0g
- Carbohydrates: 35g
- Fiber: 2g
- Protein: 3g
- Cholesterol: 5mg