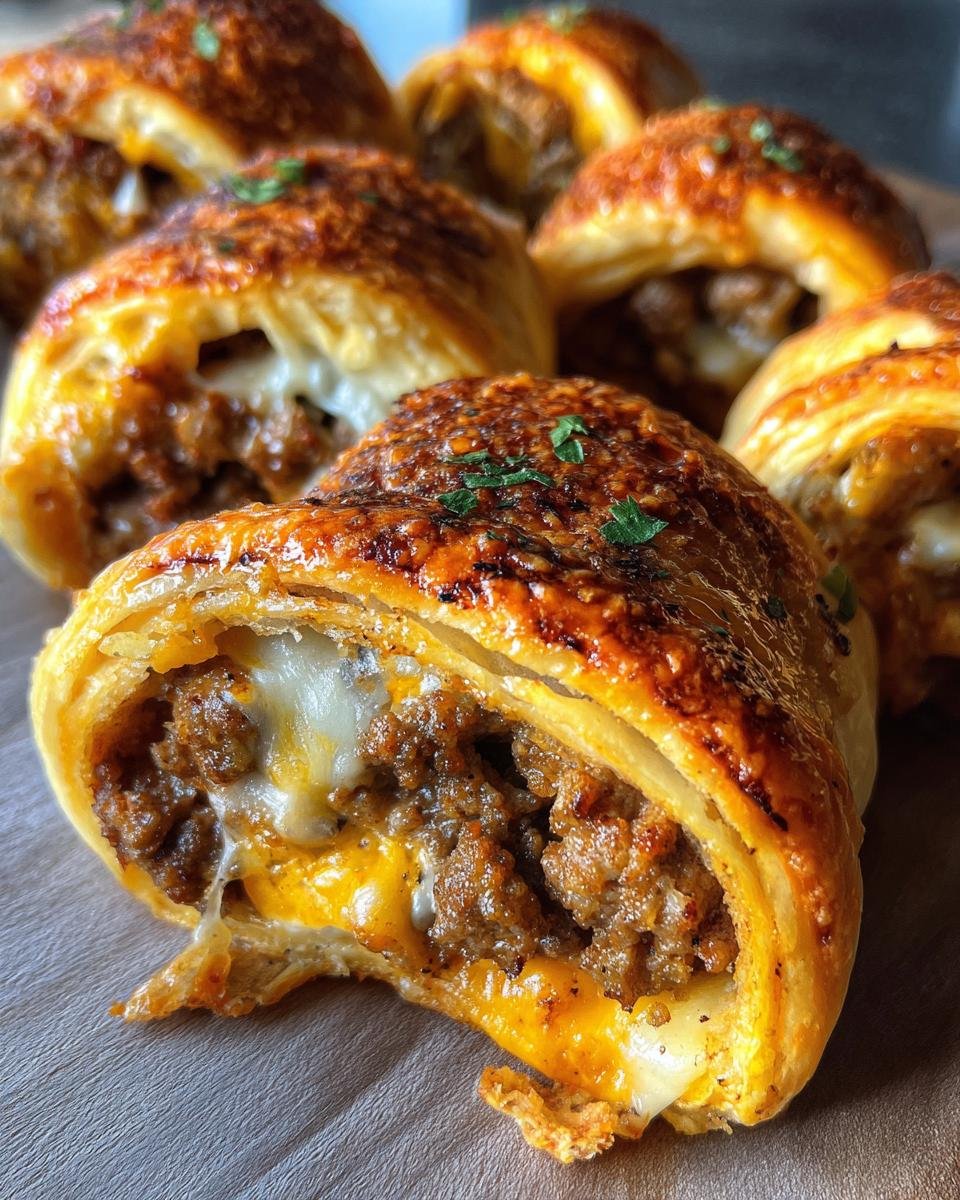
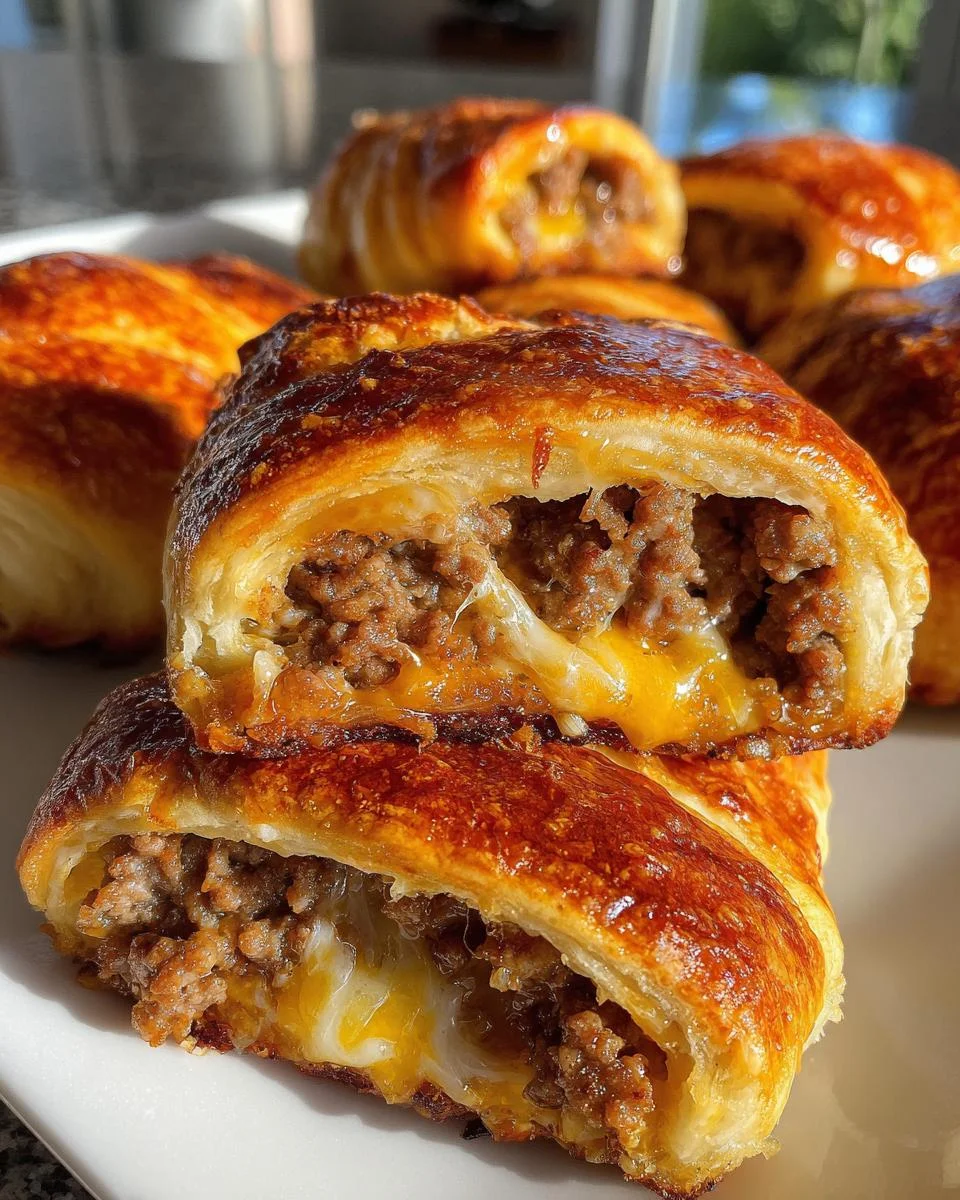
You know that moment when a cheeseburger craving hits so hard you can practically taste the melty cheese? That’s exactly where these garlic butter cheeseburger rollups were born—in my kitchen, mid-craving, with a half-empty tube of crescent dough and a serious need for flavor-packed comfort food. Imagine all the best parts of a juicy cheeseburger—savory beef, caramelized onions, that irresistible garlic butter sizzle—rolled up into golden, flaky pockets of pure bliss. The magic happens when that cheddar starts oozing out after just one bite. Trust me, these disappear faster than you can say “seconds please!”
Table of Contents
Table of Contents
Why You’ll Love These Garlic Butter Cheeseburger Rollups

Listen, these rollups aren’t just good—they’re dangerously addictive. Here’s why they’ve become my go-to for everything from game day snacks to “I forgot to meal prep” emergencies:
- Weeknight superhero: From fridge to table in 30 minutes flat. The crescent dough shortcut means no fussing with homemade pastry—just unroll, fill, and bake!
- Cheese pull perfection: That moment when you tear one open and the cheddar stretches like golden sunshine? Pure happiness. Pro tip: Use extra sharp cheddar for maximum ooze.
- Flavor bombs: Garlic butter seeps into every nook of the beef mixture, while Worcestershire sauce adds that mysterious “what makes this so good?” depth.
- Crowd pleaser magic: Kids go wild for the handheld shape, adults adore the gourmet burger taste. I’ve seen platters vanish at parties before the dip even hits the table.
- Endless variations: Swap in different cheeses, add bacon bits, or go wild with toppings—these rollups are basically a blank canvas for your cheeseburger dreams.
Seriously, once you smell that garlic butter melding with toasted crescent dough, you’ll understand why I always double the batch. Warning: May cause spontaneous recipe sharing! For more delicious ideas, check out our recent posts.
Ingredients for Garlic Butter Cheeseburger Rollups
Grab these simple ingredients—you might already have most in your kitchen! Exact measurements matter here to nail that perfect cheeseburger flavor in every bite:
- 1 lb ground beef (80/20 blend for juicy results)
- 1 tbsp garlic butter (see notes below for homemade option)
- 1 cup shredded cheddar cheese (shred it fresh—it melts better!)
- 1/2 cup diced onions (yellow or white, minced small)
- 1 tsp Worcestershire sauce (that secret umami kick)
- 1 tsp salt
- 1/2 tsp black pepper
- 1 package refrigerated crescent roll dough (the 8-count sheets work best)
Ingredient Notes & Substitutions
No stress if you need to swap things out—I’ve tested all the variations so you don’t have to:
- Ground beef alternatives: Turkey or chicken work great (drain extra fat). For vegetarians, seasoned lentils or mushrooms add awesome texture.
- Garlic butter hack: No prepared garlic butter? Melt 1 tbsp regular butter with 1 minced garlic clove—same delicious effect!
- Cheese freedom: Swap cheddar for pepper jack, gouda, or even blue cheese crumbles if you’re feeling fancy.
- Dough options: Gluten-free crescent dough works perfectly here. Puff pastry sheets can sub in a pinch (just cut into triangles first).
- Flavor boosts: A dash of smoked paprika or pickle juice in the beef mixture? Yes please!
Pro tip: If your onions are super pungent, give them a quick 1-minute sauté in the beef fat before mixing everything. Sweetens them right up!
How to Make Garlic Butter Cheeseburger Rollups
Okay, let’s get those golden, cheesy bundles of joy into the oven! Follow these steps exactly—I’ve made all the mistakes so you don’t have to:
- Heat things up: Crank your oven to 375°F (190°C). No cheating—this temp gives the dough that perfect golden crunch without burning the cheese.
- Brown that beef: In a skillet over medium-high, cook the ground beef until it’s no longer pink (about 5-6 minutes). Drain every last drop of fat—otherwise, you’ll get soggy rollups. Trust me, I learned this the hard way!
- Flavor party: Drop in the garlic butter (it should sizzle!), onions, Worcestershire sauce, salt, and pepper. Stir like you mean it for 1 minute until everything’s best friends. Let this cool slightly—hot filling makes the dough impossible to handle.
- Dough time: Unroll the crescent dough and separate the triangles. If using sheet dough, cut into 8 even triangles. See those perforations? They’re your guide to perfect portions.
- Fill ’em up: Spoon about 2 tbsp of the beef mixture onto each triangle, leaving a 1/2-inch border. Sprinkle cheese liberally—this isn’t the time to be shy!
- Roll it right: Starting at the wide end, roll each triangle tightly toward the point. Tuck the corners in as you go to keep all that cheesy goodness inside. Lightly press the tip to seal (a dab of water helps if it won’t stick).
- Bake to glory: Arrange rolls on a parchment-lined baking sheet, point-side down. Bake 12-15 minutes until they’re deep golden and the cheese starts bubbling out the sides. Oh, that smell!
Tips for Perfect Rollups
After burning, underfilling, and exploding more rollups than I care to admit, here are my golden rules:
- Seal the deal: Pinch those edges tight! Any gaps = cheese lava explosions in your oven.
- Less is more: Overstuffing leads to busted seams. Stick to 2 tbsp filling max per triangle.
- Space invaders: Give rollups 2 inches apart on the tray. They puff up like proud little pastries!
- Doneness test: The bottoms should be browned, not pale. If the tops brown too fast, tent with foil.
- Restraint: Let them cool 5 minutes before serving—that molten cheese is basically edible lava!
See those crispy, flaky layers? That’s the sound of success. Now try not to eat them all before they hit the serving plate! For more easy recipes, visit our Pinterest.
Serving Suggestions
These garlic butter cheeseburger rollups shine brightest with fun dippers—try zesty burger sauce (mayo + ketchup + relish), cool ranch dip, or spicy sriracha mayo. For a meal, pair with crispy fries or a simple garden salad. Pro tip: Serve immediately while the cheese is still gloriously gooey—that first pull-apart bite is pure magic!
Storage & Reheating
Leftovers? Ha! But if you somehow have any rollups left (miracles happen), stash them in an airtight container—they’ll keep for 3 days in the fridge. To reheat, skip the microwave (soggy sadness!) and pop them in a 350°F oven for 5-8 minutes until the crust crisps back up and that cheese gets melty again. Just like fresh from the oven!
Nutritional Information
Here’s the scoop on what’s inside these garlic butter cheeseburger rollups (per serving, based on my exact recipe): Calories: 220 • Fat: 14g • Carbs: 12g • Protein: 12g. But listen—nutrition can vary depending on your specific ingredients and brands. Maybe you went heavy on the cheese (no judgment!) or used leaner beef. These are estimates to help you enjoy guilt-free!
FAQ
Got questions? I’ve got answers! Here are the garlic butter cheeseburger rollup mysteries solved:
Can I freeze these rollups?
Absolutely! These freeze like champs. After baking and cooling, wrap them individually in foil, then stash in a freezer bag for up to 3 months. To reheat, pop them straight from freezer to 375°F oven (no thawing needed!) for 12-15 minutes. Perfect for emergency snack attacks!
What’s the best cheese substitute if I’m out of cheddar?
Oh honey, any melty cheese works! My top picks: pepper jack for spice lovers, Swiss for nuttiness, or Colby for extra creaminess. Even mozzarella gives you those Instagram-worthy cheese pulls. For dairy-free folks, Violife cheddar-style shreds melt surprisingly well—just add an extra minute under the broiler.
Help! My rollups keep bursting open!
Been there! Three quick fixes: 1) Don’t overfill (stick to 2 tbsp max), 2) Make sure your filling is cooled before rolling, and 3) Seal the edges with a fork or a dab of water. If all else fails? Call them “deconstructed cheeseburger pastries” and pretend you meant to do that!
Can I prep these ahead of time?
You bet! Assemble the rollups (unbaked) up to 24 hours ahead—just cover tightly and refrigerate. Add 2-3 extra baking minutes since they’re going in cold. The dough might not brown quite as much, but the flavor? Still amazing. Party saver!
Final Thoughts
There you have it—my foolproof garlic butter cheeseburger rollups that never fail to disappear faster than I can make them! I’d love to hear how yours turn out. Did you add any fun twists? Did your family go crazy for them like mine does? Snap a pic of that glorious cheese pull and tag me—let’s geek out over melty cheeseburger magic together!
Print
35-Minute Garlic Butter Cheeseburger Rollups with Irresistible Melted Cheese Bliss
- Total Time: 30 mins
- Yield: 8 rollups 1x
- Diet: Low Lactose
Description
Delicious garlic butter cheeseburger rollups filled with flavorful ingredients and melted cheese.
Ingredients
- 1 lb ground beef
- 1 tbsp garlic butter
- 1 cup shredded cheddar cheese
- 1/2 cup diced onions
- 1 tsp Worcestershire sauce
- 1 tsp salt
- 1/2 tsp black pepper
- 1 package refrigerated crescent roll dough
Instructions
- Preheat oven to 375°F.
- Cook ground beef in a skillet until browned. Drain excess fat.
- Add garlic butter, onions, Worcestershire sauce, salt, and pepper to the beef. Stir well.
- Roll out crescent dough and separate into triangles.
- Spoon beef mixture onto each triangle and sprinkle with cheese.
- Roll up each triangle starting from the wide end.
- Place on a baking sheet and bake for 12-15 minutes until golden brown.
Notes
- Use fresh garlic butter for best flavor.
- Add extra cheese if desired.
- Serve hot for melted cheese bliss.
- Prep Time: 15 mins
- Cook Time: 15 mins
- Category: Appetizer
- Method: Baking
- Cuisine: American
Nutrition
- Serving Size: 1 rollup
- Calories: 220
- Sugar: 1g
- Sodium: 450mg
- Fat: 14g
- Saturated Fat: 6g
- Unsaturated Fat: 5g
- Trans Fat: 0g
- Carbohydrates: 12g
- Fiber: 0g
- Protein: 12g
- Cholesterol: 40mg