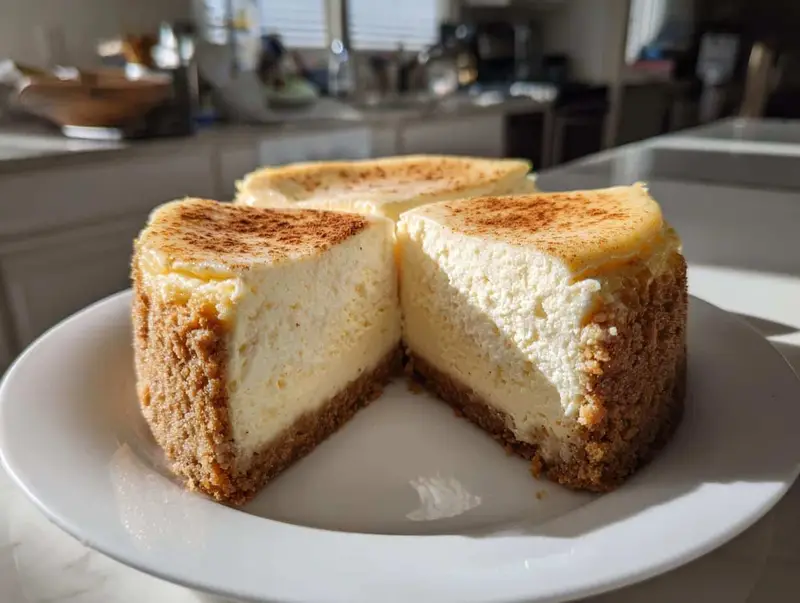
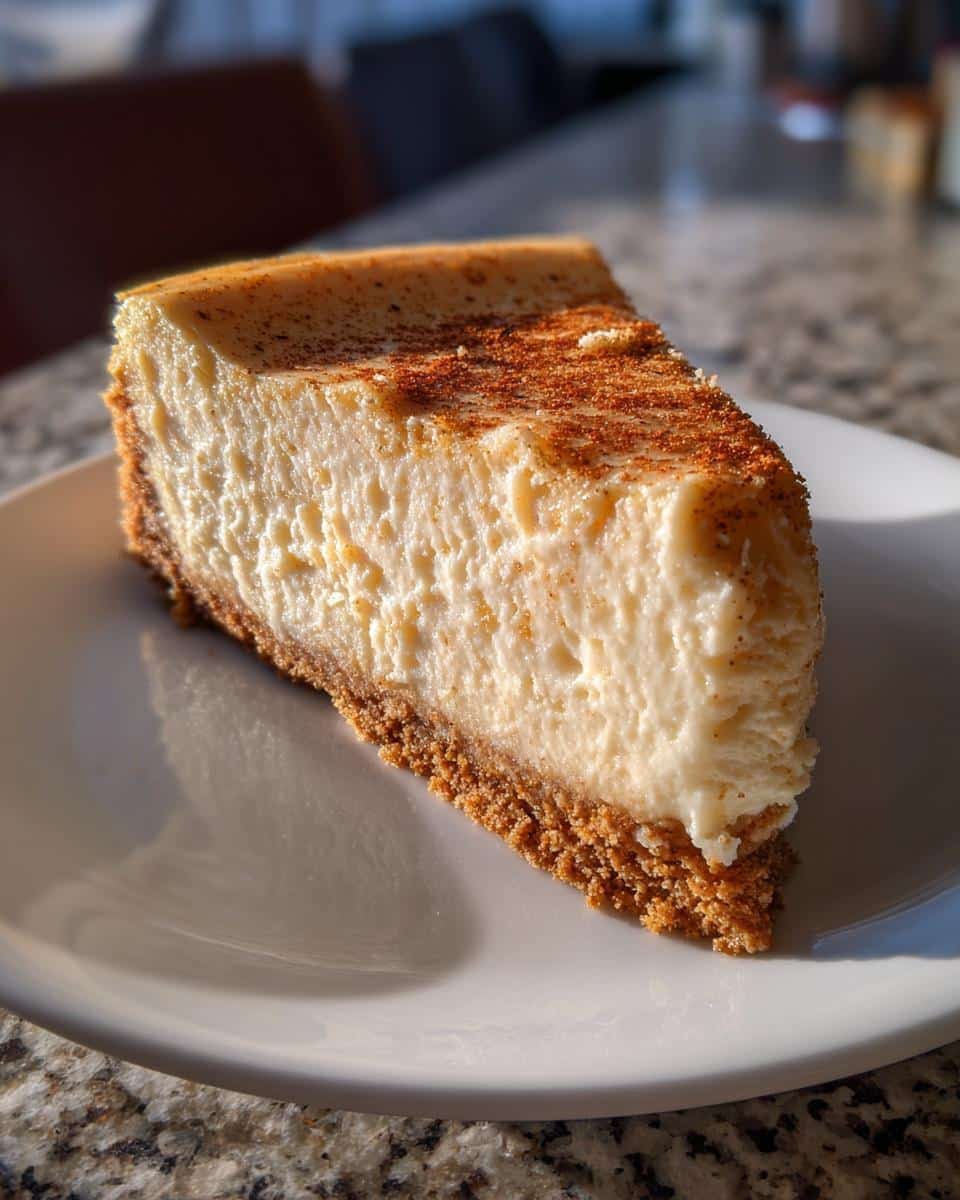
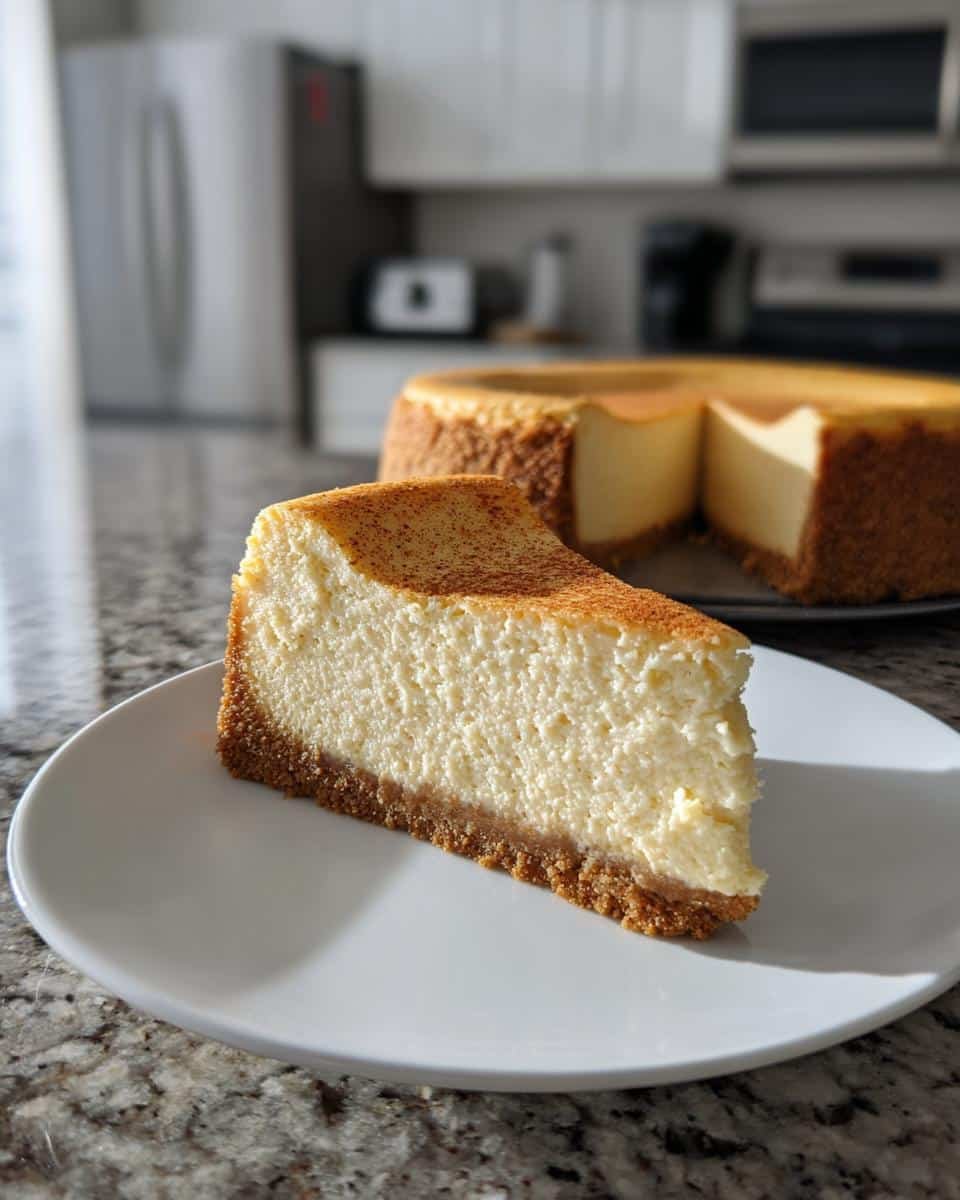
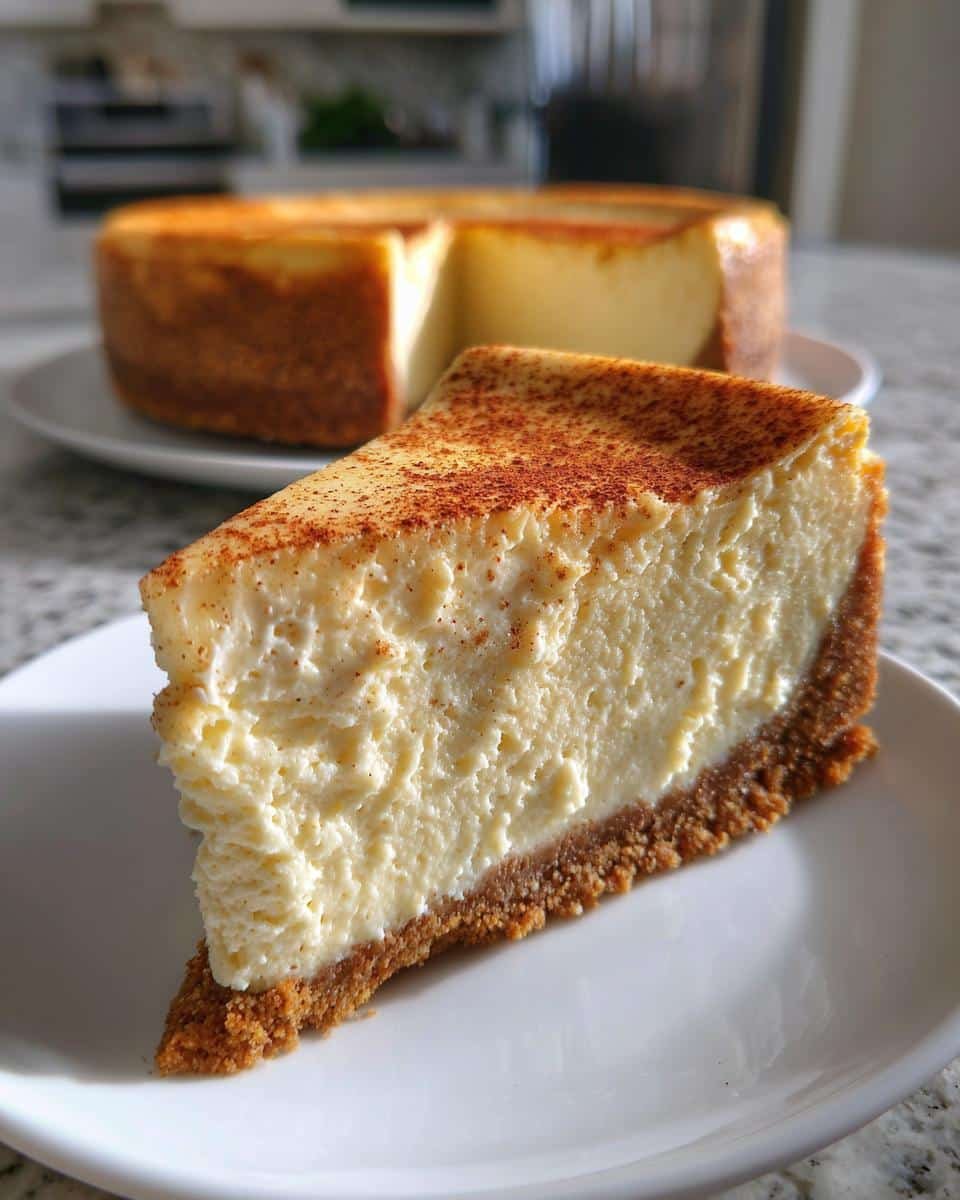
Oh my stars, do I have a treat for you! Picture this: creamy eggnog cheesecake with just the right amount of holiday spice, sitting pretty on your dessert table. I’ve been making this showstopper every Christmas since I accidentally discovered how ridiculously easy it is to turn everyone’s favorite holiday drink into a luscious cheesecake.
Now, I know what you’re thinking – cheesecakes can be intimidating. But trust me, this eggnog cheesecake recipe is foolproof. The first time I made it, my husband took one bite and declared it “Christmas in dessert form.” The secret? That velvety eggnog filling spiked with cinnamon and nutmeg, all nestled in a buttery spiced crust that’ll make your whole house smell like holiday magic.
What I love most (besides eating it, obviously) is how simple the process is. No water baths, no fancy techniques – just good ingredients and a little patience while it chills. Whether you’re a cheesecake newbie or a seasoned baker, this recipe will have you looking like a holiday dessert pro in no time!
Why You’ll Love This Eggnog Cheesecake
This isn’t just any cheesecake, my friend—it’s a holiday celebration in every bite! Here’s why it’s become my absolute must-make dessert every December:
- Creamy dreamy texture – That eggnog gives the filling the most luxurious, velvety smoothness you can imagine. It practically melts on your tongue!
- Festive flavors that sing – The warm notes of nutmeg and cinnamon make every forkful taste like Christmas morning in dessert form.
- Surprisingly simple – No water bath, no fancy techniques. If you can mix ingredients, you can make this showstopper (I promise!).
- Impresses everyone – It looks and tastes gourmet, but between you and me? It’s one of the easiest desserts on my holiday menu.
Every time I serve this, people beg for the recipe. Now you’ll be the one with the secret everyone wants to steal!
Ingredients for Eggnog Cheesecake
Now let’s gather our stars of the show! I learned the hard way that cheesecake success starts with the right ingredients prepped just so. Here’s exactly what you’ll need – and why each one matters:
- 2 cups graham cracker crumbs – Measure these packed (press them gently into your measuring cup). I crush mine fresh – just toss whole crackers in a bag and roll with a rolling pin until they’re fine as sand.
- 1/4 cup sugar – Plain white sugar does the trick for the crust. It helps the crumbs caramelize into that perfect golden base.
- 1/2 tsp ground nutmeg – Freshly grated is heavenly if you have it! This gives the crust that signature eggnog warmth.
- 1/2 cup unsalted butter, melted – I microwave it in 15-second bursts to avoid burning. The butter binds our crumbs into that perfect pressable texture.
For the dreamy filling:
- 24 oz cream cheese, softened – This is KEY! Take it out 2 hours before baking. Cold cream cheese = lumpy filling, and nobody wants that. Full-fat only – this is a holiday treat, after all!
- 1 cup sugar – Regular granulated works perfectly to balance the richness.
- 3 large eggs – Room temp is best (leave them out with the cream cheese). Crack each into a small bowl first to avoid shell surprises!
- 1 cup eggnog – Use the good stuff! I prefer rich, full-fat eggnog from the dairy section over the shelf-stable kind.
- 1 tsp vanilla extract – The better the vanilla, the better the flavor. Pure extract makes a difference here.
- 1/2 tsp ground cinnamon + 1/4 tsp ground nutmeg – These spices make the eggnog flavor *pop*. I sometimes add a pinch of cloves for extra warmth!
See? Nothing too fancy – just quality ingredients prepped with care. Now let’s turn these into magic!
Equipment You’ll Need
Before we dive in, let’s round up our baking squad! Over the years, I’ve learned that having the right tools makes all the difference with cheesecakes. Here’s what you’ll want to grab from your kitchen:
- 9-inch springform pan – The MVP of cheesecake baking! That removable ring is a game-changer for clean slices. If yours tends to leak (we’ve all been there), wrap the bottom in foil just in case.
- Electric mixer – My trusty hand mixer works great, but a stand mixer makes the job even easier. Either way, we need that creamy, lump-free texture!
- Mixing bowls – One medium for the crust, one large for the filling. I prefer glass because I can see everything mixing properly.
- Measuring cups and spoons – For cheesecake success, precision matters! My grandma taught me to spoon flour into cups and level it off – same goes for graham cracker crumbs.
- Spatula – That last bit of batter clinging to the bowl? Too precious to leave behind! A good silicone spatula gets every delicious drop.
- Wire rack – For cooling our masterpiece properly (no one wants a soggy-bottomed cheesecake!).
That’s it! No fancy gadgets needed – just these basics will help you create eggnog cheesecake magic. Now let’s get mixing!
How to Make Eggnog Cheesecake
Alright, let’s get to the fun part! I’ve made this eggnog cheesecake more times than I can count, and I’ve learned all the little tricks to make it perfect every single time. Follow these steps, and you’ll have the creamiest, most festive dessert ready to wow your guests!
Preparing the Crust
First things first – that buttery, spiced crust that makes the perfect base for our cheesecake. Here’s how we do it:
Preheat your oven to 325°F (165°C) – no guessing here, use an oven thermometer if you’re not sure! While that’s heating, grab your graham cracker crumbs, sugar, nutmeg, and melted butter. Mix them together in a bowl until all the crumbs are evenly coated and the mixture holds together when you pinch it. It should look like wet sand (you know, the good kind at the beach!).
Now, dump this into your springform pan and press it firmly into the bottom and about halfway up the sides. I use the bottom of a measuring cup to really pack it down – you want it nice and compact so it doesn’t crumble when you slice later. Pop this in the oven for exactly 10 minutes to set. When it comes out, let it cool completely on a wire rack while you make the filling. No cheating here – a warm crust plus cold filling equals potential cracks!
Making the Filling
Time for the star of the show! In your mixing bowl, beat the softened cream cheese until it’s completely smooth – about 1 minute on medium speed. Scrape down the sides (I can’t tell you how many times I’ve forgotten this step!). Add the sugar gradually and beat until fully incorporated and fluffy.
Here’s the key – add the eggs one at a time, beating just until each disappears into the mixture. Overbeating eggs is the quickest way to a cracked cheesecake, so once that yolk disappears, stop the mixer! Finally, gently mix in the eggnog, vanilla, cinnamon, and nutmeg on low speed just until combined. The batter should be silky smooth with no lumps – if you see any stubborn cream cheese bits, give it another quick mix.
Baking and Chilling
Pour that glorious filling over your cooled crust and smooth the top with a spatula. Slide it into the oven and set your timer for 50 minutes. The cheesecake is done when the edges are set but the center still jiggles slightly when you gently shake the pan – like jello, not liquid. If it’s still too wobbly at 50 minutes, give it 5 more minutes, but no more than 55 total.
Turn off the oven and crack the door open with a wooden spoon. Let the cheesecake cool there for 1 hour – this gradual cooling helps prevent cracks. Then transfer it to the counter to cool completely (about 2 hours) before covering and refrigerating for at least 4 hours, though overnight is even better. I know it’s hard to wait, but that chill time is what gives us that perfect sliceable texture!
Tips for the Perfect Eggnog Cheesecake
Alright, let me share my hard-earned secrets! After making this eggnog cheesecake more times than I can count (and learning from my mistakes), I’ve nailed down what really makes the difference between good and absolutely incredible.
Room temperature is non-negotiable – I can’t stress this enough! Take your cream cheese and eggs out at least 2 hours before you start. Cold cream cheese will never get perfectly smooth, no matter how long you mix. I usually set everything on the counter first thing in the morning if I’m baking that afternoon. If you’re in a pinch, you can microwave the cream cheese (in its wrapper!) for 10-15 seconds, but room temp is always best.
Don’t peek while baking! I know it’s tempting to open that oven door to check progress, but resist the urge! Sudden temperature changes are the number one cause of cracks. Trust your timer and trust that jiggle test I mentioned earlier. The cheesecake will continue to set as it cools, so that slightly wobbly center at 50 minutes is exactly what you want.
Patience with chilling pays off – I know, I know – waiting is the hardest part! But that overnight chill in the fridge is what gives you those clean, beautiful slices that hold their shape. The flavors also meld and deepen spectacularly. If I’m making this for a party, I always bake it the day before. When you just can’t wait, 4 hours is the absolute minimum, but trust me – overnight is magic.
Mix gently, scrape often – Overmixing introduces too much air, which can cause cracking, and undermixing leaves lumps. I mix on medium-low speed and stop as soon as everything is incorporated. And scrape that bowl down at least twice – there’s always stubborn cream cheese hiding at the bottom that needs to join the party!
Follow these simple tips, and you’ll have the most spectacular, crack-free, creamy eggnog cheesecake that’ll have everyone asking for your recipe!
Serving Suggestions
Oh, the fun part – dressing up our gorgeous eggnog cheesecake! Now that you’ve waited patiently (okay, maybe impatiently) for it to chill, let’s make it look as spectacular as it tastes. Here are my favorite ways to serve this holiday showstopper:
Whipped cream clouds – I pipe little rosettes around the edge using my star tip, then dust them with freshly grated nutmeg. For extra decadence, I’ll whip a tablespoon of eggnog into my heavy cream before sweetening it – it’s like the cheesecake’s flavor echo!
The snow globe effect – A light dusting of powdered sugar makes it look like a winter wonderland. I use a fine mesh strainer and gently tap it while moving in circles over the top. Bonus points if you stencil on a cute holiday shape first!
Caramel drizzle drama – When I really want to impress, I warm up some caramel sauce (the kind that pours like liquid gold) and zigzag it over the top. The way it pools against those creamy white slices? Absolute dessert perfection.
Beverage pairings – A cup of strong coffee cuts through the richness beautifully, but my family goes wild when I serve it with spiked hot chocolate. The adults get a splash of bourbon in theirs, and suddenly I’m everyone’s favorite holiday hostess!
Pro tip: Run your knife under hot water between slices for those picture-perfect clean cuts. And don’t be afraid to get creative – last year I added edible gold stars for New Year’s Eve, and they looked magical against the creamy backdrop. However you serve it, just be prepared for the chorus of “oohs” and “aahs” that’ll follow!
Storage and Reheating
Okay, real talk – this eggnog cheesecake disappears so fast at my house that storage is rarely an issue! But just in case you have leftovers (lucky you), here’s how to keep it tasting fresh:
Fridge is your friend – Once completely cooled, cover the cheesecake tightly with plastic wrap or store it in an airtight container. It’ll stay perfect for up to 5 days in the refrigerator. I like to press the plastic wrap directly onto the surface to prevent any fridge smells from sneaking in. The flavor actually gets better after a day or two as the spices really settle in!
Freezing? Not so much – I know freezing seems tempting, but cheesecake just isn’t the same after thawing. The texture changes, and you lose that incredible creaminess we worked so hard for. Trust me, I learned this the hard way after a freezer experiment last year – it was edible but just… sad. Better to share with neighbors or enjoy it fresh!
Serving chilled leftovers – No need to reheat – this beauty is meant to be enjoyed cold straight from the fridge. If you want to fancy up day-old slices, a quick dollop of fresh whipped cream and a sprinkle of cinnamon makes it feel brand new again!
Pro tip: If you’re making this ahead for a party, I’ve found the sweet spot is baking it 1-2 days before. Any longer and the crust starts to lose its perfect crispness. But really, with a dessert this delicious, longevity is never a problem in my house – it’s usually gone by Christmas morning!
Eggnog Cheesecake Variations
Now that you’ve mastered the classic version, let’s have some fun with twists! Over the years, I’ve played around with this recipe more times than I can count – here are my favorite ways to mix it up when I’m feeling adventurous:
Boozy upgrade: For an adults-only version, swap out 1 teaspoon of the vanilla for rum extract or add 2 tablespoons of actual rum to the filling. My brother-in-law insists this is the only way to make it “proper holiday dessert” – just don’t tell the kids!
Crust makeover: Tired of graham crackers? Try gingersnaps! The spicy snap plays beautifully with the eggnog flavors. I use the same 2-crumb measurement but reduce the added sugar since gingersnaps are sweeter. Pro tip: Add a pinch of cloves to the crust for extra warmth.
White chocolate wonder: Melt 4 ounces of white chocolate and let it cool slightly before mixing into the filling. It makes the cheesecake even creamier (if that’s possible!) and adds subtle vanilla notes. Top with chocolate shavings for a gorgeous snowflake effect.
The beauty of this recipe is how flexible it is – once you’ve got the basic technique down, the flavor possibilities are endless. Just promise me one thing: no matter what variation you try, don’t skip that glorious eggnog in the filling. That’s where the magic lives!
Nutritional Information
Alright, let’s talk numbers – but don’t let this scare you off! This eggnog cheesecake is absolutely worth every delicious bite. Here’s the breakdown per generous slice (because let’s be real, who’s taking small slices of cheesecake?):
- Calories: About 380 – remember, this is a special occasion treat!
- Fat: 24g (14g saturated) – that’s where all that creamy richness comes from
- Carbohydrates: 36g – mostly from the crust and that luscious eggnog
- Protein: 6g – thanks to all those eggs and cream cheese doing double duty
- Sugar: 28g – it’s dessert, after all!
Now, here’s my kitchen confession – these numbers can vary quite a bit depending on the brands you use. Full-fat eggnog versus light, name-brand cream cheese versus store brand, how thick you slice it… you get the idea. I’ve found that homemade eggnog can add anywhere from 50-100 extra calories per serving depending on how rich you make it!
My philosophy? This is holiday magic we’re talking about – enjoy every bite guilt-free. Maybe just balance it out with an extra walk around the neighborhood to look at Christmas lights afterward!
Frequently Asked Questions
Over the years, I’ve gotten so many questions about this eggnog cheesecake recipe (and made plenty of mistakes myself!). Here are the answers to the most common ones—because I want yours to turn out perfect the first time!
Can I use low-fat cream cheese?
Oh honey, I wouldn’t recommend it. Full-fat cream cheese gives that rich, creamy texture we all love. Low-fat versions can make the filling watery and affect how it sets. Trust me, it’s worth the indulgence—this is a holiday treat, after all!
How do I prevent cracks in my cheesecake?
The number one rule? Don’t overbake! That slightly jiggly center at 50 minutes is exactly what you want. Also, avoid overmixing the batter—too much air can cause cracks. And that gradual cooling in the oven? Non-negotiable. Follow these tips, and you’ll have a smooth, crack-free cheesecake every time.
Can I use store-bought eggnog?
Absolutely! I actually prefer the rich, full-fat eggnog from the dairy section. Just make sure it’s good quality—this is the star flavor of the cheesecake, after all. Avoid the shelf-stable kind if you can; it tends to be thinner and less flavorful.
Can I make this ahead of time?
Yes, and I highly recommend it! The flavors actually deepen after a day in the fridge. Bake it the night before your event, let it chill overnight, and you’ll have one less thing to worry about. Just keep it covered tightly in the fridge until you’re ready to serve.
Why did my cheesecake sink in the middle?
This usually happens if it’s underbaked or cooled too quickly. Make sure it’s set around the edges but still slightly jiggly in the center before pulling it out of the oven. And that gradual cooling step? It’s your secret weapon against sinking (and cracks!).
Still have questions? Don’t hesitate to ask—I’ve been there, done that, and I’m happy to help you avoid my early cheesecake disasters!
Share Your Thoughts
You’ve baked it, you’ve tasted it – now I’d love to hear all about your eggnog cheesecake adventure! Did your family go crazy for it like mine does? Did you add any special twists that turned out amazing? Leave me a comment below – I read every single one (usually while eating leftover cheesecake!).
If you snapped a photo of your gorgeous creation, I’d be absolutely thrilled if you shared it! Tag me on Instagram or Facebook so I can see your masterpiece. There’s nothing I love more than seeing your holiday dessert tables filled with this creamy dream.
And hey – if you loved this recipe as much as we do, would you do me a huge favor? Give it a 5-star rating! It helps other holiday bakers find this little slice of Christmas magic. Plus, it makes my day knowing I’ve helped create someone’s new family tradition.
Happy baking, my friend! May your cheesecake be crack-free, your eggnog plentiful, and your holiday season filled with delicious moments.
For more delicious recipes and inspiration, check out our Pinterest page!
Print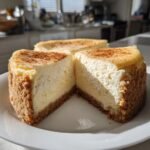
Irresistible Eggnog Cheesecake Recipe That Wins Christmas
- Total Time: 1 hour 15 minutes (plus chilling)
- Yield: 12 servings 1x
- Diet: Vegetarian
Description
A creamy and festive eggnog cheesecake with a spiced crust and smooth filling.
Ingredients
- 2 cups graham cracker crumbs
- 1/4 cup sugar
- 1/2 tsp ground nutmeg
- 1/2 cup unsalted butter, melted
- 24 oz cream cheese, softened
- 1 cup sugar
- 3 large eggs
- 1 cup eggnog
- 1 tsp vanilla extract
- 1/2 tsp ground cinnamon
- 1/4 tsp ground nutmeg
Instructions
- Preheat oven to 325°F (165°C).
- Mix graham cracker crumbs, sugar, nutmeg, and melted butter. Press into a 9-inch springform pan.
- Bake crust for 10 minutes. Let it cool.
- Beat cream cheese and sugar until smooth. Add eggs one at a time.
- Mix in eggnog, vanilla, cinnamon, and nutmeg. Pour over crust.
- Bake for 50-55 minutes until set. Cool completely before refrigerating for 4 hours.
Notes
- Use full-fat cream cheese for best texture.
- Chill overnight for firmer slices.
- Top with whipped cream and a sprinkle of nutmeg before serving.
- Prep Time: 20 minutes
- Cook Time: 55 minutes
- Category: Dessert
- Method: Baking
- Cuisine: American
Nutrition
- Serving Size: 1 slice
- Calories: 380
- Sugar: 28g
- Sodium: 280mg
- Fat: 24g
- Saturated Fat: 14g
- Unsaturated Fat: 8g
- Trans Fat: 0g
- Carbohydrates: 36g
- Fiber: 0.5g
- Protein: 6g
- Cholesterol: 120mg