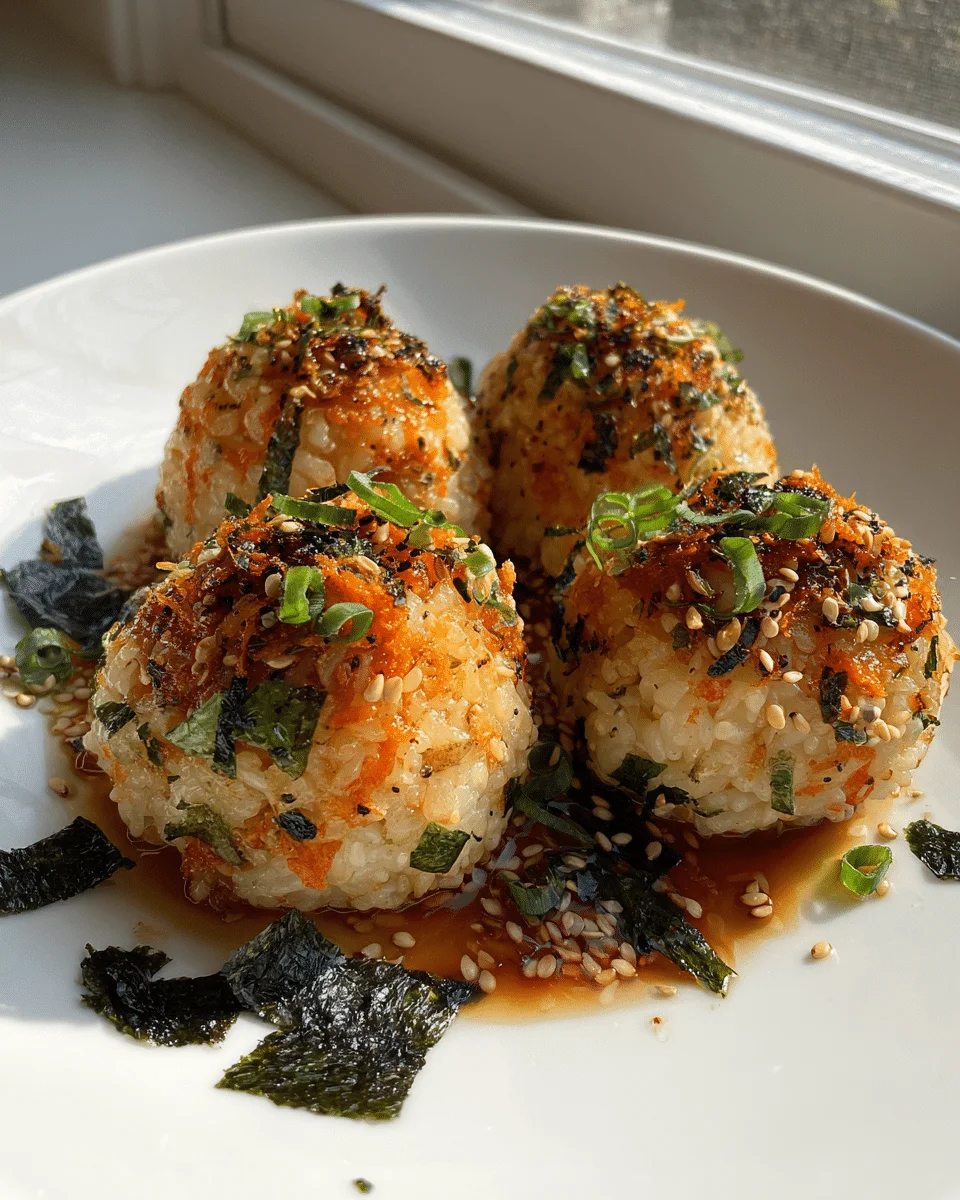
Korean rice balls – flavorful & easy – are my go-to snack when I need something delicious in a hurry. I first fell in love with these little flavor bombs during a trip to Seoul, where street vendors would shape them with lightning speed while customers waited impatiently (me included). What makes them so magical is how something so simple – just seasoned rice and a few mix-ins – can be so satisfying. They’re perfect for rushed mornings, lazy lunches, or when those mid-afternoon hunger pangs hit. The best part? You probably have all the ingredients in your kitchen right now.
Why You’ll Love These Korean Rice Balls
Let me tell you why these little flavor-packed bundles became my kitchen obsession. First off, they’re ridiculously quick – we’re talking 10 minutes from bowl to belly. I’ve made these Korean rice balls bleary-eyed before work and they still came out perfect every time.
The magic happens when that nutty sesame oil hits warm rice – suddenly you’ve got this savory, slightly sweet umami bomb that makes your taste buds dance. My kids go crazy for them (and that’s saying something!). They’re equally awesome packed in lunchboxes or tossed in a picnic basket.
Here’s what makes them truly special:
- Speed demon: Faster than ordering takeout
- Flavor fireworks: Soy sauce + sesame = pure magic
- Shape-shifter: Add kimchi one day, tuna the next
- No-fuss: Messy hands? That’s half the fun
Last week I threw in some leftover bulgogi and my husband declared it his new favorite snack. That’s the beauty of Korean rice balls – they’re basically edible blank canvases waiting for your creative touch!
Ingredients for Korean Rice Balls
Okay, let’s gather our flavor arsenal! Here’s the beautiful thing about Korean rice balls – the ingredient list is short, but every single one packs a punch. I’ve learned through many happy (and a few messy) trials that quality matters here. Don’t skimp on the sesame oil – trust me on this!
- 2 cups cooked short-grain rice – MUST be fresh and slightly warm (leftover rice just won’t stick together right)
- 1 tbsp sesame oil – Go for the toasted kind – that deep, nutty flavor makes all the difference
- 1 tbsp soy sauce – I use low-sodium so I can control the saltiness (but regular works too)
- 1 tsp sugar – Just a touch to balance the flavors – you can add more if you like it sweeter
- 1/2 tsp salt – Start with this and adjust after mixing
- 1 tbsp toasted sesame seeds – These little guys add the best crunch!
- 1/4 cup chopped green onions – Finely diced so they distribute evenly
- 1/4 cup shredded carrots (optional) – My kids love the color pop
- 1 sheet roasted seaweed – Either crumbled into the mix or cut into strips for wrapping
See? Nothing fancy, but when these simple ingredients come together… wow. I always keep these staples on hand because you never know when a rice ball craving will strike! Pro tip: if your sesame seeds aren’t already toasted, just toss them in a dry pan for 30 seconds – it wakes up their flavor like magic.
How to Make Korean Rice Balls – Step by Step
Alright, let’s turn that bowl of ingredients into perfect little flavor-packed Korean rice balls! I’ve made these so many times I could probably do it in my sleep, but I’ll walk you through each step carefully. The key here is working while the rice is still warm – it makes all the difference in getting that perfect sticky texture.
Step 1: Season the Rice
Grab your bowl of warm rice (seriously, not piping hot but definitely not cold) and drizzle in that glorious sesame oil. Use those clean hands of yours to gently mix it in – you’ll smell that nutty aroma immediately! Now add the soy sauce, sugar, and salt. This is where the magic starts – mix until every grain is evenly coated. I like to taste at this point and adjust the seasoning if needed. The rice should be slightly sticky and hold together when pressed.
Step 2: Add Mix-Ins
Time for the fun part! Sprinkle in your sesame seeds, green onions, carrots (if using), and crumbled seaweed. Here’s my secret: use a folding motion with a rice paddle or spatula to incorporate everything. You want to be gentle – no vigorous stirring that’ll turn your rice to mush! The goal is to distribute all those goodies evenly while keeping the rice grains intact. I usually do about 15-20 folds total.
Step 3: Shape the Balls
This is where things might get a little messy (in the best way possible). Fill a small bowl with water to keep nearby – you’ll need to dip your hands frequently. Take about 2 tablespoons of the mixture and gently press it between your palms to form a golf-ball sized sphere. Don’t squeeze too hard! If it’s not holding together, your rice might need a bit more moisture – just sprinkle with a few drops of water. Pro tip: slightly damp palms help create perfectly smooth rice balls without sticking.
Step 4: Serve or Customize
Now for the finishing touches! You can enjoy your Korean rice balls just like this, or get creative. Sometimes I wrap them in strips of roasted seaweed for that classic look (and extra umami punch). For parties, I’ll make a platter with different versions – some plain, some wrapped, some rolled in extra sesame seeds. They’re delicious warm or at room temperature, making them perfect for packed lunches too. My kids love when I surprise them with different fillings – a tiny cube of cheese in the center, or maybe a bit of spicy tuna!
Expert Tips for Perfect Korean Rice Balls
After making hundreds (okay, maybe thousands) of these Korean rice balls, I’ve picked up some tricks that take them from good to “oh-my-goodness-where-have-these-been-all-my-life” amazing. Trust me, these little nuggets of wisdom will save you from the sticky situations I’ve been in!
Rice matters most: I learned this the hard way – leftover rice just won’t cut it for rice balls. That fresh, slightly warm short-grain rice is your best friend here. It’s stickier and more pliable, which means your balls (snicker) will hold their shape beautifully. Cold rice? Forget about it – you’ll end up with sad, crumbly mess.
Season to taste: Here’s my golden rule – always mix the seasoning into the rice first, then taste before adding your mix-ins. I start with the measurements in the recipe, but depending on your soy sauce brand or how salty your seaweed is, you might need more sugar or a splash more sesame oil. Don’t be shy – dip a spoon in and adjust until it makes your taste buds sing!
Keep those hands wet: This is my #1 shaping secret. I keep a bowl of cool water right next to my work station and dip my hands every 2-3 rice balls. The water creates a thin barrier so the rice doesn’t stick to your palms. Just shake off the excess – you want damp hands, not dripping wet ones. Bonus tip: If your rice starts sticking midway through shaping, just rewet your hands and smooth the surface again.
One more thing – if your rice balls keep falling apart, don’t panic! Usually it means either your rice wasn’t warm enough when you started, or you need to press a bit firmer when shaping. I like to cup the rice in one hand and use the other to gently compress it, rotating as I go. After a few tries, you’ll find your rhythm and they’ll come out perfectly round every time.
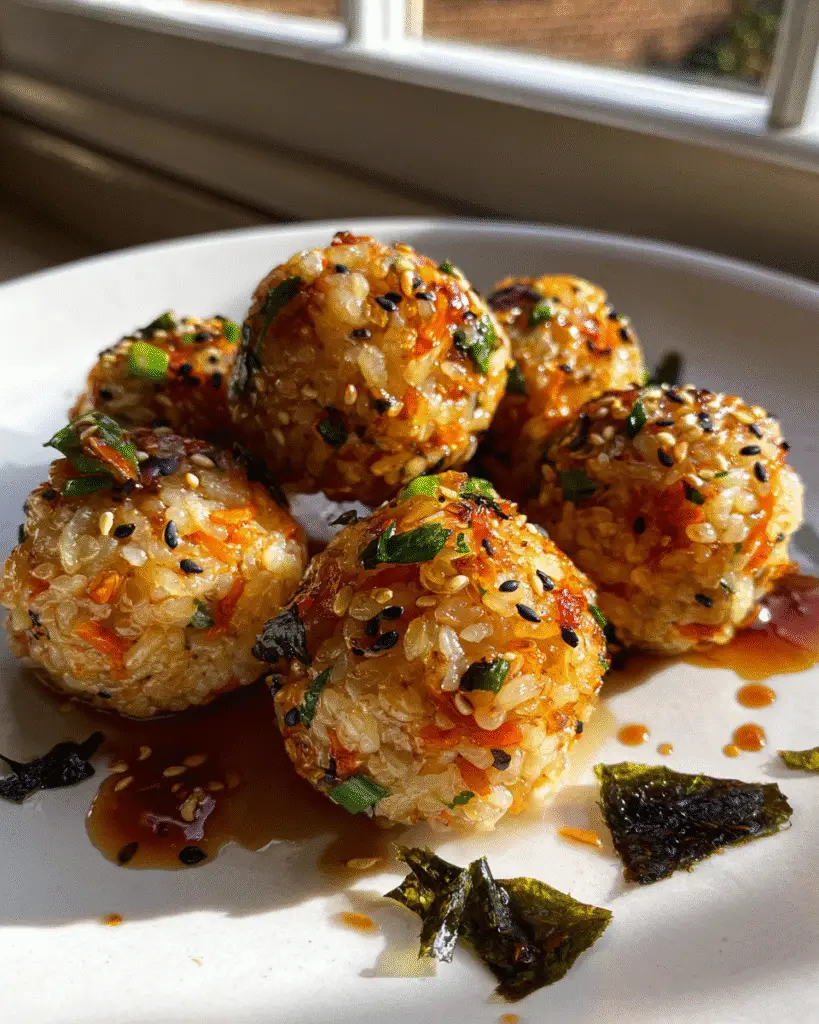
Flavor Variations & Add-Ins
Oh, this is where the real fun begins! Once you’ve mastered the basic Korean rice balls, it’s time to play mad scientist with flavors. I can’t tell you how many happy accidents I’ve had tossing in random leftovers from my fridge – some became instant hits (kimchi!), while others… well, let’s just say my dog got an unexpected treat that day.
For spice lovers: Stir in 1 teaspoon of gochujang (that addictively spicy-sweet Korean chili paste) for a kick that’ll wake up your taste buds. My husband adds this plus a squeeze of honey for his perfect “fire and honey” combo. If you’re feeling extra bold, dice up some pickled jalapeños too!
Protein power-ups:
- Tiny cubes of ham (my kids’ favorite)
- Flaked canned tuna mixed with a bit of mayo
- Leftover bulgogi or galbi meat chopped small
- Cooked shrimp or imitation crab for seafood lovers
Pro tip: If adding wet ingredients like tuna, pat them dry first so your rice doesn’t get soggy.
Veggie-loaded versions: I love sneaking in extra greens whenever possible. Try:
- Blanched spinach squeezed dry
- Finely diced cucumber (pat dry!)
- Shredded zucchini – salt it first to remove moisture
- Thin strips of bell pepper for crunch
My vegetarian friends go crazy when I add pan-fried tofu cubes marinated in soy and garlic.
The best part? You can mix and match these to create your signature rice ball. Last week I did spicy tuna with cucumber, and it was life-changing. The week before, ham and cheese (because sometimes you just need that comfort). Really, the only limit is your imagination – and maybe how clean your fridge is!
Serving and Storing Korean Rice Balls
Now that you’ve made these irresistible Korean rice balls, let me tell you how to keep them tasting their best. I’ve learned through many hungry experiments (and a few sad, dried-out rice balls) exactly how to handle these little gems.
Serve them fresh: Nothing beats Korean rice balls straight from your hands to your mouth – that’s when the texture is absolute perfection. The rice is still pleasantly warm, the seaweed crisp (if you used it), and all those flavors are singing together in harmony. I love arranging them on a wooden board with small dishes of extra sesame seeds or gochujang for dipping.
Storage smarts: If you miraculously have leftovers (doesn’t happen often in my house!), pop them in an airtight container with a slightly damp paper towel on top. This keeps them from drying out in the fridge. They’ll stay good for about 2 days, though the texture starts changing after the first day. Pro tip: Store any seaweed wraps separately so they stay crispy!
Reviving leftovers: Here’s my trick for bringing day-old rice balls back to life – microwave them for 15-20 seconds with a new damp paper towel covering them. The steam softens the rice beautifully without making it mushy. If the seaweed got soggy, just peel it off and wrap with fresh strips before serving.
One more thing – these make amazing packed lunches! Just wrap each rice ball individually in plastic wrap or parchment paper. By lunchtime, they’ll be at perfect room temperature. My kids love finding these in their lunchboxes instead of boring old sandwiches!
Korean Rice Balls – Nutritional Information
Let’s talk numbers – but don’t worry, these Korean rice balls are as kind to your waistline as they are to your taste buds! Now, full disclosure: these are estimates based on the basic recipe (your add-ins might change things). But here’s the beautiful breakdown per single rice ball – because let’s be real, who stops at just one?
Calories: Around 80 per ball – making two or three a perfectly reasonable snack (or four if you’re like me after a long day). The good news? Most of these calories come from that satisfying short-grain rice that keeps you full longer.
Carbs: 14g – but before you panic, remember these are the good complex carbs that give you steady energy. No sugar crashes here!
Protein: 2g – not bad for a plant-based snack! Add some tuna or chicken and you can easily double this.
Fat: Just 2g – and it’s mostly that heart-healthy unsaturated fat from the sesame oil. My nutritionist friend actually cheers when she sees me eating these!
Here’s what makes me really happy about these numbers – compared to most grab-and-go snacks, these rice balls deliver way more satisfaction per calorie. No weird processed ingredients, no sugar spikes – just real, wholesome food that happens to taste incredible. And when you factor in all those beneficial nutrients from sesame seeds and seaweed? That’s what I call a win-win snack!
Frequently Asked Questions
I’ve gotten so many great questions about these Korean rice balls over the years – here are the ones that pop up most often. Trust me, I’ve made every mistake possible so you don’t have to!
Can I use brown rice?
Oh boy, I tried this once thinking I’d make them “healthier” – big mistake! Brown rice just doesn’t have the same sticky starch content as short-grain white rice. Your balls will crumble faster than my resolve at a bakery. If you’re really set on whole grains, try mixing half brown and half white rice – the white rice will help hold everything together. But for your first few attempts? Stick with traditional short-grain!
How do I prevent rice balls from falling apart?
This was my biggest struggle when I first started making these! Two things are absolutely crucial: warm rice and wet hands. The warmth activates the rice’s natural stickiness, and the water creates a non-stick surface on your palms. If they’re still falling apart, try pressing firmer when shaping – cup the rice firmly (but don’t squeeze!) while rotating to compact it evenly. Still having trouble? Add a tiny bit more sesame oil – it acts like edible glue!
Are these gluten-free?
Almost! The main culprit is the soy sauce – most contain wheat. But here’s an easy fix: swap regular soy sauce for tamari (it’s gluten-free and tastes almost identical). I did this for my gluten-sensitive friend and she couldn’t tell the difference! Just check your seaweed packaging too – some brands add wheat-based seasonings. Stick to plain roasted seaweed sheets and you’re golden.
Share Your Creation!
Nothing makes me happier than seeing how you put your own spin on these Korean rice balls! My Instagram feed is basically a gallery of rice ball masterpieces from friends who’ve tried this recipe – from rainbow veggie versions to spicy tuna explosions that make my mouth water just thinking about them.
Last month, one reader sent me a photo of heart-shaped rice balls she made for her daughter’s lunchbox – complete with tiny seaweed faces! Another creative soul molded theirs into dinosaur shapes (I’m still trying to figure out how they did that so perfectly). Every time someone tags me in their kitchen adventures, it feels like we’re all cooking together across the miles.
So if you whip up a batch – whether it’s your first try or your hundredth – I’d be thrilled to see what delicious magic you create. Maybe you’ll invent the next great flavor combo that we’ll all be copying! Don’t be shy – your unique twist might just inspire someone else to discover the joy of Korean rice balls. You can find more inspiration on Pinterest.
Print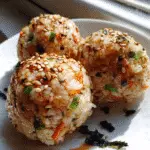
10-Minute Korean Rice Balls – Irresistibly Tasty & Easy
- Total Time: 10 mins
- Yield: 8 rice balls 1x
- Diet: Vegetarian
Description
Korean rice balls are a simple and delicious snack. They are easy to make and packed with flavor.
Ingredients
- 2 cups cooked short-grain rice
- 1 tbsp sesame oil
- 1 tbsp soy sauce
- 1 tsp sugar
- 1/2 tsp salt
- 1 tbsp toasted sesame seeds
- 1/4 cup chopped green onions
- 1/4 cup shredded carrots
- 1 sheet roasted seaweed, crumbled
Instructions
- Mix rice with sesame oil, soy sauce, sugar, and salt in a bowl.
- Add sesame seeds, green onions, carrots, and crumbled seaweed.
- Stir well until all ingredients are combined.
- Wet your hands to prevent sticking and shape the mixture into small balls.
- Serve immediately or wrap in seaweed strips for extra flavor.
Notes
- Use freshly cooked rice for best texture.
- Adjust seasoning to taste.
- Add cooked meat or kimchi for variation.
- Prep Time: 10 mins
- Cook Time: 0 mins
- Category: Snack
- Method: No-Cook
- Cuisine: Korean
Nutrition
- Serving Size: 1 rice ball
- Calories: 80
- Sugar: 1g
- Sodium: 150mg
- Fat: 2g
- Saturated Fat: 0.3g
- Unsaturated Fat: 1.5g
- Trans Fat: 0g
- Carbohydrates: 14g
- Fiber: 1g
- Protein: 2g
- Cholesterol: 0mg