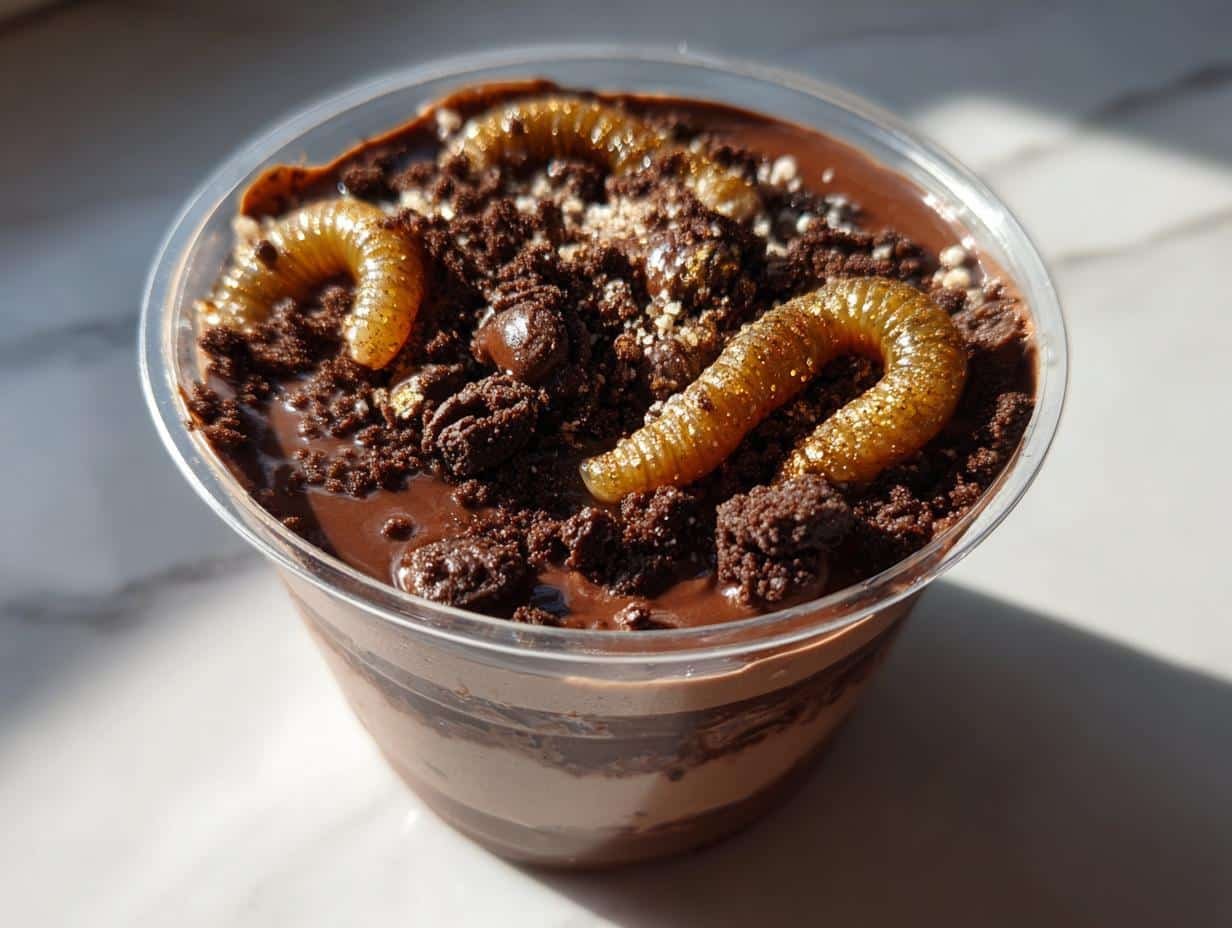
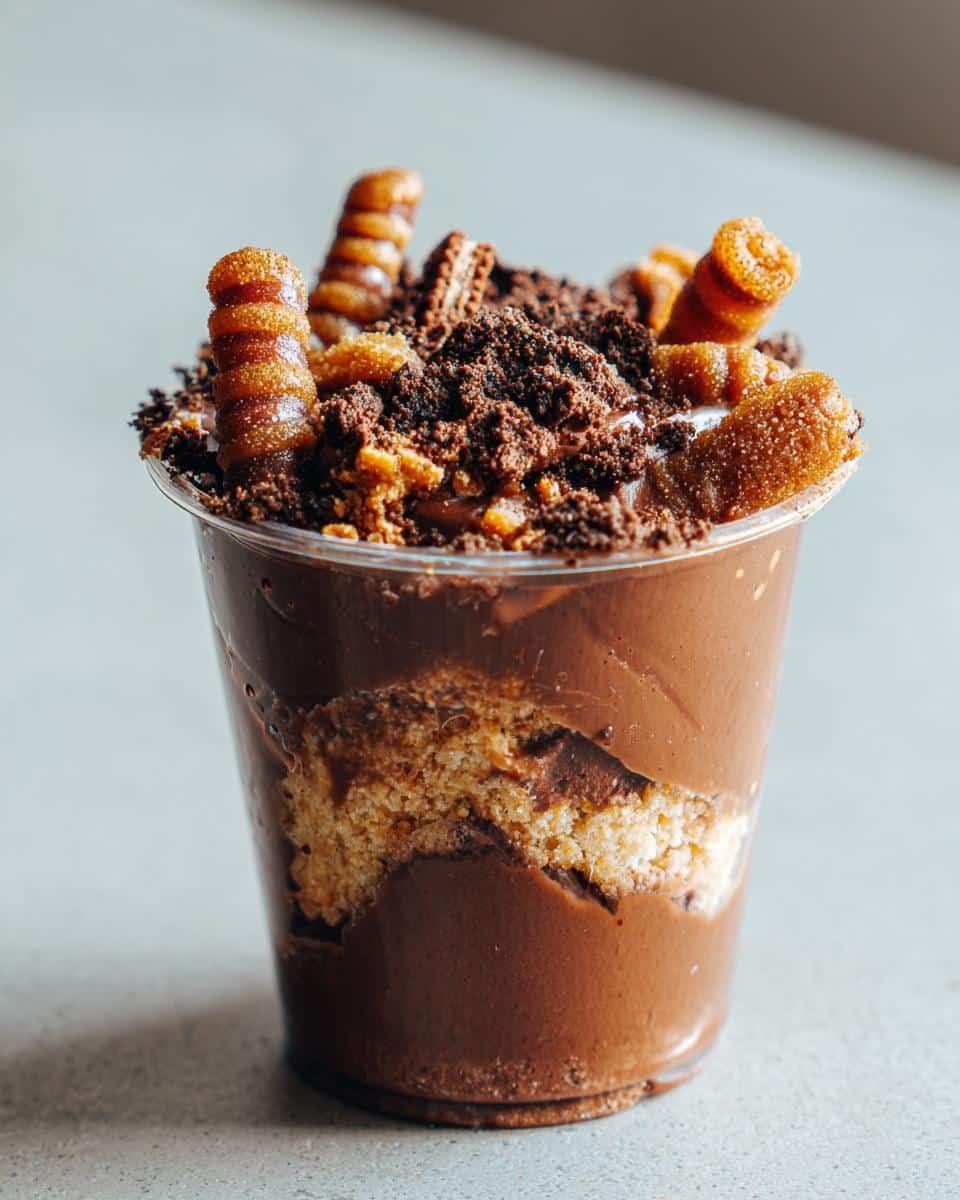
Oh, you’re in for a treat! Dirt pudding cups with gummy worms are the ultimate messy-fun dessert that brings out the kid in everyone. I still remember the first time I made these with my niece—her eyes lit up when she saw those wiggly worms peeking out of the “dirt.” It’s magic in a cup, I tell you!
This no-bake wonder takes me straight back to childhood birthday parties and Halloween bashes. The best part? You can whip it up in minutes with just a few simple ingredients. Chocolate pudding, crushed cookies, and those irresistible gummy worms create the perfect edible playground. Trust me, whether you’re serving kids or just young-at-heart adults, these dirt pudding cups always disappear faster than you can say “more worms, please!”
Table of Contents
Table of Contents
Why You’ll Love This Dirt Pudding Recipe
Oh, where do I even start? This dirt pudding recipe is my go-to when I need something quick, delicious, and guaranteed to get smiles. It’s one of those magical desserts that’s impossible to mess up – and let me tell you, in my kitchen, that’s saying something!
Quick and Simple
You know those days when you need a fun dessert NOW? This is your lifesaver. Ten minutes of mixing (no baking!), an hour in the fridge, and boom – you’ve got edible magic. The hardest part? Waiting for it to chill while the kids (or let’s be honest, you) stare longingly at the fridge.
Perfect for Parties
I’ve lost count of how many birthday parties I’ve saved with these cups. The moment you bring out cups that actually look like dirt with worms crawling out? Total showstopper. Halloween, garden parties, dinosaur themes – it works for everything. Pro tip: Add some flower-shaped cookies for an “overgrown garden” effect that’ll have everyone snapping photos before eating.
Ingredients for Dirt Pudding Cups with Gummy Worms
Here’s the beautiful part – you only need five simple ingredients to create this edible masterpiece. I always double check my pantry before starting because nothing’s worse than realizing you’re short on gummy worms halfway through (trust me, I’ve been there).
- 2 cups cold milk (whole milk makes it extra creamy!)
- 1 package (3.9 oz) instant chocolate pudding mix
- 1 tub (8 oz) whipped topping, thawed
- 15 chocolate sandwich cookies (Oreos are my go-to)
- Gummy worms (get extra – they mysteriously disappear)
- Clear plastic cups (6-8 oz size works perfectly)
Ingredient Notes
Life happens, and sometimes you need to swap things out. No worries – this recipe is super flexible! For gluten-free friends, any gluten-free chocolate sandwich cookies work great. Watching your sugar? Use sugar-free pudding mix and light whipped topping. Dairy-free? Almond milk and coconut whipped topping create an equally delicious “dirt” experience. Just promise me one thing – don’t skip the gummy worms. They’re the whole personality of this dessert!
Equipment Needed
You’ll be shocked how little you need for these dirt pudding cups! Just grab:
- A medium mixing bowl
- Whisk or spoon
- Clear plastic cups (6-8 oz size)
- Measuring cups
That’s it! No fancy gadgets required – just like Grandma used to make her treats.
How to Make Dirt Pudding Cups with Gummy Worms
Alright, let’s get our hands dirty (literally) with this super simple process. I’ve made these cups so many times I could probably do it in my sleep, but I’ll walk you through each step so yours turn out perfect on the first try.
Step 1: Prepare the Pudding
First things first – grab that bowl and whisk! Pour in your cold milk (the colder the better – it helps the pudding set faster) and sprinkle the entire packet of chocolate pudding mix over it. Now here’s my secret: whisk for a solid 2 minutes. Not 1 minute 45 seconds, but the full 2 minutes. This makes all the difference between a silky pudding and a lumpy mess. You’ll know it’s ready when it thickens enough to coat the back of a spoon but still pours easily.
Step 2: Fold in Whipped Topping
This is where the magic happens! Scoop out that fluffy whipped topping and add it to your pudding. Now, be gentle – we’re folding, not stirring. Use a rubber spatula to cut down through the middle, scrape along the bottom, and fold over the top. Repeat just until you don’t see white streaks anymore. Overmixing will deflate all that air we worked so hard to get into the whipped cream. The mixture should be light as a cloud but hold its shape when you scoop it.
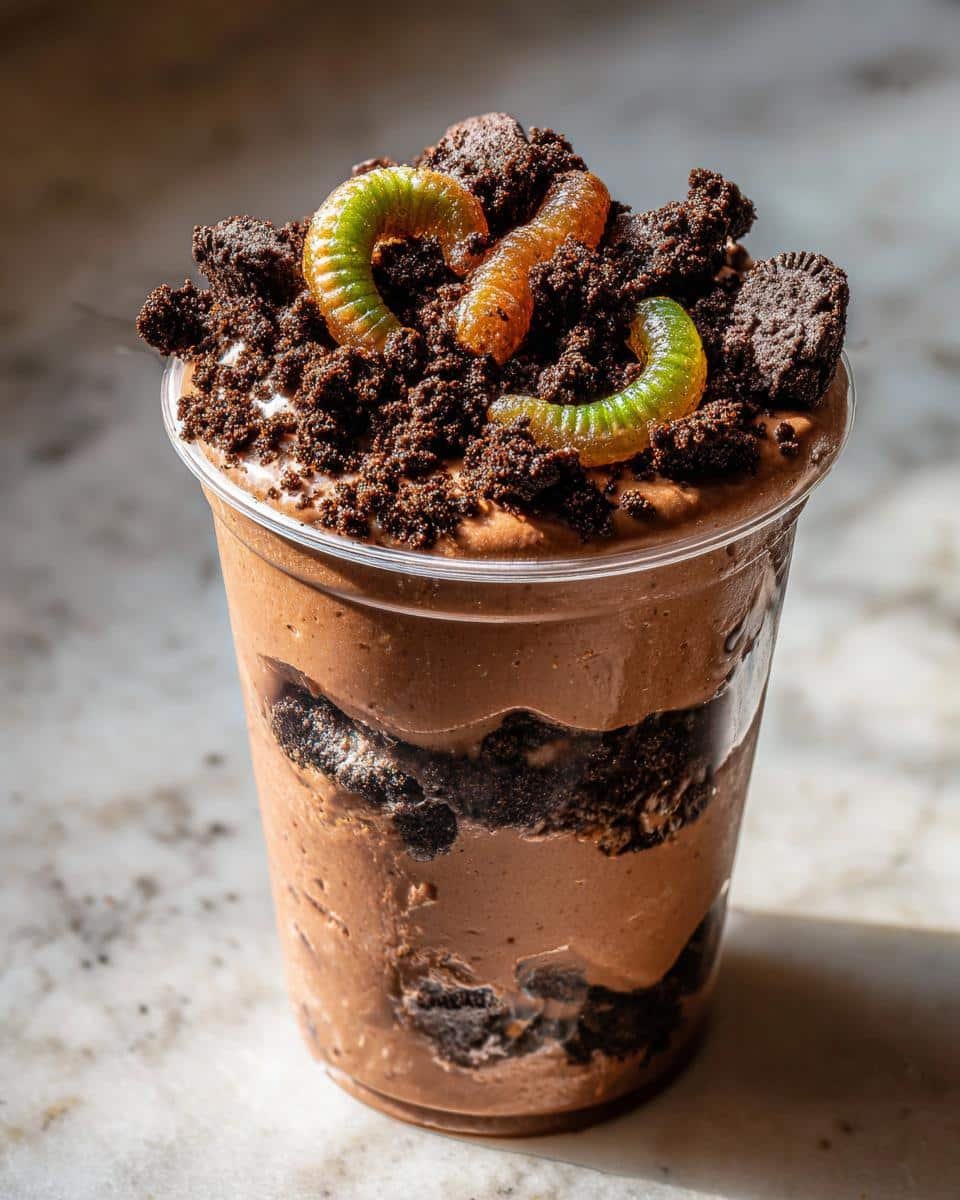
Step 3: Layer and Decorate
Time to build our edible garden! Spoon the pudding mixture into your clear cups, filling them about halfway. Now take those crushed cookies (I like to put mine in a ziplock and go to town with a rolling pin for perfect “dirt”) and sprinkle a generous layer on top. The best part? Poking those gummy worms in! Angle some so they peek out the top, bury others halfway – get creative! Pro tip: if you want really dramatic worms, let some dangle over the cup’s edge like they’re crawling out. Pop them in the fridge for at least an hour to set (if you can wait that long!).
Tips for Perfect Dirt Pudding Cups
After making these more times than I can count, I’ve learned a few tricks that take dirt pudding cups from good to “Oh my gosh, can I have the recipe?” amazing. These simple touches make all the difference!
Crushing the Cookies
Here’s the dirt on the dirt – texture matters! For that authentic “just dug up” look, I like to crush some cookies finely (think: real dirt) and leave others a bit chunkier (like little clumps of soil). My secret weapon? A food processor for about 5 pulses – any longer and you’ll get powder, which isn’t nearly as fun to eat. No processor? No problem! Toss them in a ziplock bag and roll with a rolling pin while pretending you’re a kid making mud pies.
Chilling Time
I know, I know – waiting is the hardest part. But trust me on this: that full hour in the fridge is non-negotiable. It lets the pudding set properly so your “dirt” layer stays put when you add the worms. Hot tip? If you’re really in a rush, pop them in the freezer for 20 minutes instead – just don’t forget about them! The perfect dirt pudding cup should be cool, creamy, and hold its shape when you dig in with a spoon.
Variations of Dirt Pudding
Oh, the possibilities are endless with this recipe! Once you’ve mastered the classic version, it’s so fun to play around with different flavors. My personal favorite twist? Using vanilla pudding and golden Oreos for “sandbox” pudding cups – perfect for beach-themed parties. Or try mixing crushed Oreo cream centers into the pudding for an extra decadent treat.
For Halloween, swap the chocolate pudding for orange-flavored and use sour gummy worms. Kids go wild for my “pumpkin patch” version with crushed graham crackers as dirt and candy pumpkins mixed in. The best part? No matter how you customize it, those sneaky gummy worms always steal the show!
Serving and Storage
When it’s showtime, gather everyone around before revealing these wiggly wonders – the looks on their faces are priceless! Serve straight from the fridge with little spoons for maximum messy fun. If (big IF) you have leftovers, just cover the cups with plastic wrap and refrigerate for up to 2 days.
Make-Ahead Option
Party day stress? Been there! Here’s my lifesaver: assemble these cups completely the night before. The cookies stay crunchy, the pudding stays creamy, and the worms stay perfectly positioned. Just add an extra sprinkle of “dirt” before serving if the tops look a bit damp. Works every time!
Nutritional Information
Just between us, we’re not exactly eating dirt pudding cups for their health benefits! A typical serving has about 250 calories, but these numbers can change based on your specific ingredients. Using sugar-free pudding or light whipped topping can knock those numbers down if you’re watching things. Either way, it’s all about enjoying every delicious, wiggly bite!
FAQs About Dirt Pudding Cups with Gummy Worms
I get so many questions about these adorable dirt cups – let me share the answers to the ones I hear most often!
Can I use homemade pudding?
Absolutely! While instant pudding is quicker, homemade works great too. Just make sure it’s chilled completely before folding in the whipped topping – warm pudding will melt your fluff! I like to make mine a bit stiffer than usual since we’re layering it. Pro tip: If your homemade pudding seems too thin, add a tablespoon of cornstarch while cooking to help it set firmer.
How long do the cups last?
Honestly, they rarely last more than a few hours in my house! But properly stored with plastic wrap over the tops, they’ll keep their texture in the fridge for about 2 days. The cookies might soften a bit after day one, but that just makes them easier for little ones to eat. I don’t recommend freezing them though – the pudding gets icy and the worms turn into little rubber rocks!
Can I make this vegan?
You bet! My friend’s vegan version is just as delicious. Use almond or oat milk with dairy-free pudding mix, coconut whipped topping, and vegan gummy worms (check labels – some contain gelatin). The cookies are easy too – most store-bought chocolate sandwich cookies are accidentally vegan! Just be sure to crush them extra fine since vegan pudding can be a touch softer.
For more fun recipes and ideas, check out our Pinterest page!
Print
3 Amazing Dirt Pudding Cups with Gummy Worms Kids Adore
- Total Time: 1 hour 10 minutes
- Yield: 6 servings 1x
- Diet: Vegetarian
Description
A fun and easy dessert that looks like dirt with gummy worms peeking out. Perfect for kids’ parties or Halloween treats.
Ingredients
- 2 cups cold milk
- 1 package (3.9 oz) instant chocolate pudding mix
- 1 tub (8 oz) whipped topping, thawed
- 15 chocolate sandwich cookies, crushed
- Gummy worms, for topping
- Clear plastic cups, for serving
Instructions
- In a bowl, whisk milk and pudding mix for 2 minutes until thickened.
- Fold in whipped topping until smooth.
- Spoon the mixture into clear cups, filling halfway.
- Sprinkle crushed cookies on top to resemble dirt.
- Add gummy worms by pressing them into the pudding.
- Chill for at least 1 hour before serving.
Notes
- Use gluten-free cookies for a gluten-free version.
- Substitute with sugar-free pudding for a lower-calorie option.
- Store leftovers in the fridge for up to 2 days.
- Prep Time: 10 minutes
- Cook Time: 0 minutes
- Category: Dessert
- Method: No-Bake
- Cuisine: American
Nutrition
- Serving Size: 1 cup
- Calories: 250
- Sugar: 25g
- Sodium: 300mg
- Fat: 10g
- Saturated Fat: 5g
- Unsaturated Fat: 3g
- Trans Fat: 0g
- Carbohydrates: 35g
- Fiber: 1g
- Protein: 3g
- Cholesterol: 5mg