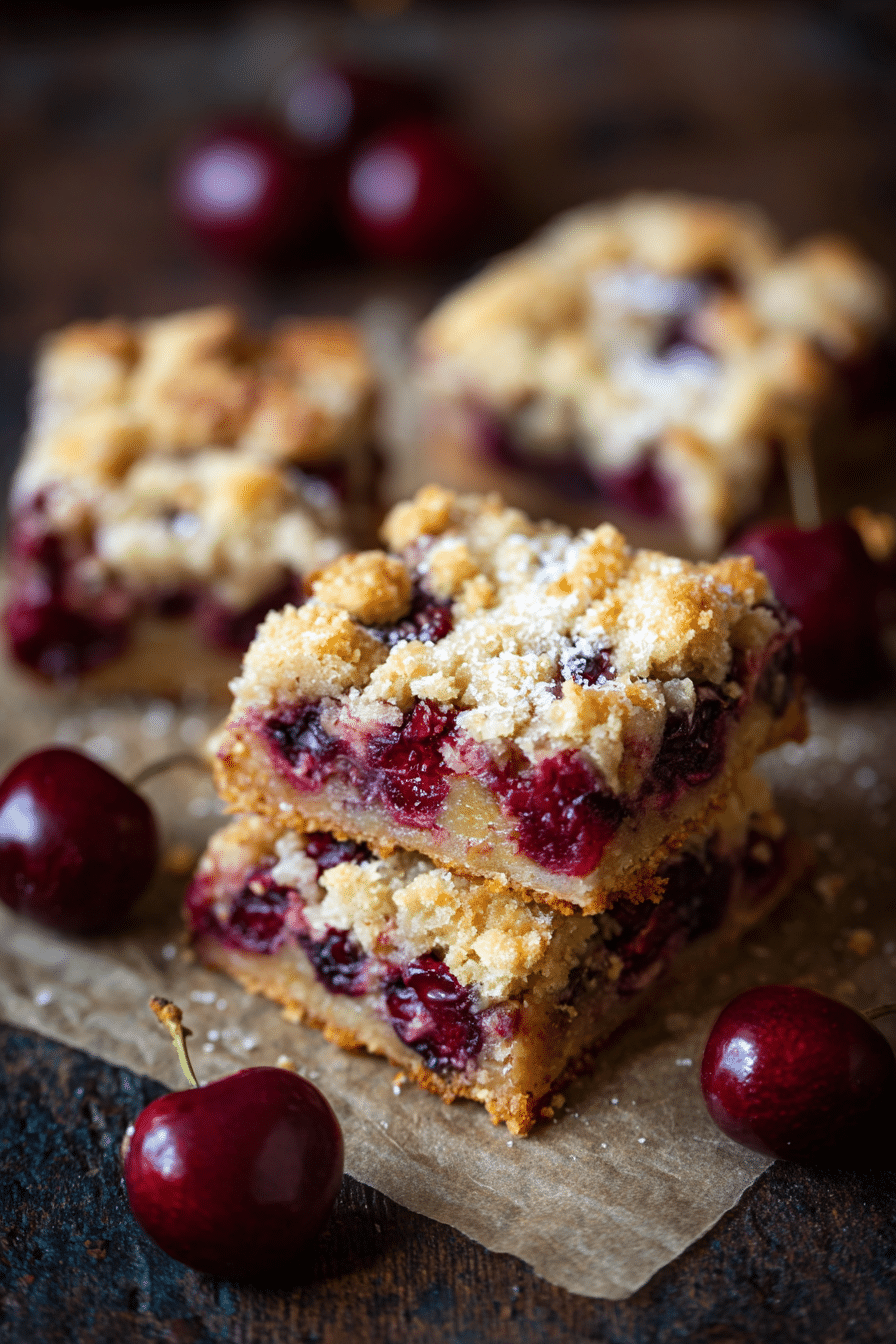
If you’re anything like me, certain recipes carry more than flavor—they carry memories. These Cherry Pie Bars are one of those recipes. Every time I bake them, I think of my grandmother’s tiny kitchen, the scent of buttery crust in the air, and the sticky red-stained smiles from sneaking cherries before they made it into the bowl. This recipe is warm, nostalgic, and incredibly satisfying to make. Whether you’re baking for a picnic, a holiday gathering, or just craving something sweet and simple, these Cherry Pie Bars are the ultimate treat. And yes, they’re absolutely crammed with fresh cherry flavor.
Cherry Pie Bars Recipe
Table of Contents
Why Cherry Pie Bars Deserve a Spot in Your Recipe Box
A Nostalgic Twist on a Classic
Cherry Pie Bars are more than just dessert—they’re comfort in every bite. Growing up, I was always drawn to fruit-based treats over frosted cupcakes or chocolate-heavy desserts. There’s something wholesome and honest about cherries baked into a golden crust. These bars are a simplified version of the traditional pie, but they don’t cut corners on flavor. You still get that juicy cherry filling, that buttery base, and a crumbly topping that makes every bite feel like something special. Unlike a full pie, though, Cherry Pie Bars are portable, sliceable, and great for sharing—perfect for summer cookouts or lunchbox surprises.
They remind me of the Cherry Streusel Bars I shared last spring—also sweet and tart with a bakery-style finish. What sets these apart is the custard-like richness in the filling, thanks to the sour cream and eggs, which give the bars structure and smoothness.
Versatile, Easy, and Always Crowd-Pleasing
One of the reasons I come back to this Cherry Pie Bars recipe again and again is how adaptable it is. You can use fresh or frozen cherries (just pit them carefully or use a cherry pitter). And if you’re short on time, canned cherry pie filling works in a pinch, though fresh cherries really take the flavor up a notch. Plus, you can prep the crust in minutes with a pastry blender and have them baking while you clean up. It’s that easy.
Looking for something similarly fruity and fun? You’ll love this German Cherry Crumb Cake, especially if you’re in the mood for a more cake-like texture with a hint of spice.
How to Make Cherry Pie Bars Step-by-Step
Gather the Essentials for the Perfect Cherry Pie Bars
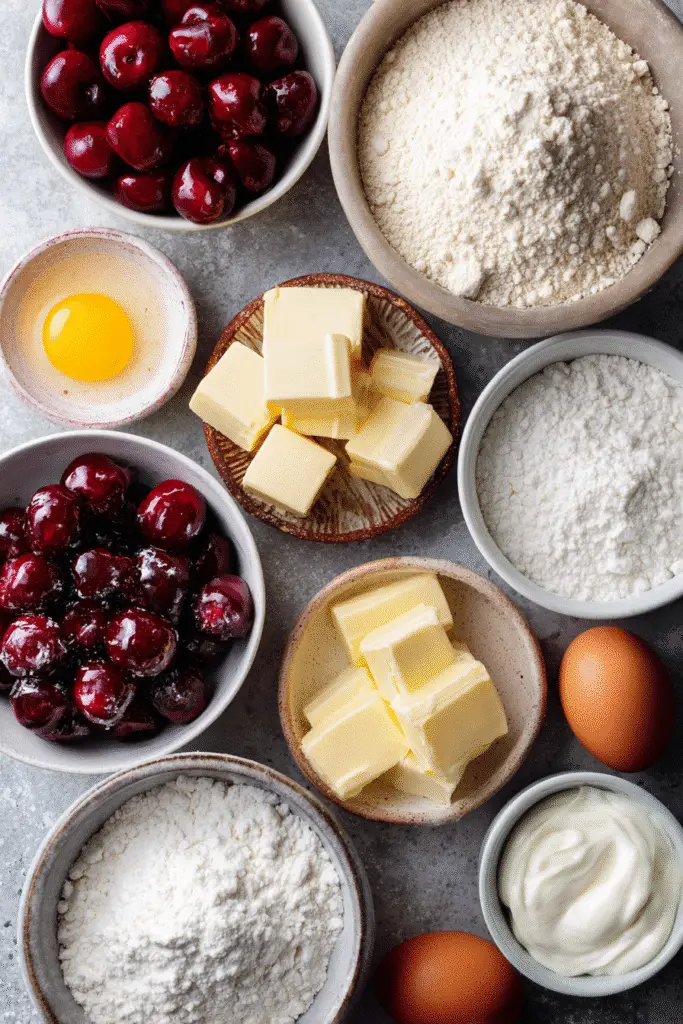
Before you begin, make sure you have the right tools. For this recipe, you’ll need a 9×13″ glass baking dish, a pastry blender, and a couple of mixing bowls—simple gear you probably already have. The crust is where the magic starts: it’s a blend of unbleached all-purpose flour, sugar, and chilled unsalted butter. The secret? Don’t skip the unbleached flour—bleached flour can toughen your bars and dull the flavor.
You’ll need:
- 3 cups unbleached all-purpose flour
- 1½ cups granulated sugar
- ¼ tsp sea salt
- 1½ cups unsalted butter, chilled
That buttery crumble doubles as both the base and the topping. Set aside 1½ cups before you press the rest into the baking dish. Bake it for 12–15 minutes at 350°F—just until golden and fragrant.
For the filling:
- 4 large eggs
- 1½ cups granulated sugar
- 1 cup sour cream
- A dash of sea salt
- 1 tsp almond extract
- ¾ cup unbleached flour
- 3 cups pitted, halved cherries
Bake, Cool, and Savor the Goodness
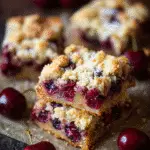
Pour the cherry filling over your hot crust and sprinkle the reserved crumble on top. Back in the oven it goes—another 55 to 65 minutes until the center is set. The aroma? Heavenly. Let the bars cool for at least an hour before slicing into neat squares.
If you’re into sweet summer squares, don’t miss the Rhubarb Custard Bars—they’re equally simple and just as nostalgic. For a more whimsical twist, these Strawberry Shortcake Kabobs are fun to serve at parties!
Creative Variations for Cherry Pie Bars You’ll Want to Try
Simple Add-Ins to Change It Up
Once you’ve mastered the classic Cherry Pie Bars recipe, it’s time to play a little. One of the best things about this dessert is how adaptable it is to seasonal flavors and pantry staples. Want a richer twist? Fold in some white chocolate chips or a handful of slivered almonds for extra texture. Feeling bold? Try blending a mix of cherries and blackberries for a deeper, more complex fruit flavor that’s still beautifully tart.
The almond extract in the filling is already a nod to traditional flavor pairings, but a teaspoon of vanilla adds warmth, especially when serving with whipped cream. You could even sprinkle a bit of cinnamon or nutmeg into the crumb topping if you’re making this for a fall gathering.
This kind of creativity reminds me of the Peach Cobbler Cookies—a fun spin on a comfort classic that feels familiar but new.
Gluten-Free or Holiday-Inspired Versions
Need a gluten-free version? Swap in a 1:1 gluten-free flour blend and make sure your almond extract and sour cream are GF-certified. Going dairy-free? Use vegan butter and a plant-based sour cream alternative. The texture may vary slightly, but the bars still bake beautifully.
You can even turn Cherry Pie Bars into a holiday dessert. Add green pistachios and a drizzle of white icing on top for a Christmas-ready treat. Or swap cherries for cranberries with orange zest for Thanksgiving.
If you’re looking for more dessert bars that travel well and look gorgeous on a platter, definitely check out these Mulberry Cheesecake Squares.
Storing and Serving Cherry Pie Bars Like a Pro
How to Store for Freshness
After your Cherry Pie Bars have cooled, you’ll want to store them properly to keep that perfect texture. If you’re serving within a day, just cover the dish tightly with foil or plastic wrap and leave it at room temperature. For longer storage, slice the bars and place them in an airtight container. They’ll stay fresh in the fridge for up to 5 days.
These bars also freeze beautifully. Stack them with parchment between layers in a freezer-safe container and freeze for up to 3 months. Just thaw in the fridge overnight or at room temp for an hour before serving.
Need more freezer-friendly options? Try these Strawberry Shortcake Cheesecake Rolls. They’re creamy, fruity, and hold up well when stored.
How to Serve Cherry Pie Bars Beautifully
These bars shine on their own, but you can dress them up with a scoop of vanilla ice cream or a dollop of whipped cream. Add a few fresh cherries on the side for extra color and flavor. Serve on a dessert platter at a potluck or wrap individually in parchment paper for a sweet lunchbox treat.
They’re especially lovely for seasonal celebrations—Mother’s Day brunch, summer cookouts, or even Valentine’s Day.
For another celebration-worthy option, you’ll love this soft, airy Strawberry Shortcake Layer Cake—a showstopper that’s surprisingly easy to pull together.
FAQs About Cherry Pie Bars
Can I use frozen cherries for cherry pie bars?
Yes, but thaw and drain them well to avoid excess moisture.
How do I know when cherry pie bars are done baking?
The top should be golden and the center should be set. A toothpick should come out clean.
Can cherry pie bars be made ahead of time?
Absolutely. They taste even better the next day and are easy to slice when chilled.
What’s the best way to cut cherry pie bars neatly?
Cool completely, then slice with a sharp knife. Wipe between cuts for clean edges.
Cherry Pie Bars Recipe That Will Make You Love Baking Again
Description
Easy, nostalgic Cherry Pie Bars with buttery crust and creamy cherry filling. Perfect for gatherings or weeknight dessert.
Ingredients
CRUST:
3 cups unbleached all-purpose flour
1 1/2 cups granulated sugar
1/4 tsp sea salt
3 sticks unsalted butter, chilled
CHERRY PIE FILLING:
3 cups cherries, pitted and halved
1 1/2 cups granulated sugar
4 large eggs
1 cup sour cream
1 dash sea salt
1 tsp almond extract
3/4 cup unbleached all-purpose flour
Instructions
1. Stir sugar, salt, and flour in a large bowl.
2. Cut in cold butter with a pastry blender until crumbly.
3. Set aside 1½ cups of mixture for topping. Press the remaining into a greased 9×13” baking dish.
4. Bake crust at 350°F for 12–15 minutes.
5. In another bowl, whisk eggs, sugar, sour cream, salt, almond extract, and flour.
6. Fold in the cherries and pour over the hot crust.
7. Sprinkle with reserved crumble mixture and bake for 55–65 minutes.
8. Cool for at least one hour before slicing into bars.
Notes
Use fresh or frozen cherries.
Refrigerate leftovers up to 5 days.
Freeze for up to 3 months.
Conclusion
Cherry Pie Bars are the kind of dessert that brings joy with every bite. Whether you’re baking them for a summer picnic, holiday spread, or just because it’s Tuesday, they offer the comforting flavors of cherry pie with the ease of a snackable bar. With their buttery crust, creamy cherry filling, and crumbly topping, they’re irresistible straight out of the pan or dressed up with a scoop of ice cream.
They’re easy to make, endlessly adaptable, and sure to become a recipe you come back to again and again—just like we do here at RecipesLia.com.