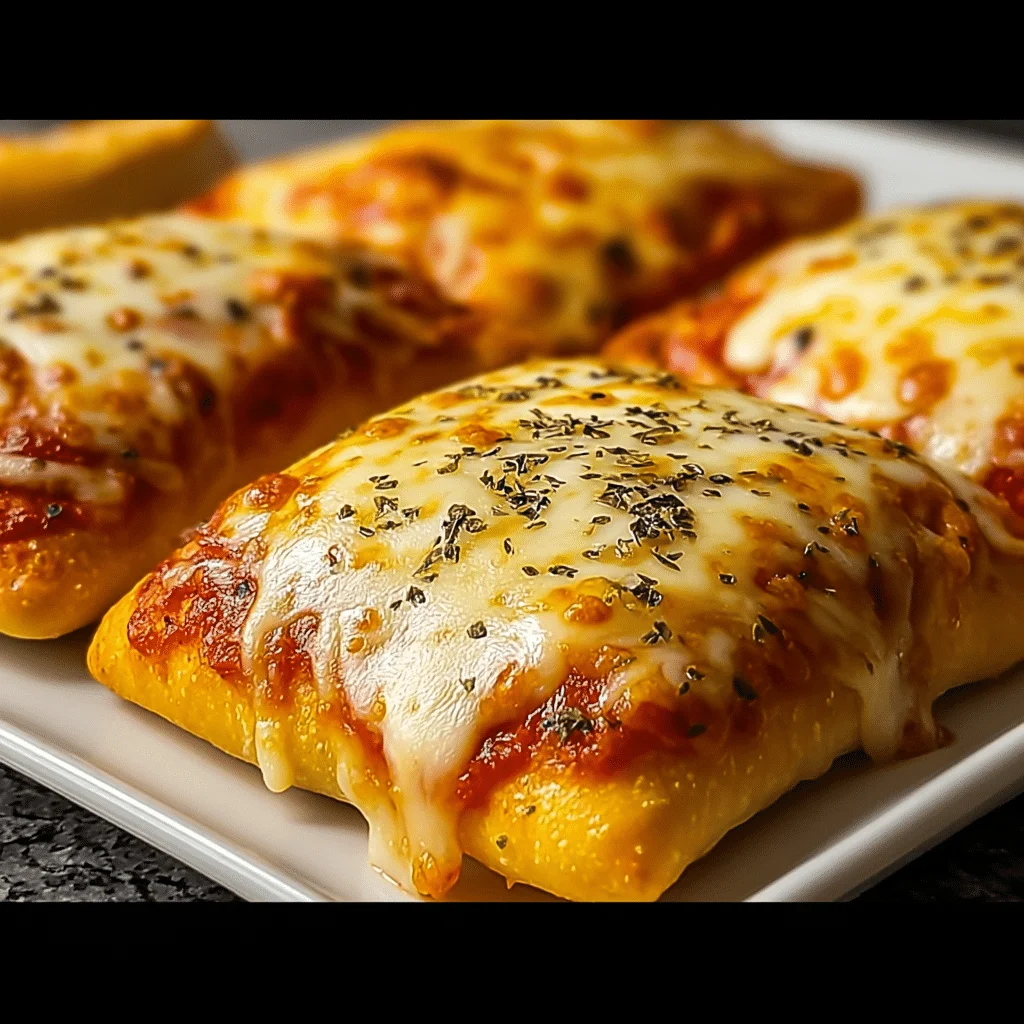
If you’re craving a quick, delicious dinner that feels both nostalgic and totally satisfying, these Cheesy Pizza Pockets are just what you need. This article covers everything from the story behind these savory snacks to tips for perfect golden pockets every time. We’ll explore different dough options, creative filling combinations, smart prep tricks, and even freezer-friendly steps. Whether you’re whipping them up for a game night or packing them in school lunches, these pizza pockets are sure to be a new favorite.
Cheesy Pizza Pockets: Easy
Table of Contents
The Story & Why I Love Cheesy Pizza Pockets
A Bite of Nostalgia
Pizza has always held a special place in my kitchen—growing up, Friday nights meant doughy crusts, bubbling cheese, and sauce-smeared smiles all around the table. But as life got busier, I needed something just as comforting but a lot more convenient. Enter: Cheesy Pizza Pockets.
I still remember the first time I folded store-bought dough around a cheesy pepperoni filling—it was a weeknight, the fridge was nearly empty, and I had exactly 30 minutes before school pickup. That spontaneous experiment turned into a household staple, and it’s one I’ve happily returned to ever since.
The beauty of Cheesy Pizza Pockets lies in their simplicity and flexibility. Whether you’re using crescent roll dough for a buttery, flaky finish or refrigerated pizza dough for a classic chew, the result is always deeply satisfying. Stuffed with gooey mozzarella, rich marinara, and your favorite toppings, every bite hits that crave-worthy balance of crispy and melty.
Now, I love making them ahead of time and freezing a batch—perfect for quick snacks, after-school hunger attacks, or even an easy dinner alongside a big green salad. They remind me of homemade Hot Pockets but better. Honestly, so much better.
And if you’re a fan of comfort dishes with a twist, you’d probably love these spaghetti garlic bread bowls too—cheesy, saucy, and pure magic in every bite. Or for a crunchier snack, try pairing your pockets with homemade Cheeze-Its; it’s a flavor party waiting to happen.
Why This Recipe Works
First, it’s totally customizable. Whether you’re all about pepperoni, love a good veggie combo, or want to keep things simple with just sauce and cheese, the filling adapts to your mood. Add a pinch of Italian seasoning and red pepper flakes, and you’ve just turned it up a notch.
Second, the dough choices make this recipe accessible for all cooking levels. Crescent roll dough offers that rich, buttery vibe—ideal if you’re after something similar to pastry. Prefer a more classic pizza taste? Go with refrigerated pizza dough. Or, if you’re feeling ambitious, homemade dough brings unbeatable freshness.
Lastly, they bake in under 20 minutes. And they reheat like a dream.
Dough Choices & Pizza Pocket Perfection
The Best Dough for Cheesy Pizza Pockets
The dough is the foundation of your pizza pockets, and you’ve got options—each offering something slightly different in taste and texture.
Refrigerated pizza dough is the go-to if you want that familiar pizzeria flavor. It’s stretchy, easy to shape, and bakes into a soft yet chewy crust. This is great for traditionalists and pairs especially well with sausage or veggie-loaded fillings.
If you’re after a flakier, buttery texture, crescent roll dough is a wonderful shortcut. It bakes beautifully golden, has a light crunch, and turns the pockets into something that feels just a little more indulgent—like a cross between a pizza and a croissant.
Now, if you have a bit more time, making your own dough is an option worth exploring. It gives you control over ingredients and allows for little tweaks like adding herbs or garlic powder right into the dough itself. For more creative takes on savory pastry-style dough, you might enjoy making cottage cheese flatbread or even crispy cottage cheese treats for a crunchy side.
No matter which dough you choose, the key is to keep it evenly rolled—about 1/8 inch thick. Too thick and you risk a doughy interior; too thin and it may tear or overcook.
Tips for Rolling, Filling & Sealing the Perfect Pocket
Once your dough is rolled out, cut it into equal squares or circles (a 4–5 inch square is ideal). Don’t overfill—about 2 tablespoons of filling is plenty. A generous layer of mozzarella, a spoonful of marinara, and a sprinkle of Parmesan create the classic combo. Then toss in your add-ins—mini pepperoni, chopped bell peppers, or olives all work beautifully.
Brush the edges lightly with water or egg wash before folding—this acts like glue to seal your pockets. Press the edges with a fork or pinch them closed like a turnover.
For that perfect golden crust, brush the tops with beaten egg and sprinkle with a dash of garlic powder or dried oregano. It adds a punch of flavor and that mouthwatering finish.
Place them on a parchment-lined baking sheet and pop them in a preheated oven at 375°F. They should be done in about 15–18 minutes—look for a deep golden hue and bubbling cheese at the seams.
Want a side that complements the pizza pocket magic? Try these baked broccoli cheese balls or even a mini tomato mozzarella basil tart for a snack board feel.
Filling Ideas for Every Taste
Classic to Creative: Filling Combos
Start with the base—marinara and mozzarella—and then take it wherever your cravings lead.
Classic meat lovers will love mini pepperoni or cooked sausage with mozzarella and Parmesan. Add some Italian seasoning and a dash of red pepper flakes to really bring out that pizzeria flavor.
Veggie fans? Think sautéed mushrooms, olives, diced bell peppers, or even spinach. Just make sure your veggies are cooked or drained to avoid excess moisture.
For something gourmet, try roasted red peppers with feta, or go sauce-free with a garlic-ricotta filling. You’ll end up with a white pizza vibe that feels upscale yet effortless.
Inspired by the savory filling from this tomato tart recipe, you can also experiment with fresh mozzarella and herbs for a lighter summer version.
Pockets for Picky Eaters
Got different tastes in the house? No problem. Make a few different batches and label them with a toothpick or sprinkle of a different topping.
Here’s a helpful pocket planning table:
| For | Filling Combo |
|---|---|
| Kids | Mozzarella, marinara, mini pepperoni |
| Vegetarian | Mushrooms, olives, bell peppers |
| Low Carb | Ricotta, spinach, garlic, mozzarella |
| Meat Lover | Sausage, pepperoni, ham, cheese |
Make-Ahead & Freezing Tips
Prep & Freeze Like a Pro
To make a big batch ahead of time, assemble your pockets and place them on a baking sheet in the freezer until firm. Then transfer to a freezer bag. When ready to bake, add 5–7 extra minutes to the cooking time.
Already baked? Cool, wrap in foil, and freeze. Reheat in an oven or air fryer for best texture.
Serve alongside a cheesy garlic chicken wrap or a fresh green salad for a complete meal that’s anything but boring.
Reheating & Serving
Reheat in the oven at 350°F for 10–12 minutes or in the air fryer. Skip the microwave unless you’re okay with softer dough.
These make amazing lunchbox meals, game day snacks, or casual Friday dinners. Pair them with a warm dipping sauce and you’ve got a winner.
Print
Cheesy Pizza Pockets: Easy, Fun Dinner Everyone Will Love
- Total Time: 28 minutes
- Yield: 8 pockets 1x
Description
Cheesy Pizza Pockets are a fun, customizable handheld dinner filled with melty mozzarella and your favorite pizza toppings.
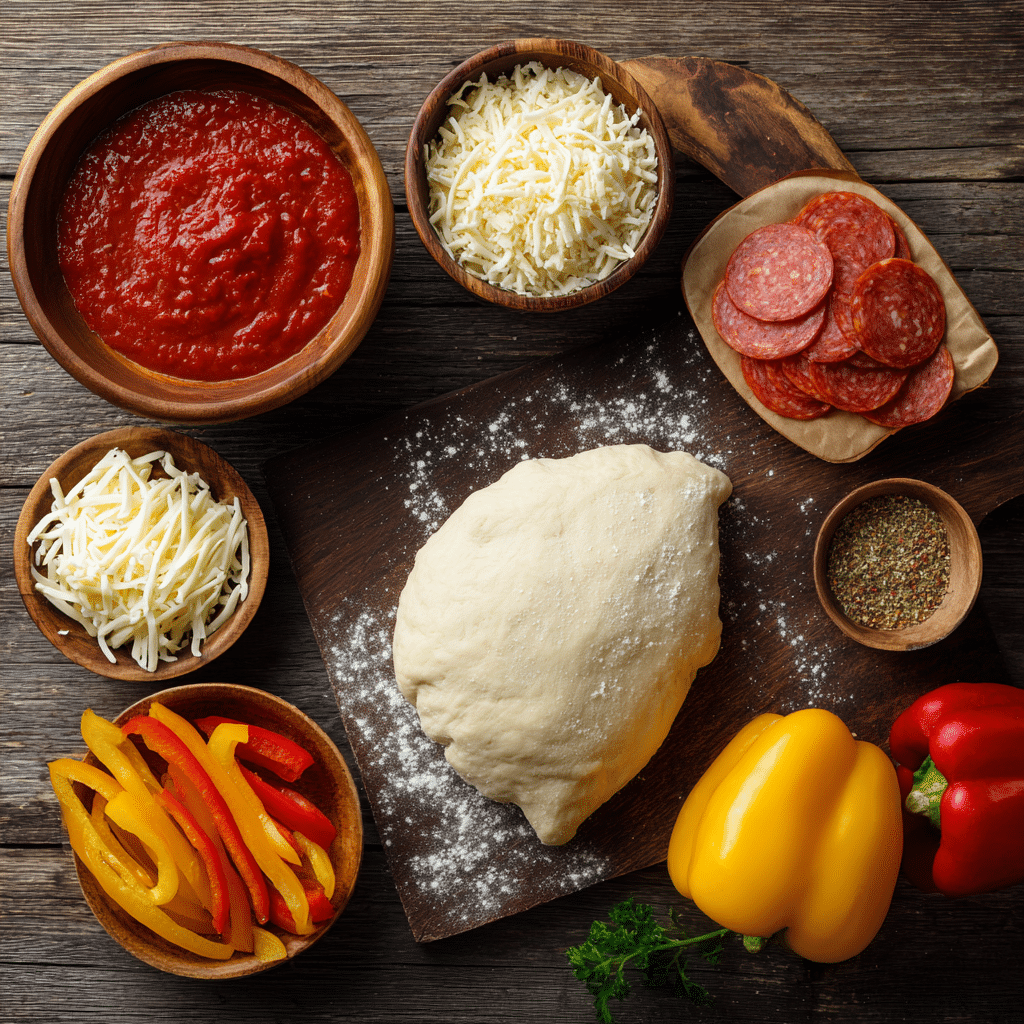
Ingredients
1 package refrigerated pizza dough (or crescent roll dough for flakier texture)
1/2 cup marinara or pizza sauce
1 1/2 cups shredded mozzarella cheese
1/4 cup grated Parmesan cheese
1/4 cup mini pepperoni or cooked sausage (optional)
1/4 cup chopped bell peppers, mushrooms, or olives (optional)
1 tsp Italian seasoning
Pinch of red pepper flakes (optional)
1 egg, beaten (for egg wash)
Dried oregano or garlic powder (for garnish)
Instructions
1. Preheat oven to 375°F. Line a baking sheet with parchment paper.
2. Roll out dough and cut into 4-5 inch squares.
3. Place sauce, cheese, and toppings in the center of each square.
4. Fold dough over and seal edges with fork. Brush with egg wash.
5. Sprinkle with oregano or garlic powder if desired.
6. Bake for 15–18 minutes until golden and bubbly.
Notes
Use parchment to prevent soggy bottoms.
Don’t overfill or dough may burst open during baking.
Freeze unbaked pockets and bake from frozen with 5 extra minutes.
- Prep Time: 10 minutes
- Cook Time: 18 minutes
- Category: Dinner, Snacks
- Method: Baking
- Cuisine: American
Nutrition
- Serving Size: 2 pockets
- Calories: 290
- Sugar: 2g
- Sodium: 540mg
- Fat: 14g
- Saturated Fat: 6g
- Unsaturated Fat: 7g
- Trans Fat: 0g
- Carbohydrates: 30g
- Fiber: 1g
- Protein: 11g
- Cholesterol: 35mg
FAQs
What dough works best for pizza pockets?
Refrigerated pizza dough offers classic flavor; crescent dough adds flakiness. Homemade works too!
Can I make cheesy pizza pockets ahead of time?
Yes! Assemble and refrigerate or freeze. Bake fresh or from frozen.
How do I avoid soggy pockets?
Sauté veggies, don’t overfill with sauce, and bake on parchment.
What’s the best way to reheat them?
Use an oven or air fryer to keep them crispy and delicious.
Short Story
Hi there! I’m Lia, the heart and hands behind recipeslia.com. These Cheesy Pizza Pockets bring back the joy of pizza night in a fun, handheld way. They’re filled with gooey mozzarella, tangy sauce, and any toppings your heart desires—just like I used to make with my kids on Friday nights. Whether you bake a batch fresh or freeze some for later, they’re a family favorite that’s both quick and satisfying. From after-school snacks to casual dinners, this is one recipe I always come back to. Let’s get rolling—literally—and make something delicious together.