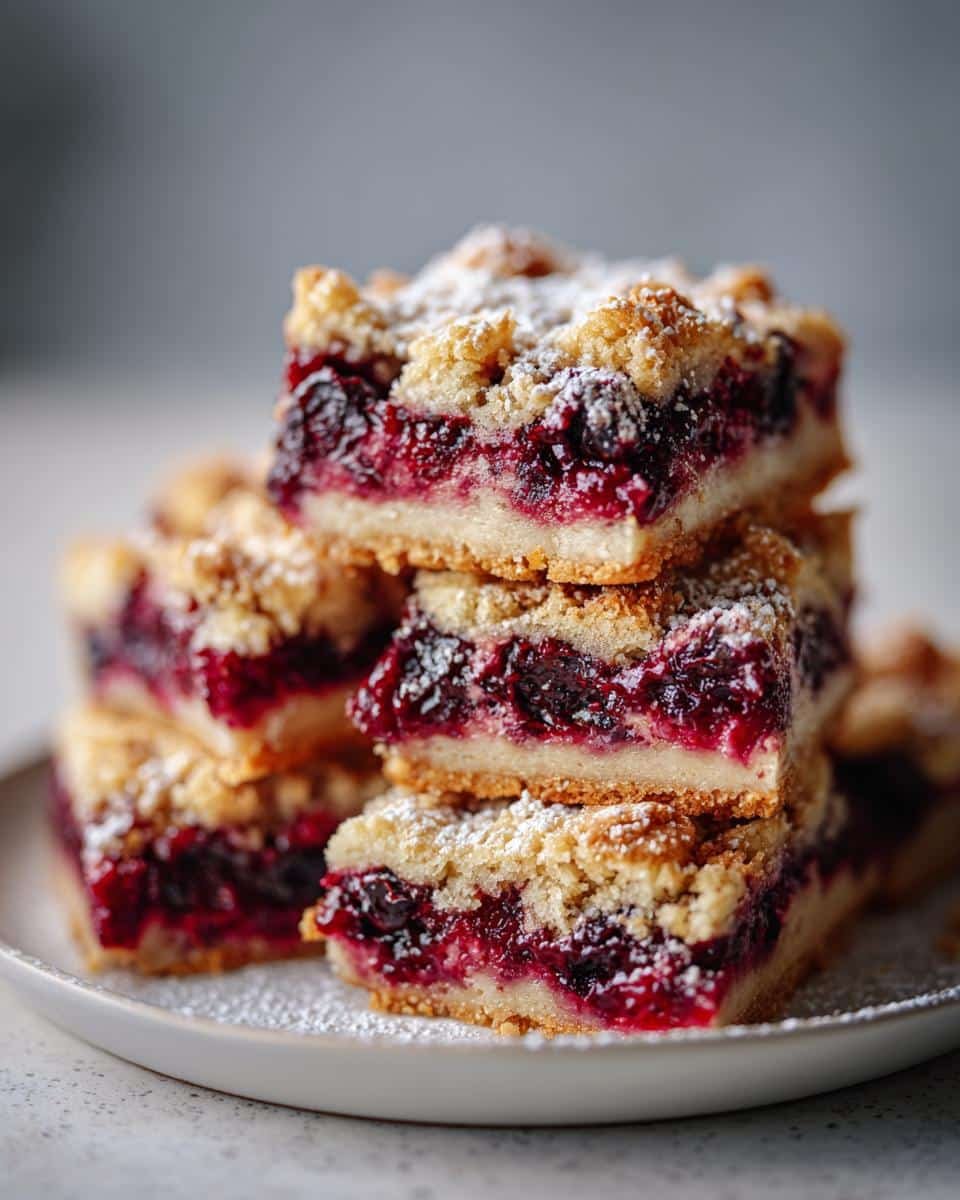
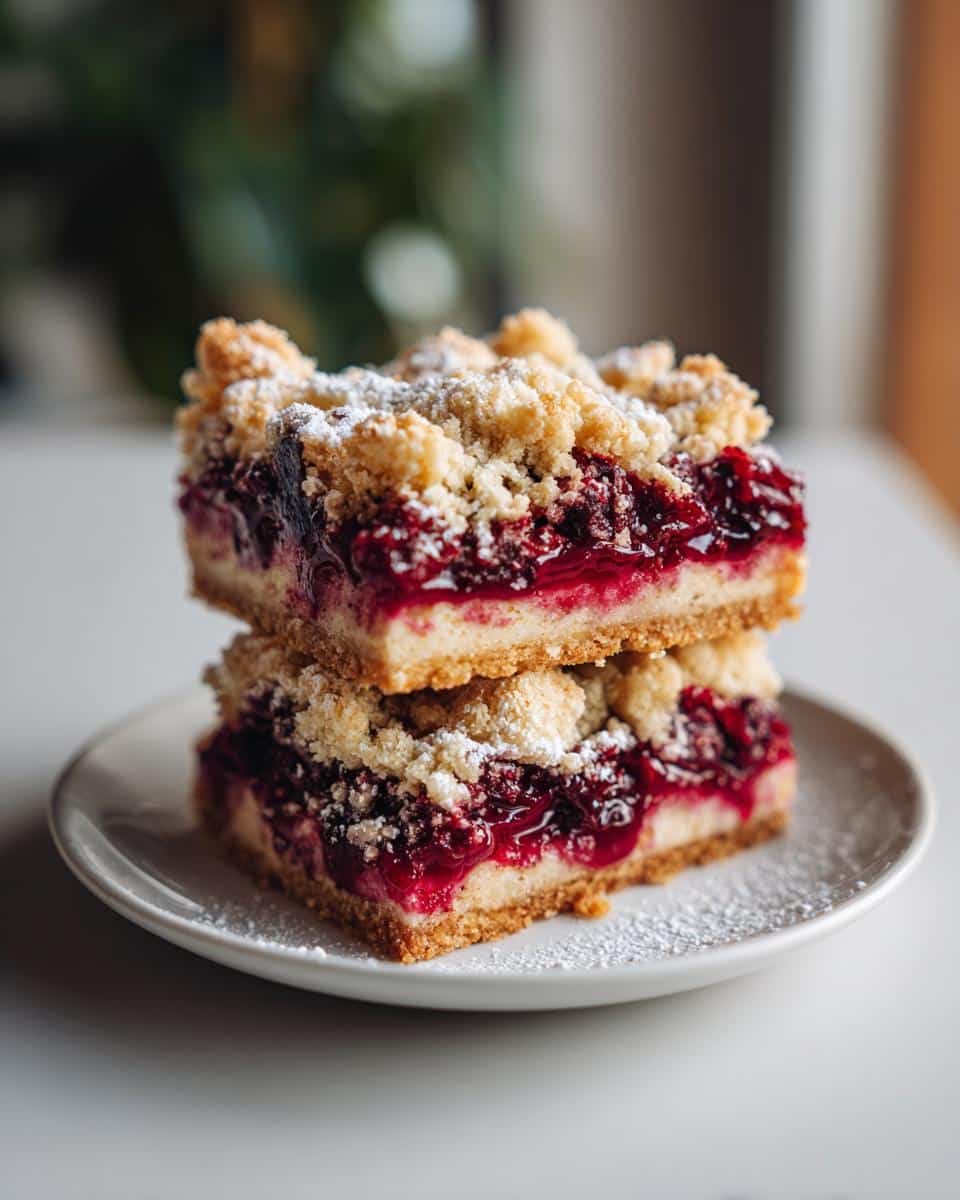
Oh my gosh, you have to try these berry crumble bars! They’re my go-to dessert when I want something sweet but not too fussy – and bonus, they’re naturally gluten-free. Picture this: buttery, crumbly crust hugging a jammy berry filling that bursts with flavor in every bite. I swear, these disappear faster than I can make them whenever friends come over.
I first fell in love with berry desserts during summer visits to my aunt’s farm. She’d let me pick raspberries straight from the bushes, and by afternoon we’d turn them into the most amazing treats. These bars capture that same magic – the way the berries soften into this sweet-tart filling while the golden crumb topping gets perfectly crisp. The best part? They come together with just a bowl and a spoon – no fancy equipment needed.
Whether you’re gluten-free by choice or necessity, these berry crumble bars will make you forget all about traditional desserts. They’ve got that nostalgic crumble taste we all love, but with a texture that’s somehow even better than the wheat-filled versions. Trust me, one bite and you’ll be hooked!
Why You’ll Love These Berry Crumble Bars
Let me tell you why these berry crumble bars have become my dessert obsession – and why you’ll adore them too!
- Easy as pie (but way simpler!): No rolling pins, no fancy techniques – just mix, layer, and bake. Even my 10-year-old niece can make these without help!
- Gluten-free that doesn’t taste “free” of anything: The buttery crust is so good, no one will guess it’s gluten-free. I’ve fooled my wheat-loving dad three times now.
- Berry flexible: Use whatever berries you’ve got – fresh summer bounty or frozen winter stash. My favorite combo? Raspberry-blueberry, but blackberries make it extra jammy!
- Crowd-pleaser magic: These disappear at potlucks faster than I can say “seconds please!” Perfect for when you need to feed a group without stress.
- Breakfast-worthy: Okay fine, I’ve definitely eaten these with my morning coffee. The fruit makes it practically health food, right?
Seriously, these bars check all the boxes – delicious, simple, and adaptable. Once you try them, you’ll understand why they’re my most-requested recipe!
Ingredients for Berry Crumble Bars
Here’s everything you’ll need to make these irresistible berry crumble bars – I promise it’s all simple stuff you probably have already!
- 2 cups packed gluten-free flour blend (see my notes below about which blends work best)
- 1/2 cup granulated sugar (for that perfect sweetness without being overwhelming)
- 1/2 teaspoon salt (trust me, this makes all the difference in balancing flavors)
- 1/2 cup cold butter, cubed (I’m talking fridge-cold – this creates those perfect crumbly bits)
- 1 large egg (helps bind everything together beautifully)
- 2 cups mixed berries (fresh or frozen both work – more on that below!)
- 1 tablespoon lemon juice (brightens up the berry flavor)
- 1/4 cup granulated sugar (for the berry layer – adjust based on your fruit’s sweetness)
- 1 tablespoon cornstarch (our secret weapon against runny filling)
Ingredient Notes & Substitutions
Don’t stress if you need to swap things – I’ve tested all these variations and they all work great:
Gluten-free flour: My favorite blend is King Arthur Measure for Measure because it behaves just like regular flour. If your blend doesn’t contain xanthan gum, add 1/4 teaspoon to the dry ingredients.
Sugar alternatives: Coconut sugar works beautifully if you want something less refined. For lower glycemic options, monk fruit or erythritol blends work too – just check the conversion ratios.
Berries: Frozen berries are totally fine! No need to thaw – just toss them in frozen. The mix I use most often is blueberries, raspberries and blackberries, but strawberries work too if you chop them small.
Butter: If you’re dairy-free, cold coconut oil works surprisingly well – just make sure it’s solid when you mix it in.
Equipment You’ll Need
One of the best things about these berry crumble bars? You don’t need any fancy gadgets to make them! Here’s what I grab from my kitchen:
- 8×8 inch baking pan – My trusty metal one has made hundreds of batches. Glass works too, just add a couple extra minutes to baking time.
- Medium mixing bowl – For tossing together that irresistible crumbly crust.
- Pastry cutter – My grandma’s old-fashioned one works best for cutting in the butter, but two forks or even your fingers will do in a pinch!
- Silicone spatula – Perfect for scraping every last bit of berry filling into the pan.
Nice-to-haves (but not essential):
- Parchment paper – Makes cleanup a breeze and helps lift the bars out neatly.
- Measuring cups and spoons – Though I’ll admit I sometimes eyeball the sugar amounts!
- Small bowl – For mixing the berry filling separately before it goes on the crust.
See? Nothing complicated! Half the time I make these, I don’t even bother getting out my stand mixer – a little arm workout from mixing by hand makes the dessert taste even better, if you ask me!
How to Make Berry Crumble Bars
Alright, let’s get baking! These berry crumble bars come together in three simple steps – crust, filling, and topping. I promise it’s easier than it looks, and the heavenly smell wafting from your oven will make all the effort worth it!
Step 1: Prepare the Crust
First things first – preheat your oven to 350°F (175°C). While that’s heating up, grab your mixing bowl and whisk together the gluten-free flour, 1/2 cup sugar, and salt. Now here’s the fun part – take your cold, cubed butter and start working it into the dry ingredients.
I like to use a pastry cutter at first, then switch to my fingers to really get that perfect crumbly texture. You’re looking for pea-sized butter bits throughout – this is what gives the crust that irresistible flakiness. Once it looks like coarse sand, crack in the egg and mix just until combined. The dough will be crumbly but should hold together when you squeeze it – that’s how you know it’s perfect!
Step 2: Make the Berry Filling
While your oven finishes preheating, let’s make that luscious berry layer. Toss your berries (no need to thaw if using frozen!) with lemon juice in a separate bowl. Sprinkle over the 1/4 cup sugar and cornstarch, then gently mix until all the berries are coated.
Here’s my pro tip: let this mixture sit for about 5 minutes. The sugar will draw out some juice, and the cornstarch will start working its magic to thicken everything up. Don’t worry if it looks super juicy at first – that’s exactly what we want for that jammy center!
Step 3: Assemble & Bake
Now for the fun assembly! Take about half of your crumb mixture and press it firmly into the bottom of your prepared 8×8 pan. I mean really press it – use your fingers or the bottom of a measuring cup to create an even, compact layer. This becomes your base, so you want it nice and solid.
Next, spread your berry mixture evenly over the crust. Try to distribute the berries as evenly as possible – I like to use a rubber spatula to gently nudge them into place. Then take the remaining crumb mixture and sprinkle it over the top. Don’t press this part – you want those lovely, loose crumbs that’ll get all golden and crisp in the oven.
Pop it in the oven for 35-40 minutes. You’ll know it’s done when the topping is lightly golden and the berry filling is bubbling around the edges. The hardest part? Letting it cool completely before cutting! I know it’s tempting, but trust me – waiting ensures clean slices and lets the filling set properly. About an hour does the trick.
Tips for Perfect Berry Crumble Bars
After making these berry crumble bars more times than I can count, I’ve picked up some foolproof tricks that guarantee perfection every time. Here are my absolute must-know tips:
Chill that dough! If your crust mixture feels too sticky when you’re working with it, just pop it in the fridge for 10-15 minutes. Cold dough equals flakier results – I learned this the hard way after one too many summer batches where my kitchen was too warm!
Press, press, press that bottom crust layer. I use the bottom of a measuring cup to really compact it – you want it almost like a cookie crust that’ll hold up to the juicy berries. Too loose and your bars will fall apart when cutting.
Taste your berries first before adding sugar to the filling. Super tart? Add an extra tablespoon of sugar. Super sweet? You can cut back a bit. The lemon juice balances everything out beautifully either way.
Let them cool completely before cutting – I know it’s torture, but it makes all the difference! I set a timer for one hour to resist temptation. Warm bars are delicious but messy, while cooled bars slice like a dream.
Serving & Storage
Oh, the joy of serving these berry crumble bars! My absolute favorite way? Warm from the oven (okay, slightly cooled) with a big scoop of vanilla ice cream melting over the top. The contrast between the crisp crumble and cold, creamy ice cream is pure magic. For breakfast (don’t judge!), I love them at room temperature with my morning coffee – the berries make it totally acceptable, right?
When storing leftovers (if you have any!), here’s what works best:
- Room temperature: Keep them in an airtight container for up to 3 days. The crust stays surprisingly crisp this way!
- Refrigerator: If your kitchen runs warm, pop them in the fridge for up to 5 days. Just let them come to room temp before serving – or warm briefly in the microwave.
- Freezer: These freeze like a dream! Cut into squares first, then wrap individually in parchment before freezing in an airtight bag. They’ll keep for 2-3 months. Thaw at room temp or warm gently in the oven.
Pro tip: If freezing, leave off the ice cream until serving day. Learned that lesson the messy way when my freezer became a sticky disaster zone!
Nutritional Information
Now, I’m no nutritionist, but I know you’ll want the scoop on what’s in these delicious berry crumble bars! Keep in mind these numbers are estimates – your exact counts might vary depending on your berry mix and specific ingredients. But here’s the general breakdown per bar (based on cutting into 9 generous squares):
- Calories: About 220 – perfect for a satisfying treat!
- Fat: 10g (that glorious butter doing its thing)
- Saturated Fat: 6g (worth every delicious gram)
- Carbohydrates: 30g (mostly from the natural fruit sugars)
- Fiber: 2g (thank you, berry skins!)
- Sugar: 15g (adjustable based on your berry sweetness)
- Protein: 2g (surprising little protein boost from the egg and flour)
- Sodium: 150mg (just enough salt to make all the flavors pop)
Remember, these are gluten-free but still a treat – though I’d argue the antioxidant-rich berries make them practically health food! The cornstarch helps keep the sugar content reasonable while still giving you that jammy, sweet filling we all crave. And hey, compared to store-bought desserts, you’re getting way more real fruit and way fewer mystery ingredients!
FAQ About Berry Crumble Bars
I get so many questions about these berry crumble bars – here are the ones that pop up most often with my tried-and-true answers!
Can I use oats in this recipe?
Absolutely! Replace 1/2 cup of the gluten-free flour with rolled oats for extra texture. Just make sure they’re certified gluten-free if that’s important for you. The oats add a lovely chewiness that I adore!
How can I make these vegan?
Easy peasy! Swap the butter for cold coconut oil (measure it packed like brown sugar) and use a flax egg (1 tbsp ground flax + 3 tbsp water, let sit 5 mins) instead of the regular egg. I’ve done this for my vegan friends and they couldn’t tell the difference!
What are the best berries to use?
My favorite combo is equal parts raspberries and blueberries – the raspberries get jammy while the blueberries stay plump. Blackberries add gorgeous color but can be seedy, while strawberries need chopping small. Frozen mixed berries work perfectly too – no need to thaw!
Can I double this recipe?
You bet! Double all ingredients and bake in a 9×13 pan. Might need an extra 5-10 minutes baking time – just watch for that golden top and bubbly edges. This is my go-to for potlucks!
Why did my filling turn out runny?
Two likely culprits: not enough cornstarch or cutting too soon. Next time, try adding an extra teaspoon of cornstarch if your berries were extra juicy. And resist cutting for that full hour – I promise the wait is worth it for clean slices!
Share Your Berry Crumble Bars Adventure!
I can’t wait to hear how your berry crumble bars turn out – every batch tells its own delicious story! Did you go classic with blueberries or mix in some unexpected berries? Maybe you discovered the perfect crumble-to-fruit ratio? Drop a comment below and let me know – I read every single one!
Better yet, snap a photo of your creation (that golden crumble top gets me every time!) and tag me on Instagram @[YourHandle]. There’s nothing I love more than seeing your kitchen triumphs and putting a name to face with your amazing bakes. Pro tip: natural lighting by a window makes those berry colors pop in photos!
If you loved this recipe as much as I do, I’d be thrilled if you could:
- Leave a star rating (those little stars make my day!)
- Pin it to your dessert board for later
- Share with friends who need berry goodness in their life
Your feedback helps me create more recipes you’ll love. Plus, your berry combos might just inspire my next batch – last week a reader suggested adding rhubarb and now I’m obsessed! Happy baking, friends – may your crumble always be buttery and your berries always juicy!
Print
Irresistible Berry Crumble Bars – Gluten-Free Bliss in 40 Minutes
- Total Time: 50 minutes
- Yield: 9 bars 1x
- Diet: Gluten Free
Description
Berry crumble bars are a delicious gluten-free dessert with a buttery crust and fruity filling.
Ingredients
- 2 cups gluten-free flour
- 1/2 cup sugar
- 1/2 tsp salt
- 1/2 cup cold butter, cubed
- 1 egg
- 2 cups mixed berries
- 1 tbsp lemon juice
- 1/4 cup sugar
- 1 tbsp cornstarch
Instructions
- Preheat oven to 350°F (175°C).
- Mix flour, sugar, and salt in a bowl.
- Cut in butter until crumbly.
- Press half the mixture into a greased 8×8 pan.
- Combine berries, lemon juice, sugar, and cornstarch.
- Spread berry mixture over crust.
- Sprinkle remaining crumb mixture on top.
- Bake for 35-40 minutes until golden.
- Cool before cutting into bars.
Notes
- Use fresh or frozen berries.
- Store in an airtight container for up to 3 days.
- Prep Time: 15 minutes
- Cook Time: 35 minutes
- Category: Dessert
- Method: Baking
- Cuisine: American
Nutrition
- Serving Size: 1 bar
- Calories: 220
- Sugar: 15g
- Sodium: 150mg
- Fat: 10g
- Saturated Fat: 6g
- Unsaturated Fat: 3g
- Trans Fat: 0g
- Carbohydrates: 30g
- Fiber: 2g
- Protein: 2g
- Cholesterol: 35mg