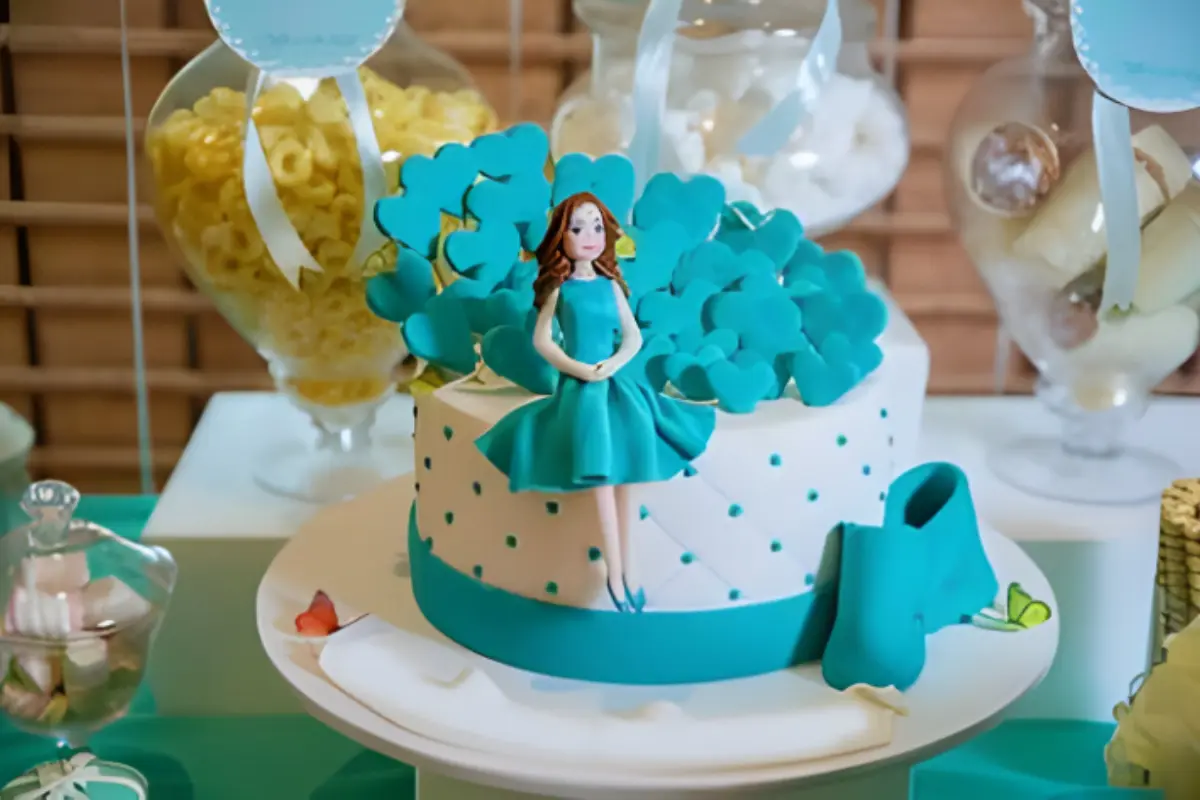
Creating a Barbie cake is more than just baking; it’s an art form that brings joy and wonder to any celebration. This iconic cake, shaped to resemble the beloved Barbie doll, has become a staple at birthday parties and special events, captivating the hearts of both young and old. In this comprehensive guide, we’ll walk you through every step of creating your very own Barbie cake, from gathering your ingredients and tools to the final, breathtaking reveal. Whether you’re a seasoned baker or a first-timer, our tips, tricks, and step-by-step instructions will help you craft a masterpiece that’s as delightful to look at as it is to eat. So, let’s dive into the world of cake artistry and make some magic happen!
Part 1: Introduction to Making a Barbie Cake
Introduction
Ah, the Barbie cake! It’s not just any cake; it’s a fantastical creation that turns an ordinary celebration into something truly memorable. But before you start envisioning the smiles and gasps of delight, let’s talk about what you’ll need to embark on this cake-decorating adventure.
Ingredients
First things first: the ingredients. You’ll need a robust 3-layer cake recipe or two boxes of your favorite cake mix. The choice of flavor is yours, but let’s be honest, a strawberry pink hue does add that extra Barbie-esque charm. For the frosting, you can go classic with buttercream or get fancy with a strawberry frosting for that crumb coat and those adorable rosettes. Remember, the key to a great cake is not just how it looks but how it tastes.
Tools and Equipment
Now, onto the tools of the trade. You might think you need a magic wand to create a Barbie cake, but all it really takes are some basic baking tools. A Bundt Cake Recipes – Master Baking & Decorating, a couple of 6-inch round cake pans, and, of course, a Barbie doll (preferably one that doesn’t mind getting a bit of frosting on her feet) are essential. For the decoration phase, arm yourself with piping bags, a variety of tips, and a steady hand. Oh, and don’t forget the food coloring to achieve that perfect shade of pink!
In the next sections, we’ll dive deeper into each step, ensuring you have all the guidance you need to bring your Barbie cake to life. So, tie on your apron, preheat your oven, and let’s get baking!
Part 2: Ingredients and Tools Needed
Ingredients
Crafting a Barbie cake is akin to painting a masterpiece, where your ingredients are your palette. To start, you’ll need a canvas of cake. Opt for a 3-layer strawberry cake recipe or, for those in a pinch, two boxes of cake mix will do the trick. The goal? A cake that’s not only tall enough to accommodate Barbie’s legs but also deliciously memorable.
For the frosting, the world is your oyster. A strawberry frosting works wonders for the crumb coat and in-between layers, offering a burst of flavor and a nod to our pink theme. However, for the exterior, a sturdy buttercream frosting is your best bet, especially for piping those intricate rosettes. Remember, you’re aiming for a balance of taste and texture, so choose ingredients that will complement each other and stand up to the task of decoration.
Tools and Equipment
Now, let’s talk tools. No need to break the bank, but a few key items will make your cake-baking journey smoother. A bundt pan and two 6-inch round cake pans are essential for shaping your cake. And don’t overlook the importance of parchment paper and non-stick spray to ensure your cake layers come out clean and intact.
When it comes to decorating, precision is key. A set of piping bags and a variety of tips (think rosettes and stars) will allow you to add those beautiful details that make a Barbie cake truly stand out. And, of course, a Barbie doll — choose one that matches the birthday girl’s or boy’s preference, and you’re all set.
Armed with the right ingredients and tools, you’re well on your way to creating a Barbie cake that’s as stunning as it is sweet. In the next part, we’ll dive into the baking and assembling process, where the real fun begins. So, gather your supplies, and let’s turn that kitchen into a cake-decorating studio!
Part 3: Step-by-Step Guide
Preparing the Cake
Alright, let’s roll up our sleeves and get down to the nitty-gritty of baking this showstopper. First off, whip up your cake batter using either a Ultimate Bundt Cake Guide or those handy cake mixes. The aim here is to create a base that’s both flavorful and sturdy enough to support our Barbie centerpiece.
- Bake the Base: Grease your bundt pan and two 6-inch round cake pans. Pour the batter into these pans, filling them about two-thirds full to allow for rising. The bundt pan will form the skirt of Barbie’s dress, while the round pans will add height and shape to the ensemble.
- Oven Time: Bake at 350°F (175°C) until the edges are golden and a toothpick inserted into the center comes out clean. The smaller cakes will likely bake quicker, so keep an eye on them!
- Cooling Phase: Let the cakes cool in their pans for a bit before transferring them to a wire rack. This step is crucial for a smooth assembly process later on.
Assembling the Cake
Now, for the exciting part — bringing Barbie into the picture!
- Layering Up: Once cooled, it’s time to stack your cakes. If you’ve opted for the bundt pan, place the bundt cake as the base. Then, layer the 6-inch cakes on top, trimming if necessary to ensure Barbie fits snugly in the center.
- Inserting Barbie: Before Barbie makes her grand entrance, wrap her legs in plastic wrap for hygiene. Then, carefully insert her into the center of the cake. It might take a bit of maneuvering, but with a gentle touch, she’ll fit right in.
Decorating the Cake
With Barbie in place, it’s time to unleash your inner artist.
- Frosting: Start with a crumb coat of strawberry frosting to smooth out any imperfections and to give the cake a crumb-free base for decorating. Let it chill in the fridge to set.
- Piping Rosettes: Using your buttercream frosting, pipe rosettes starting from the base of the cake and working your way up. For an ombre effect, gradually lighten the color of your frosting as you ascend. This technique adds depth and drama to Barbie’s gown.
- Adding Details: Don’t forget to decorate Barbie’s bodice. You can pipe additional frosting to create a top for Barbie or use fondant for a more sculpted look. Add any final touches with edible glitter, pearls, or flowers to bring the entire look together.
Voilà! You’ve now created a breathtaking Barbie cake that’s sure to be the centerpiece of any celebration. In the next part, we’ll cover some expert tips and tricks to ensure your cake is not only beautiful but also structurally sound. Stay tuned, and remember, the key to a great cake is patience, creativity, and a sprinkle of fun!
Part 4: Expert Tips and Tricks
Expert Baking Tips
Baking a Barbie cake is an adventure, and like any good adventure, it comes with its challenges. But fear not! With these expert tips, you’ll navigate the baking process like a pro.
- Even Baking: To prevent doming, which can make layering tricky, use baking strips around your pans. This little trick promotes even baking and results in flat, stackable cakes.
- Moisture is Key: Nobody likes a dry cake. To keep your cake moist, consider brushing each layer with a simple syrup before assembling. It’s a game-changer, especially if you’re baking a day ahead.
- Cooling Matters: Patience is a virtue, especially in baking. Allow your cakes to cool completely before assembly and decoration. This prevents the frosting from melting and ensures a smooth decorating process.
Decorating Like a Pro
Now, onto the fun part — decorating! Here’s how to ensure your Barbie cake looks as good as it tastes.
- Stable Foundation: Use a dab of frosting to “glue” your first cake layer to the cake board. This prevents the cake from sliding around as you decorate.
- Crumb Coat: Don’t skip the crumb coat. This initial thin layer of frosting catches any loose crumbs and creates a smooth base for your final layer of frosting or fondant.
- Piping Perfection: Practice your piping techniques before you start decorating the actual cake. Get comfortable with the pressure needed to create even, consistent rosettes or stars. Remember, confidence is key!
- Color Gradation: For an ombre effect, start with your darkest shade at the bottom and gradually add more white frosting to lighten the color as you move up the cake. This creates a stunning visual impact that’s sure to wow.
Decorating a cake is an art, and like all art, it takes time to perfect. So, give yourself grace, experiment, and most importantly, have fun with it. After all, it’s not just about the final product but the joy and creativity you bring to the process.
In the next part, we’ll dive into some frequently asked questions about making a Barbie cake, ensuring you’re fully equipped to tackle this baking project with confidence. Stay tuned for invaluable insights that will help you avoid common pitfalls and achieve baking success!
Part 5: FAQs
Creating a Barbie cake can spark a lot of questions, especially if it’s your first time tackling this iconic bake. Here, we’ll address some of the most common queries to help smooth out any wrinkles in your cake-making journey.
Can you use a Bundt pan for a Barbie cake?
Absolutely! A Bundt pan is actually an excellent choice for the base of your Barbie cake. It creates a natural skirt shape for Barbie’s dress. Just ensure the cake is tall enough to cover Barbie’s legs. You might need to add additional layers from round cake pans to achieve the desired height.
How do you put a Barbie in a cake?
First, wrap Barbie’s legs in plastic wrap to keep things hygienic. If you’ve used a Bundt cake as the base, you’ll have a natural cavity to insert the doll. For layered round cakes, carefully carve a hole in the center of your stacked cakes before inserting Barbie. It’s a bit like fitting Cinderella into her glass slipper; a snug fit is what you’re aiming for.
How many people does a Barbie doll cake feed?
This largely depends on the size of your cake and how generously you slice it. A standard Barbie cake, utilizing a Bundt pan and two 6-inch layers, can easily serve up to 20-25 guests. If you’re expecting a larger crowd, consider making a wider base or additional side cakes to ensure there’s enough to go around.
Wrapping Up
Tackling a Barbie cake might seem daunting at first, but with the right preparation and a sprinkle of creativity, it’s an incredibly rewarding project. Remember, the most important ingredients are patience and fun. Don’t stress over perfection; it’s the love and effort you put into the cake that truly make it special.
In our next section, we’ll explore some LSI and NLP keywords to help your Barbie cake adventures reach even more eager bakers online. Stay tuned for the final touches that will make your cake-baking story as engaging to read about as it is to eat!
Part 6: LSI and NLP Keywords
In the digital age, sharing your Barbie cake masterpiece online can inspire others and showcase your baking talents. To ensure your content reaches a wider audience, incorporating LSI (Latent Semantic Indexing) and NLP (Natural Language Processing) keywords is crucial. These keywords help search engines understand the context of your content, making it more discoverable to those seeking baking inspiration.
Incorporating Keywords
When writing about your Barbie cake experience, sprinkle these LSI and NLP keywords throughout your content:
- Princess cake tutorial
- DIY doll cake
- Easy cake decorating
- Homemade birthday cake ideas
- Ultimate Barbie Cake Guide
- Buttercream frosting techniques
- Cake design for beginners
- Edible cake decorations
Using these keywords not only helps your content rank better in search results but also ensures it resonates with readers searching for baking tips, cake decorating ideas, or simply looking for their next creative project.
SEO Best Practices
To maximize the impact of your keywords:
- Use Naturally: Integrate keywords smoothly into your content. They should enhance, not detract from, the reader’s experience.
- Focus on Quality: Provide valuable, engaging content. High-quality content that addresses readers’ needs and interests ranks better.
- Optimize Your Images: If you’re posting photos of your Barbie cake, use keywords in the image file names and alt text to improve SEO.
By following these guidelines and incorporating relevant keywords, your Barbie cake adventure can inspire a wider audience, sharing the joy of baking with fellow enthusiasts around the globe.
In the final part of our guide, we’ll conclude with some additional resources and final thoughts to ensure your Barbie cake journey is as sweet and rewarding as the cake itself. Stay tuned for the cherry on top of this baking adventure!
Part 7: Conclusion and Additional Resources
Congratulations! You’ve journeyed through the whimsical world of creating a Barbie cake, from gathering your ingredients and tools to mastering the art of cake decoration. This cake isn’t just a treat for the taste buds; it’s a feast for the eyes and a testament to your creativity and dedication.
Wrapping Up
Creating a Barbie cake is more than just baking; it’s an act of love, a celebration of creativity, and a way to make special occasions even more memorable. Whether for a birthday, a party, or just because, this cake is sure to dazzle and delight. Remember, the most beautiful part of the process is the joy it brings — both in the making and the sharing.
Additional Resources
To further hone your cake decorating skills or explore more creative baking projects, check out these resources:
- Wilton Cake Decorating for tutorials, tips, and tools for cake decoration.
- Barbie Official Website to inspire your cake design with the latest Barbie styles and themes.
- Food Coloring Guide to choose the perfect shades for your cake.
These links will guide you to external resources that are not competitors but complementary to your cake-making journey, offering inspiration, instruction, and the tools to bring your creative visions to life.
Final Thoughts
As we conclude this guide, remember that every cake you bake is a story — a story of trial and error, of laughter and learning. The Barbie cake you’ve created is a chapter in your baking book, one filled with color, joy, and perhaps a sprinkle of magic. So, here’s to many more chapters of delicious creativity!
Thank you for following along on this sweet adventure. May your oven be warm, your frosting smooth, and your cakes ever so delightful. Happy baking!