Oh my gosh, let me tell you about the first time I fell head over heels for Easy Chicken Katsu! I was wandering through a tiny Tokyo side street after a long day of travel, starving and exhausted, when this incredible aroma stopped me in my tracks. Crispy, golden, and served with the most amazing tangy sauce – one bite of that Japanese-style fried chicken cutlet and I was hooked. Now it’s my go-to weeknight dinner when I need something quick but crave-worthy. The best part? That perfect crunch gives way to the juiciest chicken inside. Trust me, once you try this Easy Chicken Katsu at home, you’ll understand why it’s Japan’s ultimate comfort food!
Why You’ll Love This Easy Chicken Katsu

This recipe is my absolute weeknight hero, and here’s why:
- Crazy fast – From fridge to plate in under 30 minutes (even faster than takeout!)
- That *crunch* – Panko breadcrumbs create this magical crispy shell that shatters when you bite in
- Anything goes – Serve it over rice, in sandwiches, or chop it up for salads (my kids love it bento-box style)
- Foolproof crispy – Even if you’ve never fried anything before, this method works every single time
Seriously, it’s the kind of dish that’ll make you feel like a kitchen rockstar with minimal effort. The first time my neighbor tried it, she texted me “HOW?!” at 9pm – that’s the power of good katsu!
Ingredients for Easy Chicken Katsu
Grab these simple ingredients – I bet you have most already! The magic happens when they all work together:
- 2 boneless, skinless chicken breasts (pounded to 1/2-inch thickness – trust me, this matters!)
- 1 cup all-purpose flour (for that perfect first coating)
- 2 large eggs, beaten (room temp eggs stick better)
- 1 cup panko breadcrumbs (NOT regular breadcrumbs – we’ll talk why below)
- 1/2 tsp salt + 1/4 tsp black pepper (basic but essential)
- 1 cup vegetable oil (you want about 1-inch depth in your frying pan)
Ingredient Notes & Swaps
Okay, let’s geek out about ingredients for a sec! Panko is that Japanese-style breadcrumb that looks like little flakes – it stays extra crispy because it doesn’t absorb as much oil. If you absolutely can’t find it, regular breadcrumbs work in a pinch, but the texture won’t be as magical.
For my egg-free friends: Try using 1/4 cup milk or even mayo instead – weird but works! Need gluten-free? Swap the flour for rice flour and use GF panko (they make it now!). The oil can be any neutral high-heat oil – I sometimes use peanut oil when I’m feeling fancy.
How to Make Easy Chicken Katsu
Alright, let’s get frying! This method is foolproof if you follow these steps – I’ve made this dozens of times and it never fails me. The key is moving quickly but carefully, especially when handling that gorgeous crispy coating.
Step 1: Prep the Chicken
First things first – grab those chicken breasts and let’s flatten them out. Place them between two sheets of plastic wrap (trust me, this saves cleanup!) and pound them to an even 1/2-inch thickness. I use a rolling pin or even a heavy skillet if my meat mallet’s hiding. Even thickness = even cooking. Pat them dry with paper towels – moisture is the enemy of crispiness!
Step 2: Bread Like a Pro
Now for the fun part! Set up your breading station: flour on one plate, beaten eggs in a shallow bowl, panko on another plate. Here’s my secret: use one hand for dry ingredients and one for wet to avoid “club fingers” (you’ll thank me later). Coat each piece first in flour (shake off excess), then egg (let excess drip off), then press firmly into panko. Really press those crumbs in – this gives you that signature crunch!
Step 3: Fry to Golden Perfection
Heat about 1-inch of oil in a heavy skillet over medium heat. Test it’s ready by dropping in a panko crumb – if it sizzles immediately, you’re golden (literally!). Carefully add chicken – don’t crowd the pan! Fry 3-4 minutes per side until deeply golden brown. Resist flipping early – let that crust form! Drain on a wire rack (not paper towels – keeps underside crispy). Listen for that satisfying “crunch” when you cut into it – that’s how you know you nailed it!

Expert Tips for the Best Easy Chicken Katsu
Here’s all my hard-earned katsu wisdom from years of trial and (delicious) error! First up: double coating – after your first egg dip, do a quick second round of panko for extra crunch. Game changer! Always use a wire rack to drain instead of paper towels – this keeps steam from making the bottom soggy (I learned this the hard way).
Invest in an instant-read thermometer – chicken’s done at 165°F internally, but pull it at 160°F since it keeps cooking. And here’s my weird trick: let the breaded chicken rest 5 minutes before frying – helps the coating stick better. Oh, and if your oil starts smoking? Immediately lower heat and add a bit more fresh oil. Your katsu should be golden, not burnt!
Serving Your Easy Chicken Katsu
Now comes the best part – loading up your plate! My absolute must-have is tonkatsu sauce (find it in Asian markets or make your own with Worcestershire, ketchup, and soy sauce). Pile that golden katsu over steaming white rice with a heap of shredded cabbage – the cool crunch balances the crispy chicken perfectly. Feeling fancy? Add miso soup and pickled ginger for a full Japanese diner experience at home!
Storing and Reheating Easy Chicken Katsu
Leftovers? No problem! Store cooled katsu in an airtight container in the fridge for up to 3 days. Never microwave – it turns that beautiful crisp into sad sogginess. Instead, reheat in a 375°F air fryer for 3-4 minutes (flip halfway!) to bring back the crunch. For oven folks, 10 minutes at 375°F on a wire rack works too. Pro tip: If the breading looks dry, spritz lightly with oil before reheating!
Easy Chicken Katsu FAQs
I get asked these questions all the time – here’s everything I’ve learned from my katsu adventures!
Can I bake instead of fry? Absolutely! Bake at 400°F on a wire rack for 20-25 minutes, flipping halfway. Spray with oil first for better browning – but fair warning, it won’t be quite as crispy as fried.
How thin should the chicken be? Aim for 1/2-inch thickness after pounding. Any thicker and the coating burns before the chicken cooks through. Any thinner and it dries out too fast!
Best panko brand? I swear by JFC Premium Panko (the blue bag) – extra flaky and golden. But any Japanese brand beats regular breadcrumbs. Store opened panko in the freezer to keep it fresh!
Can I use chicken thighs? Yes! Thighs stay juicier, but trim excess fat and pound slightly thinner since they’re denser.
Nutritional Information for Easy Chicken Katsu
Here’s the scoop on what’s in that crispy deliciousness! A single serving (one glorious cutlet) comes in around 420 calories – but remember, these are estimates. The exact numbers change based on how much oil your chicken absorbs (I’ve found it’s usually less than you’d think!). You’re looking at about 35g of protein per serving too – not bad for something this tasty!
Did your Easy Chicken Katsu turn out as golden and crispy as mine? I’d love to hear about it! Tag me in your kitchen adventures or leave a rating – your feedback makes my day! Check out more delicious recipes on Pinterest.
Print
Juicy 30-Minute Easy Chicken Katsu You’ll Crave
- Total Time: 23 mins
- Yield: 2 servings 1x
- Diet: Low Lactose
Description
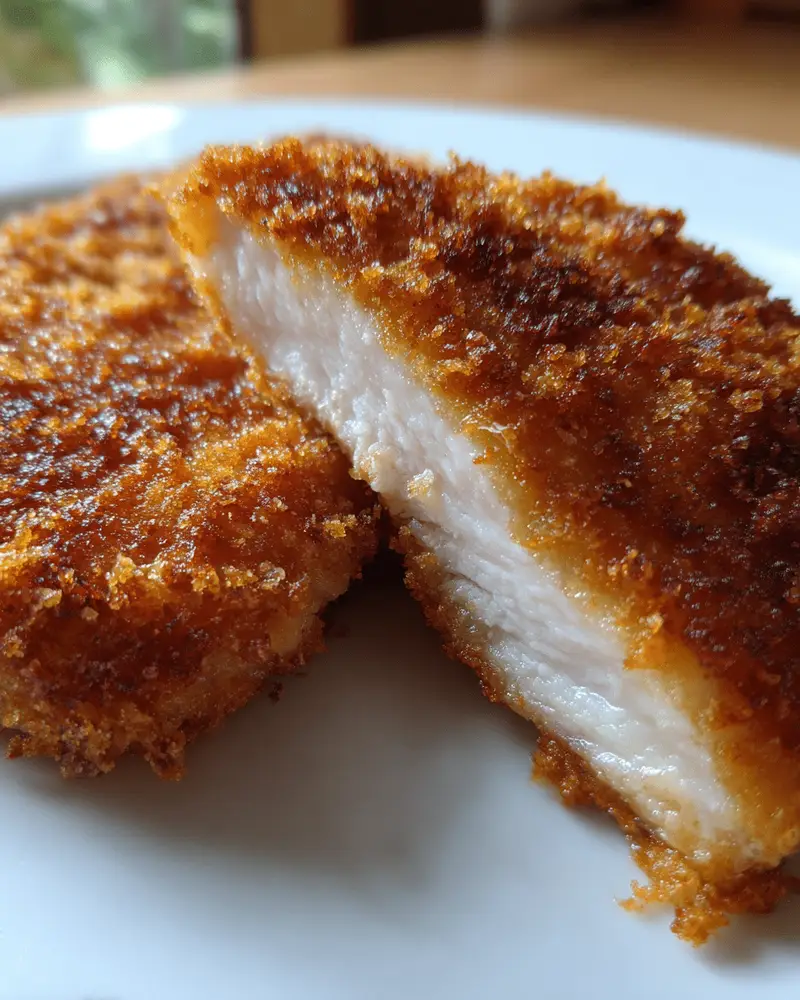
A simple and delicious Japanese-style fried chicken cutlet that’s crispy on the outside and juicy inside.
Ingredients
- 2 boneless, skinless chicken breasts
- 1 cup all-purpose flour
- 2 eggs, beaten
- 1 cup panko breadcrumbs
- 1/2 tsp salt
- 1/4 tsp black pepper
- 1 cup vegetable oil for frying
Instructions
- Pound chicken breasts to 1/2-inch thickness.
- Season chicken with salt and pepper.
- Dredge chicken in flour, then dip in beaten eggs.
- Coat chicken with panko breadcrumbs.
- Heat oil in a pan over medium heat.
- Fry chicken for 3-4 minutes per side until golden brown.
- Drain on paper towels before serving.
Notes
- Serve with tonkatsu sauce or ketchup.
- Use a meat thermometer to ensure chicken reaches 165°F.
- For extra crispiness, double coat with egg and breadcrumbs.
- Prep Time: 15 mins
- Cook Time: 8 mins
- Category: Main Dish
- Method: Pan-frying
- Cuisine: Japanese
Nutrition
- Serving Size: 1 cutlet
- Calories: 420
- Sugar: 1g
- Sodium: 350mg
- Fat: 18g
- Saturated Fat: 3g
- Unsaturated Fat: 12g
- Trans Fat: 0g
- Carbohydrates: 30g
- Fiber: 2g
- Protein: 35g
- Cholesterol: 180mg