Oh my gosh, you’ve got to try these mummy-wrapped foods—they’re the hit of every Halloween party I throw! I still remember the first time I made them for my son’s school bash. The kids went wild, and honestly? The teachers might’ve snuck a few extras when no one was looking. These little guys are so simple but look ridiculously fun, with the dough strips wrapped just right to look like tiny mummy bandages. Whether you’re hosting a spooky dinner or just want to surprise the family, these mummy-wrapped bites are guaranteed to disappear faster than a ghost in the night.
Why You’ll Love These Mummy-Wrapped Foods
Trust me, these adorable mummy bites aren’t just cute—they’re downright addictive! Here’s why they’ve become my go-to party trick:
- Instant crowd-pleaser: The “bandaged” look gets laughs every time—even from grown-ups pretending not to be amused
- Crazy versatile: Swap the fillings based on what’s in your fridge (my kids love pepperoni “mummies” for pizza night)
- Perfect party food: They bake up golden and stay warm in napkins—no messy plates!
- Kid-approved: Little hands can help wrap the dough strips (messy = more memories)
The best part? You probably have everything you need already—just raid that leftover rotisserie chicken!
Ingredients for Mummy-Wrapped Foods
Grab these simple ingredients—you might already have most in your kitchen! The beauty of this recipe is how forgiving it is, but here’s what I always use for the tastiest mummy wraps:
- 1 package puff pastry or pizza dough (thawed if frozen—trust me, wrestling with frozen dough is scarier than any mummy!)
- 1 cup cooked and diced meat (chicken, beef, or sausage work great—leftovers are perfect here)
- 1/2 cup shredded cheese (I’m partial to sharp cheddar, but use what melts best for you)
- 1 large egg (for that gorgeous golden egg wash—don’t skip this!)
- 2 tbsp olive oil (helps crisp up those “bandages”)
- 1 tsp salt (I use kosher—it distributes better)
- 1 tsp black pepper (freshly cracked adds the best flavor)
Ingredient Notes & Substitutions
Here’s where you can get creative with your mummy wraps—I’ve tried all these swaps with great success:
- Vegetarian? Skip the meat and use roasted veggies (zucchini and mushrooms are my fave) or just go extra cheesy!
- Gluten-free? Many stores now carry GF puff pastry or pizza dough—just check the baking time as it may differ slightly.
- Dairy-free? Nutritional yeast gives a cheesy flavor without actual cheese, or use your favorite vegan shreds.
Important safety tip: Always use pre-cooked meat since baking time is short—raw chicken mummies would be a Halloween horror we don’t want! I often use last night’s grilled chicken or even deli meat in a pinch.
Equipment You’ll Need
Don’t worry—you won’t need any fancy gadgets for these mummy wraps! Just gather these basic kitchen tools (I bet most are already in your drawers):
- Baking sheet: Any standard size works—no need for perfection here
- Parchment paper: Lifesaver for easy cleanup and no stuck-on “mummy bandages”
- Pastry brush: That $2 one from the grocery store is fine—just needs to spread egg wash
- Sharp knife: For cutting dough strips (a pizza cutter works great too!)
- Rolling pin: If you don’t have one, a wine bottle works in a pinch—I’ve done it!
See? Nothing scary about this equipment list. Now let’s get wrapping!
How to Make Mummy-Wrapped Foods
Okay, let’s get wrapping! These steps are so simple—my 7-year-old could do them (and often does). Just follow along, and you’ll have a tray of adorable mummies ready before you can say “Boo!”
Step 1: Prep the Dough and Filling
First things first—preheat that oven to 375°F (190°C). While it’s warming up, let’s tackle the dough. Lay it out on a lightly floured surface and roll it to about 1/8-inch thickness—think thick enough to hold filling but thin enough to crisp beautifully.
Now grab that sharp knife or pizza cutter and slice the dough into strips about 1/2-inch wide. They don’t need to be perfect—crooked “bandages” look even more mummy-like! Cut your cooked meat into tiny bite-sized pieces (about 1/2-inch cubes) so they’ll be easy to wrap.
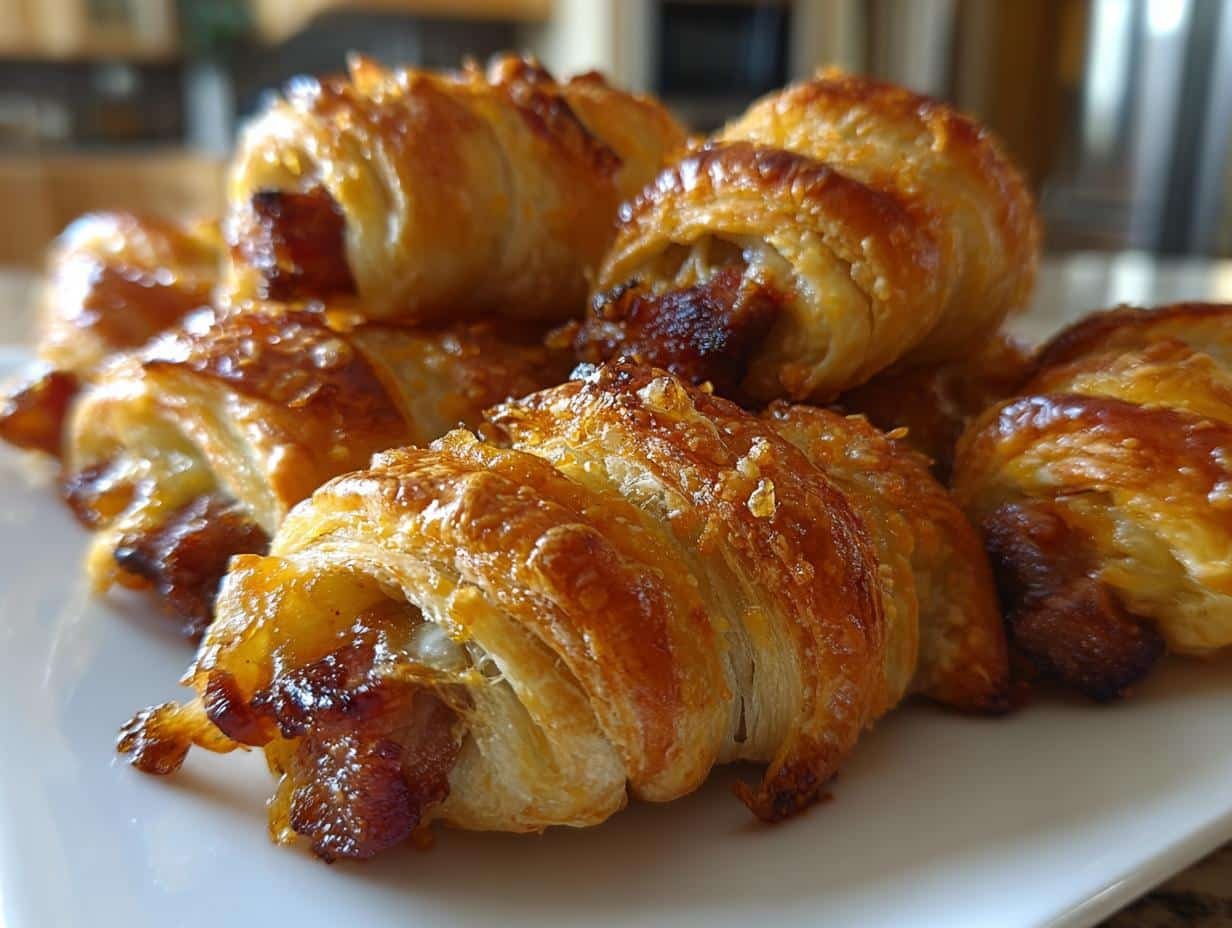
Step 2: Wrap Like a Mummy
Here comes the fun part! Place a piece of meat on your work surface and start crisscrossing dough strips over it. The key is to leave little gaps between strips—that’s what gives them that authentic unraveled-mummy look.
Leave one end of the meat peeking out slightly—this will be your mummy’s “face” (you can add tiny mustard eyes later if you’re feeling fancy). Don’t worry if some wraps look messy—real mummies weren’t exactly neat freaks!
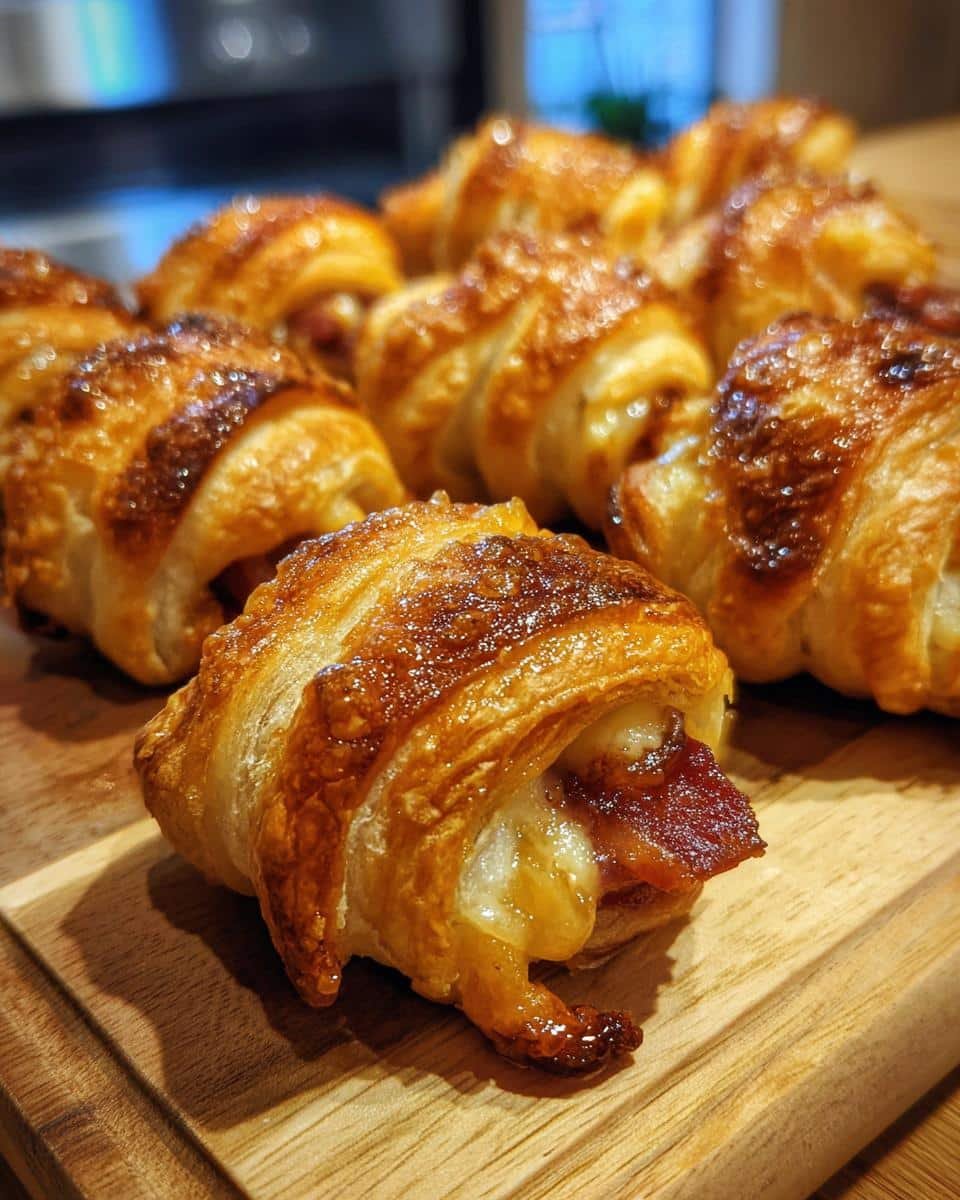
Step 3: Bake to Golden Perfection
Line your baking sheet with parchment (seriously, this prevents mummy tragedies!) and arrange your little wrapped guys about an inch apart. Now whisk that egg with a teaspoon of water and gently brush it over all exposed dough—this gives them that gorgeous golden glow.
Pop them in the oven for 15-20 minutes. You’ll know they’re done when the “bandages” turn a beautiful golden brown and smell irresistible. Pro tip: Rotate the pan halfway through for even browning—though slightly uneven baking adds character!
Tips for Perfect Mummy-Wrapped Foods
After making these adorable mummies more times than I can count (and yes, sometimes they don’t turn out perfect—oops!), I’ve picked up some foolproof tricks to make yours shine:
- Chill the dough first: If your dough feels sticky, pop it in the fridge for 15 minutes—it’ll be easier to handle and hold its shape better as “bandages.”
- Don’t crowd the pan: Give each mummy some breathing room (about an inch apart) so they crisp up evenly instead of steaming together.
- Peek-a-boo test: Lift one gently with a spatula at 15 minutes—the bottom should be golden, not pale. If it needs more time, just give it another 2-3 minutes.
- Extra crispy trick: For crunchier wraps, brush with olive oil instead of egg wash—my husband swears by this version.
- Emergency save: If some strips unravel while baking (it happens!), just press them back gently with a fork—they’ll still taste amazing.
Remember—even “imperfect” mummies disappear just as fast! The key is to have fun with it.
Serving Suggestions for Mummy-Wrapped Foods
Now for the best part—showing off your adorable mummy creations! Here’s how I love to serve them so they really steal the spotlight at any gathering:
- Dipping drama: Serve with small bowls of marinara (“blood sauce”), ranch (“mummy slime”), or even sriracha mayo for grown-ups who like heat. I sometimes drizzle the sauces in zigzags for extra spooky effect!
- Spooky plating: Arrange them on a black serving tray with “bandage” strips of parchment paper underneath. Last year I drew little red food coloring eyes on the exposed meat ends—the kids went nuts!
- Monster mash-up: Pair with other Halloween snacks like “witches’ finger” breadsticks or “eyeball” meatballs for a full monster-themed spread.
- Quick upgrade: Right before serving, sprinkle with chopped parsley or chives—the green makes a great contrast against the golden “bandages.”
My favorite trick? Labeling the platter with a sign that says “Mummy’s Little Helpers”—always gets a laugh! Whether it’s a kids’ party or an adults-only Halloween bash, these presentation touches take your mummy wraps from cute to unforgettable.

Storing and Reheating
Okay, confession time—I rarely have leftovers of these mummy wraps because they vanish so fast! But when I do (usually because I made a double batch—smart move!), here’s how I keep them tasting fresh:
Fridge storage: Let your mummies cool completely, then tuck them into an airtight container with parchment between layers. They’ll stay happy for about 3 days—any longer and the “bandages” start losing their crispness. I’ve tried freezing them, but honestly? The texture’s never quite the same after thawing.
Reheating magic: Skip the microwave unless you want soggy mummies! Instead, pop them on a baking sheet in a 350°F (175°C) oven for 5-7 minutes. That quick blast brings back their golden crispness beautifully. If they’re looking a little pale, a quick brush with olive oil before reheating works wonders.
Pro tip: If you’re reheating a whole tray for a party, cover loosely with foil for the first few minutes to prevent over-browning, then uncover for the last minute or two. This keeps them warm without turning the “bandages” into charcoal!
Nutritional Information
Now, I’m no nutritionist—just a home cook who loves good food—but here’s the general breakdown per mummy wrap. Remember, these are estimates (my grandma always said, “Recipes are guidelines, not rulers!”) and will change based on your exact ingredients and how generous you are with the cheese (no judgment here!).
- Calories: About 120 per piece—perfect for popping several without guilt!
- Protein: 5g (that meaty filling keeps you satisfied)
- Carbs: 10g (mostly from that flaky, golden dough we love)
- Fat: 8g (thank the butter in the pastry and that melty cheese)
- Fiber: 1g (hey, every bit counts when you’re eating mummies!)
- Sugar: Just 1g (unless you go wild with sweet dipping sauces)
Important note: These numbers can swing based on whether you use puff pastry vs. pizza dough, or chicken vs. beef. My advice? Enjoy them without overthinking—life’s too short to count every calorie when you’re eating something this fun!
FAQs About Mummy-Wrapped Foods
I get so many questions about these adorable mummy bites every Halloween—here are the answers to the ones I hear most often from fellow home cooks!
Can I freeze mummy-wrapped foods before baking?
Absolutely! I do this all the time when prepping for parties. Just assemble them as usual, arrange on a parchment-lined tray, and freeze solid before transferring to a freezer bag. No thawing needed—just add 2-3 extra minutes to the baking time straight from the freezer. The dough might not get quite as golden, but they’ll still taste amazing!
What’s the best meat substitute for vegetarian mummies?
Oh, I’ve experimented with this a ton! My favorite is roasted mushrooms—they have that meaty texture when baked. Marinated tofu cubes work great too (press them well first!). For a quick fix, canned chickpeas mashed with some seasoning make surprisingly tasty little mummy “bodies.” The kids never guess they’re plant-based!
Help! My dough strips keep breaking—what am I doing wrong?
Don’t worry—this happened to me constantly at first! The secret is making sure your dough isn’t too cold (it cracks) or too warm (it stretches weirdly). If it keeps snapping, let it sit at room temp for 5 minutes. And remember—imperfect “bandages” look more authentic anyway!
Can I make these ahead for a party?
You bet! I bake them up to 6 hours in advance, let them cool completely, then reheat in a 300°F oven for 3-4 minutes before serving. They’ll crisp right back up. Just don’t add any sauce until the last minute—nobody likes a soggy mummy!
Why do mine sometimes come out soggy on the bottom?
Ah, the dreaded sogginess! Two tricks: 1) Make sure your baking sheet is preheated for 5 minutes before adding the mummies (I pop it in while the oven heats), and 2) If using juicy fillings like fresh mozzarella, pat them dry first. A little cornmeal sprinkled on the parchment works magic too!
Final Thoughts
Well, there you have it—my foolproof way to create these adorable mummy-wrapped foods that always steal the show! I can’t wait for you to try them and see those smiles (and maybe some silly monster noises) around your table. Honestly? The messier the wrapping process gets, the better—those imperfect little mummies always have the most character.
Tag me if you share photos of your creations—I live for seeing everyone’s variations! Last year a reader sent me a picture of her “zombie mummies” with olives for eyes, and I’ve been obsessed ever since. Whether you stick to my classic version or go wild with your own fillings and decorations, I just know these will become your new Halloween tradition too. You can find more fun ideas on Pinterest!
Now go raid that fridge, grab that rolling pin, and let’s make some deliciously spooky memories together. Happy wrapping!
Print
Spooky Mummy-Wrapped Foods That Will Haunt Your Taste Buds
- Total Time: 35 minutes
- Yield: 12 pieces 1x
- Diet: Vegetarian
Description
A creative way to present and serve foods wrapped in dough, resembling mummy bandages, perfect for themed parties or fun family meals.
Ingredients
- 1 package puff pastry or pizza dough
- 1 cup cooked meat (chicken, beef, or sausage)
- 1/2 cup shredded cheese
- 1 egg (for egg wash)
- 2 tbsp olive oil
- 1 tsp salt
- 1 tsp black pepper
Instructions
- Preheat your oven to 375°F (190°C).
- Roll out the puff pastry or pizza dough into thin strips.
- Cut the cooked meat into small, bite-sized pieces.
- Wrap the dough strips around the meat pieces, leaving small gaps to resemble mummy bandages.
- Place the wrapped pieces on a baking sheet lined with parchment paper.
- Brush the dough with egg wash for a golden finish.
- Bake for 15-20 minutes or until the dough is golden brown.
- Serve warm with dipping sauce.
Notes
- Use pre-cooked meat to ensure food safety.
- Experiment with different fillings like cheese or vegetables.
- For a crispier texture, bake at a higher temperature for less time.
- Prep Time: 15 minutes
- Cook Time: 20 minutes
- Category: Appetizer
- Method: Baking
- Cuisine: International
Nutrition
- Serving Size: 1 piece
- Calories: 120
- Sugar: 1g
- Sodium: 200mg
- Fat: 8g
- Saturated Fat: 3g
- Unsaturated Fat: 4g
- Trans Fat: 0g
- Carbohydrates: 10g
- Fiber: 1g
- Protein: 5g
- Cholesterol: 25mg