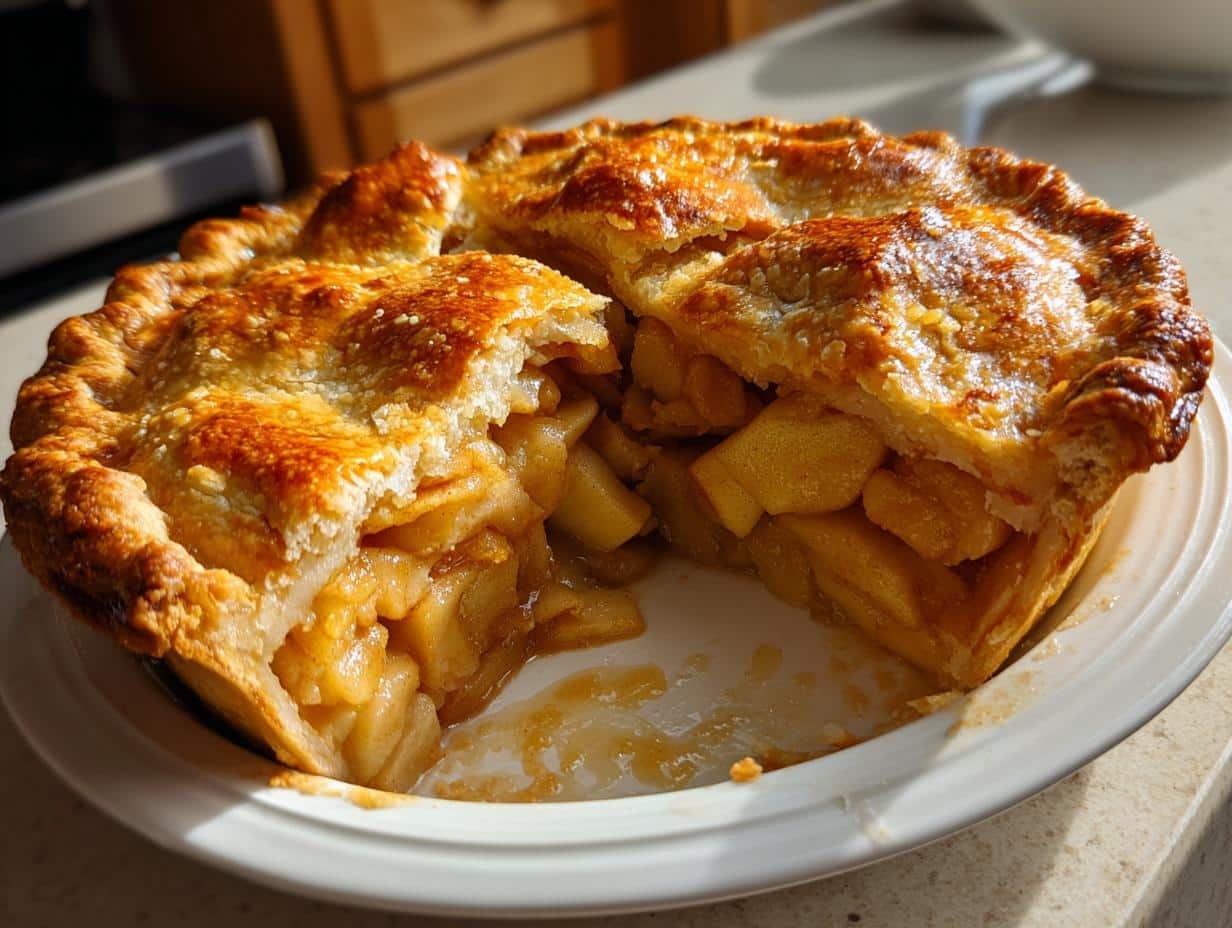
There’s something magical about the scent of a Homemade Apple Pie with Flaky Butter Crust wafting through the kitchen. It takes me right back to my grandma’s house every autumn, where she’d pull golden pies from the oven while telling me her secret – “Cold butter makes the flakes, darling!” That crisp, buttery crust shattered into delicate layers with each forkful, giving way to spiced apples that were sweet but never cloying.
This recipe holds generations of wisdom in its simplicity. No fancy gadgets needed – just good old-fashioned elbow grease and patience. The magic happens when chilled butter meets flour, creating those irresistible pockets that puff up golden and crisp. And the filling? Tart Granny Smiths balanced with just enough sugar to let their natural brightness shine through.
What makes this pie special isn’t just the taste (though trust me, it’ll ruin store-bought versions forever). It’s the way the kitchen smells while it bakes, the satisfaction of slicing through that gorgeous lattice, and the inevitable chorus of “Mmm!” when you serve it warm with melting vanilla ice cream. This is the kind of dessert that turns an ordinary Tuesday into a celebration.
Why You’ll Love This Homemade Apple Pie with Flaky Butter Crust
This isn’t just any apple pie—it’s the kind that makes people pause mid-bite, fork hovering, with that “Oh wow” expression. Here’s why it’ll become your go-to dessert:
- That crust, though. The flaky layers practically sing when you break into them—shatteringly crisp, thanks to cold butter worked in just right. No sad, soggy bottoms here!
- Apples that hold their own. Tart Granny Smiths (or Honeycrisps if you’re feeling fancy) keep their shape and brightness, spiced with cinnamon and nutmeg like Grandma intended.
- Simplicity wins. No weird ingredients or fussy steps—just flour, butter, apples, and a little elbow grease. Even first-time pie makers nail this one.
- It smells like home. From the moment those spiced apples hit the buttery crust to the golden finish in the oven, your kitchen will smell like pure nostalgia.
Trust me, once you taste that first slice—warm, with melting ice cream pooling into the flaky crevices—you’ll understand why this recipe’s been passed down for generations.
Ingredients for Homemade Apple Pie with Flaky Butter Crust
Every great pie starts with great ingredients—and I’m picky about mine. Here’s what you’ll need to make magic happen (and why each one matters):
For the crust (the star of the show!):
- 2 1/2 cups all-purpose flour – Spoon and level it, don’t scoop! Too much flour makes tough crusts.
- 1 cup unsalted butter, chilled and cubed – Straight from the fridge is key. I cut mine into 1/2-inch pieces while humming show tunes to keep it cold.
- 1 tsp salt – Balances the sweetness and enhances flavor. No one wants a bland crust.
- 1 tbsp sugar – Just enough for subtle sweetness and golden color.
- 6-8 tbsp ice water – Seriously, toss an ice cube in your water glass. Warm water melts the butter pockets we need for flakiness.
For the filling (where the apples shine):
- 6 cups thinly sliced apples – Granny Smith’s my go-to for tartness, but Honeycrisp works if you like sweeter. Slice them 1/4-inch thick—too thin turns mushy.
- 3/4 cup sugar – Adjust up to 1 cup if your apples are extra tart, but I like mine bright.
- 2 tbsp lemon juice – Keeps apples from browning and adds zing. Fresh only—bottled tastes metallic.
- 1 tsp cinnamon + 1/4 tsp nutmeg – Warm spice perfection. Freshly grated nutmeg if you’re feeling fancy.
- 2 tbsp unsalted butter, diced – Tiny cubes dotted on top of the apples before sealing the pie. Melts into caramel-y pockets of joy.
See? No weird ingredients—just pantry staples transformed into something extraordinary. Now let’s get our hands floury!
Equipment You’ll Need
No fancy gadgets required—just a few trusty tools to make pie magic happen:
- 9-inch pie dish – Glass or ceramic works best for even browning (metal can make the crust too dark).
- Rolling pin – My grandma’s wooden one has seen decades of pies, but any sturdy pin will do.
- Large mixing bowl – For tossing apples and bringing the dough together.
- Pastry cutter or fork – To work that cold butter into the flour until it looks like coarse crumbs.
- Sharp knife – For slicing apples and cutting decorative vents in the top crust.
That’s it! Now let’s get to the fun part—making that glorious crust.
How to Make Homemade Apple Pie with Flaky Butter Crust
Alright, let’s dive into the good stuff! Making this pie feels like performing kitchen magic—simple steps, but wow do they transform humble ingredients into something spectacular. Follow these steps, and you’ll have everyone begging for your recipe.
Preparing the Crust
First rule: keep everything cold! I even chill my mixing bowl for 10 minutes before starting. Whisk together the flour, salt, and sugar, then toss in those chilled butter cubes. Now here’s the fun part—use your fingers or a pastry cutter to work the butter into the flour until it looks like coarse crumbs with pea-sized butter pieces still visible. Those butter pockets? That’s where our flakiness comes from!
Drizzle in ice water one tablespoon at a time, gently stirring with a fork until the dough just comes together. Squeeze a bit—if it holds its shape, you’re golden! Divide into two disks, wrap in plastic, and refrigerate for at least 30 minutes. (Confession: I’ve left mine overnight when prepping ahead—works like a charm!)
Assembling the Pie
Roll out your first disk on a floured surface until it’s about 12 inches across—don’t worry if it’s not perfect, rustic edges add charm! Gently drape it into your pie dish, letting the excess hang over the edges. Now toss those apple slices with sugar, lemon juice, and spices until they’re glossy and fragrant. Pile them high in the crust—they’ll settle as they bake.
Dot the top with those tiny butter cubes—this creates little pools of caramel magic. Roll out your second disk for the top crust, lay it over the apples, and crimp the edges together with your fingers or a fork. Don’t forget to cut a few slits in the top! I always make mine into a little star pattern—because why not?
Baking to Perfection
Pop that beauty into a preheated 375°F oven and resist the urge to open the door for at least 30 minutes! Around the 40-minute mark, start peeking—when the crust is deep golden and juices bubble through the vents, it’s done. The hardest part? Letting it cool for at least 2 hours before slicing. I know, torture! But trust me, that wait means neat slices instead of apple soup.
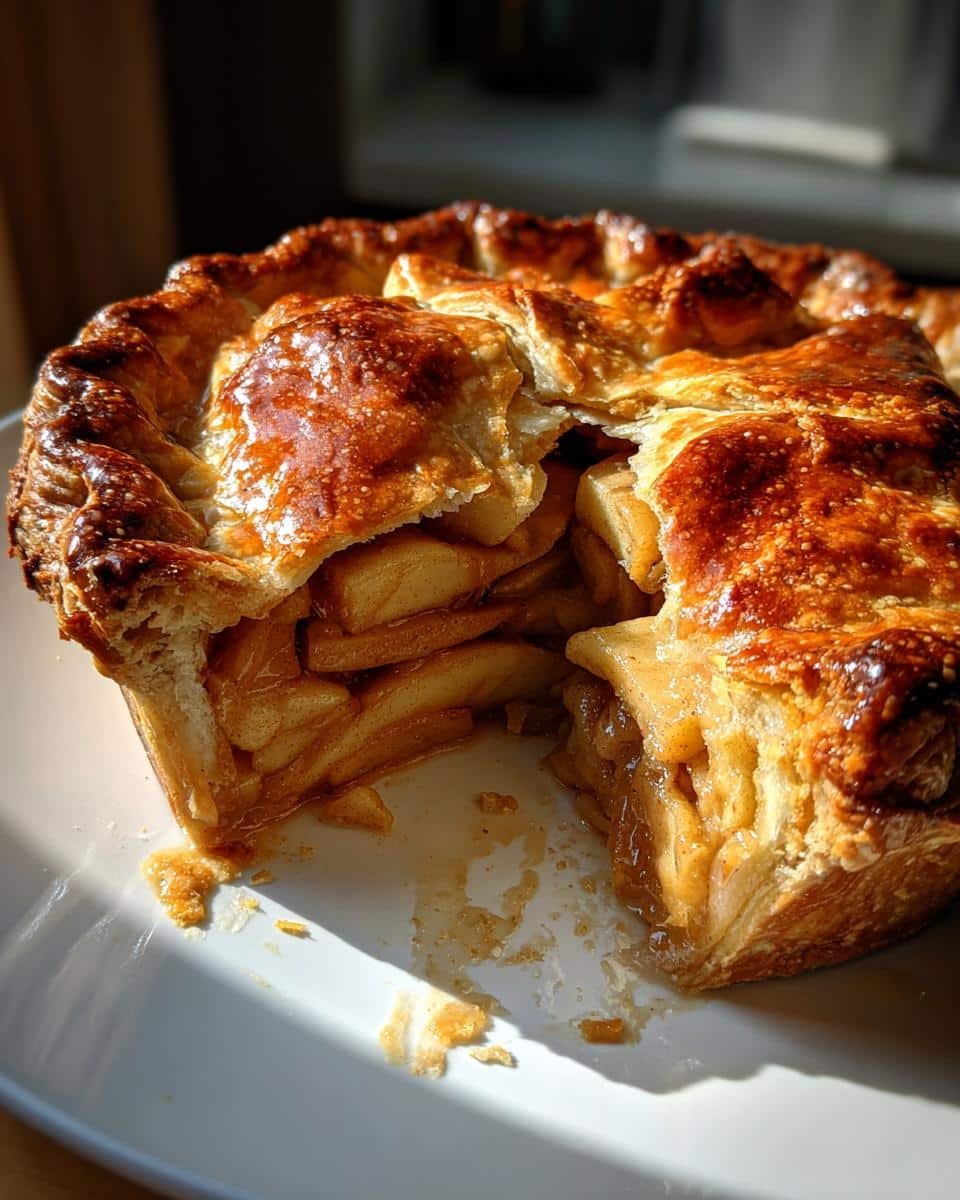
The reward? That first forkful of crisp, buttery crust giving way to spiced apples—absolute heaven. And the way your kitchen smells? Pure nostalgia in pastry form.
Tips for the Best Homemade Apple Pie with Flaky Butter Crust
After decades of pie-making triumphs (and yes, a few disasters), here are my foolproof secrets for apple pie perfection:
- Butter belongs in the fridge. Warm butter = sad, dense crust. I even chill my flour and bowl sometimes—that’s how serious I am about flakes!
- Slice apples just right. Too thin turns mushy, too thick stays crunchy. Aim for 1/4-inch slices—about the width of a pencil.
- Let it rest. I know it’s torture, but letting the pie cool for 2 hours means clean slices instead of apple lava. Worth it!
- Bottom crust insurance. Brush the bottom crust with egg white before adding filling—keeps it crisp even under juicy apples.
Oh! And always make extra dough—those buttery scraps bake into irresistible cinnamon-sugar cookies while you wait for the pie!
Serving Suggestions
Let’s be real—this pie is heavenly all on its own, but a scoop of vanilla ice cream melting into those flaky layers? Absolute perfection. For a cozy twist, try warm caramel drizzled over the top, or a dollop of barely-sweetened whipped cream with a sprinkle of cinnamon. Breakfast? (I won’t judge if you don’t!)
Storing and Reheating
This pie keeps beautifully at room temperature for 2 days—just cover it loosely with a clean towel. For longer storage, freeze the whole pie (or individual slices) wrapped tightly in plastic for up to 3 months. When that craving hits, reheat slices in a 350°F oven until the crust crisps up again—microwaving makes the crust soggy, and we can’t have that!
Nutritional Information
Now, let’s be honest—no one eats apple pie for its nutritional stats! But if you’re curious, the values will vary depending on your exact ingredients and serving size. The crust’s butter gives richness, while the apples add fiber and natural sweetness. It’s a treat meant to be savored, not scrutinized—so go ahead, enjoy that second slice with zero guilt!
FAQs About Homemade Apple Pie with Flaky Butter Crust
Over the years, I’ve fielded every apple pie question imaginable—here are the ones I hear most often, along with my tried-and-true solutions:
Q1. Can I use store-bought crust instead?
Technically? Yes. Emotionally? I’ll pretend you didn’t ask! The flaky butter crust MAKES this pie—those frozen ones can’t compare. But if you’re truly pressed for time, look for all-butter pastry in the freezer aisle (never the shortening-based ones).
Q2. How do I prevent a soggy bottom crust?
Three tricks: 1) Brush the unbaked bottom crust with egg white before adding filling—creates a moisture barrier. 2) Bake on the oven’s lower rack for the first 30 minutes. 3) Ensure your filling isn’t too wet—toss apples with sugar and let them sit 15 minutes, then drain any excess liquid.
Q3. Why did my filling turn watery?
Some apples (like McIntosh) break down too much. Stick with Granny Smith or Honeycrisp, slice them 1/4-inch thick, and never skip the lemon juice—it helps apples hold their structure.
Q4. Can I make this pie ahead?
Absolutely! Assemble the pie (unbaked) and freeze for up to 3 months—just add 10-15 minutes to baking time. Or refrigerate assembled pie overnight before baking—perfect for holiday prep!
Q5. My crust shrank—what went wrong?
You probably overworked the dough or didn’t let it rest enough before rolling. Chill the shaped crust in the pie dish for 15 minutes before filling—those gluten strands need to relax!
Share Your Creation
I’d love to see your masterpiece! Snap a pic of your flaky-crusted beauty and share it in the comments—did you go classic lattice or get creative with cutouts? Every pie tells a story, and I’m here cheering you on (and maybe drooling over your photos). Happy baking!
Print
Golden Homemade Apple Pie with 7 Secrets to Flaky Butter Crust Bliss
- Total Time: 1 hour 20 minutes
- Yield: 8 servings 1x
- Diet: Vegetarian
Description
A classic homemade apple pie with a flaky butter crust. Perfect for any occasion.
Ingredients
- 2 1/2 cups all-purpose flour
- 1 cup unsalted butter, chilled and cubed
- 1 tsp salt
- 1 tbsp sugar
- 6–8 tbsp ice water
- 6 cups thinly sliced apples (Granny Smith or Honeycrisp)
- 3/4 cup sugar
- 2 tbsp lemon juice
- 1 tsp cinnamon
- 1/4 tsp nutmeg
- 2 tbsp unsalted butter, diced
Instructions
- Preheat oven to 375°F (190°C).
- Mix flour, salt, and sugar in a bowl. Cut in chilled butter until crumbly.
- Add ice water, 1 tbsp at a time, until dough forms.
- Divide dough in half, shape into disks, and refrigerate for 30 minutes.
- Roll out one disk for the bottom crust and place in a pie dish.
- Toss apples with sugar, lemon juice, cinnamon, and nutmeg. Fill the crust.
- Dot with diced butter.
- Roll out the second disk for the top crust. Cover the pie and seal edges.
- Cut slits in the top crust for ventilation.
- Bake for 45-50 minutes until golden brown.
Notes
- Use cold butter for a flaky crust.
- Let pie cool before slicing to set the filling.
- Serve with vanilla ice cream if desired.
- Prep Time: 30 minutes
- Cook Time: 50 minutes
- Category: Dessert
- Method: Baking
- Cuisine: American
Nutrition
- Serving Size: 1 slice
- Calories: 320
- Sugar: 25g
- Sodium: 150mg
- Fat: 15g
- Saturated Fat: 9g
- Unsaturated Fat: 5g
- Trans Fat: 0g
- Carbohydrates: 45g
- Fiber: 3g
- Protein: 3g
- Cholesterol: 35mg