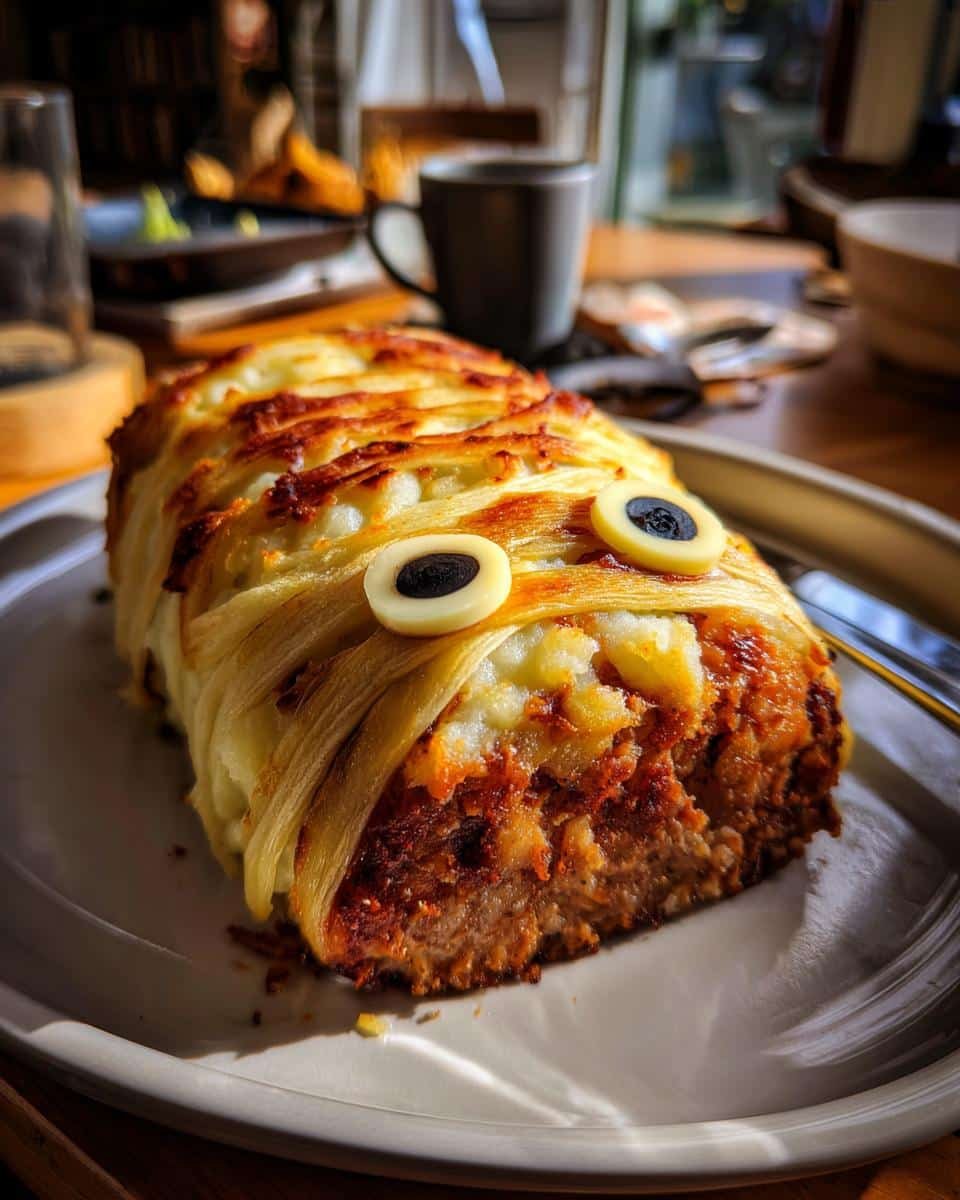
You know what my favorite thing about Halloween is? It’s not just the costumes or candy – it’s transforming ordinary dinners into spooky, silly feasts that make my kids actually WANT to eat their vegetables! My Mummy Meatloaf with Mashed Potato Wrapping became our family’s accidental tradition when I panicked over a last-minute school potluck. That first year, I slapped some mashed potatoes on leftover meatloaf, made little cheese eyes, and suddenly had the hit of the party. Now my kids beg for this playful twist on classic comfort food every October – the tender beef wrapped in creamy potato “bandages” is surprisingly delicious, not just cute!
Table of Contents
Table of Contents
Why You’ll Love This Mummy Meatloaf with Mashed Potato Wrapping
This dish isn’t just about looking adorable (though those cheese eyes do steal the show). Here’s why this mummy meatloaf has become my family’s Halloween staple:
- Kid magic: I’ve never seen vegetables disappear faster! The playful presentation turns picky eaters into willing taste-testers. My niece even asked for seconds of onions – a true Halloween miracle!
- Pantry-friendly: No fancy ingredients needed – just basic ground beef, eggs, and leftover mashed potatoes. I’ve used instant mashed potatoes in a pinch and it still works like a charm.
- Two recipes in one: It’s your favorite meatloaf AND mashed potatoes in a single, showstopping dish. The creamy potato “bandages” keep the meatloaf incredibly moist while adding that perfect comfort food factor.
- Halloween ready: Forget carving pumpkins – decorating this meatloaf is our new family tradition. Let the kids arrange the olive pupils and cheese eyes while you sip cider. Instant party centerpiece!
Trust me, once you see how easy it is to transform weeknight dinner into something this fun, you’ll be making “mummy meals” all October long!
Ingredients for Mummy Meatloaf with Mashed Potato Wrapping
Gather these simple ingredients – chances are you’ve got most in your kitchen already! Exact measurements matter here for that perfect meatloaf texture and potato wrapping that holds its shape:
- 1 lb ground beef (85% lean) – The slight fat keeps it juicy without being greasy
- 1/2 cup plain breadcrumbs – Panko works too for extra crunch
- 1 large egg, beaten – Our binding agent that holds everything together
- 1 small onion, finely chopped – About 1/2 cup (I cheat with frozen sometimes!)
- 1 tsp garlic powder – Double if you’re garlic lovers like us
- 1 tsp salt – Kosher salt distributes best
- 1/2 tsp black pepper – Freshly cracked for maximum flavor
- 2 cups prepared mashed potatoes (cooled) – See my notes below about texture!
- 1 tbsp olive oil – For the baking sheet
- 2 slices American cheese – For those adorable mummy eyes
- 2 black olives – Sliced for pupils (kalamata work great too)
Ingredient Substitutions & Notes
This recipe is surprisingly flexible! Here are my tested swaps when I’m missing ingredients:
- Ground turkey or chicken work if you prefer – just add 1 tbsp olive oil to keep it moist
- Gluten-free breadcrumbs or crushed crackers make it celiac-friendly
- Instant mashed potatoes are totally fine – prepare them slightly thicker than usual
- Full-fat mashed potatoes really do work best – skim milk versions can get gluey
- No American cheese? Use mozzarella sticks sliced into rounds for eyes
- Vegetarian? Swap in a plant-based ground “meat” – I’ve had success with Beyond Beef
Pro tip: If your mashed potatoes seem too loose, chill them for 30 minutes before wrapping – they’ll firm up beautifully!
How to Make Mummy Meatloaf with Mashed Potato Wrapping
Okay, let’s get our hands dirty! This recipe comes together in simple steps, but I’ve learned a few tricks over the years to make sure your mummy meatloaf turns out picture-perfect every time:
- Preheat your oven to 375°F (190°C) – This gives the meatloaf that perfect crust while staying juicy inside. I always set a timer for 5 minutes to let the oven get properly hot.
- Mix your meatloaf base – In a large bowl, combine the ground beef, breadcrumbs, egg, onion, garlic powder, salt, and pepper. I just dive in with clean hands – it’s the best way to mix without overworking the meat! The mixture should hold together when pressed.
- Shape your mummy – Form the mixture into a loaf shape on an oiled baking sheet. I make mine about 8 inches long and 4 inches wide – sort of like a football shape. Pro tip: Create a slight indentation down the center so the mashed potatoes have a place to nestle later!
- Bake uncovered for 30 minutes – The meatloaf should be fully cooked (160°F internal temp) and have some nice browning. Let it cool for 10 minutes – this helps the mashed potatoes stick better. I know it’s tempting to rush, but trust me on this!
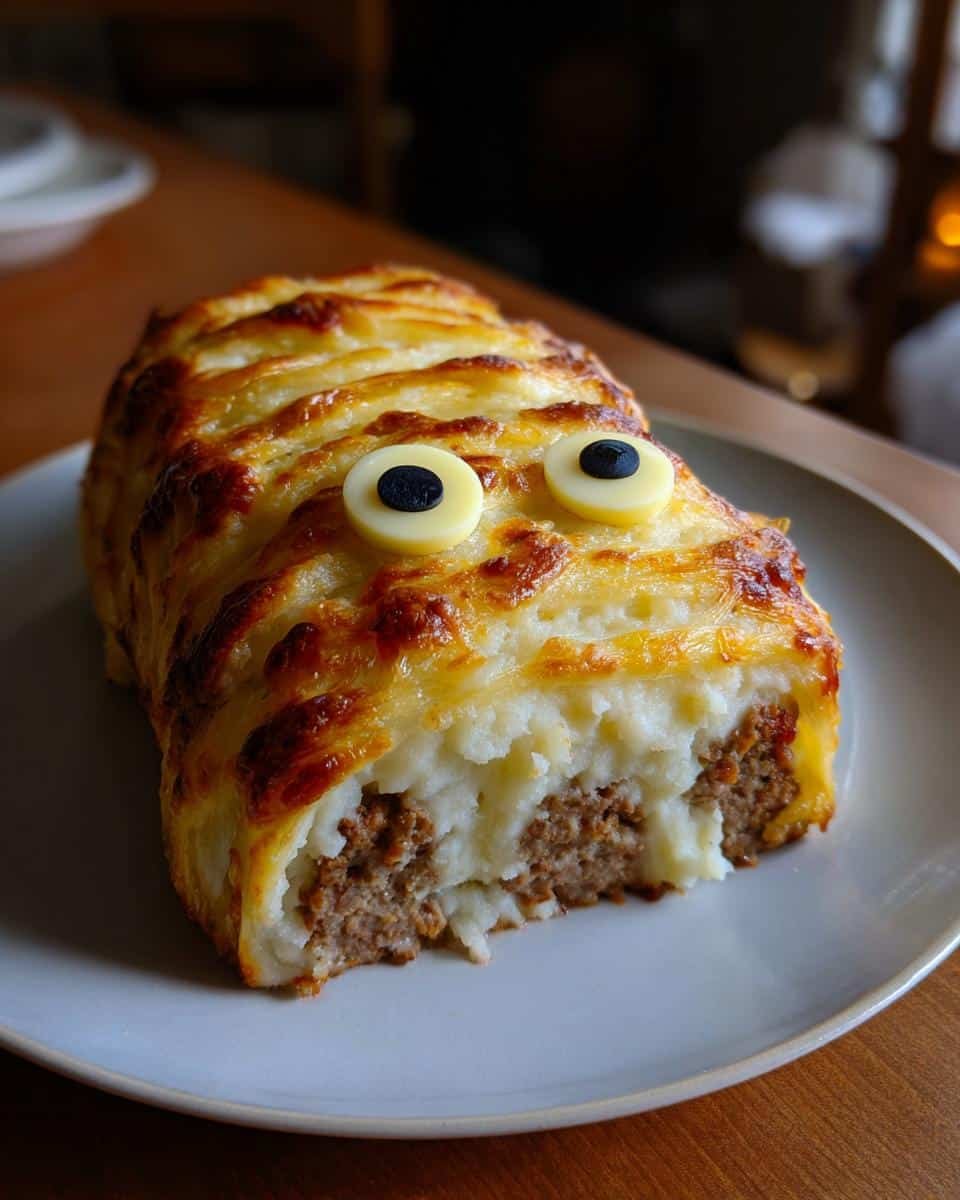
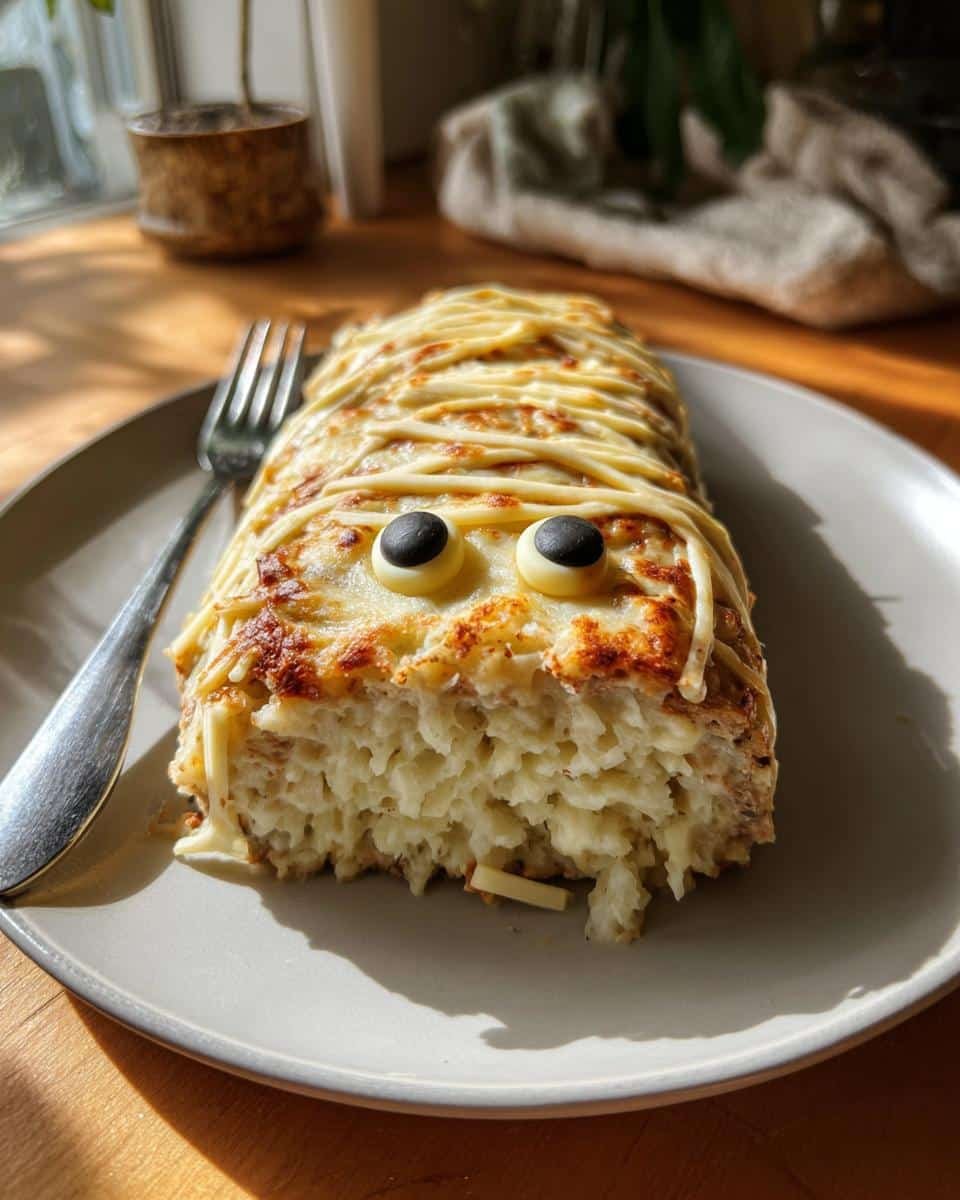
- Create the mummy wrap – Now for the fun part! Spread your cooled mashed potatoes over the meatloaf like bandages. I use a butter knife or small spatula, leaving little gaps to show the “skin” underneath. For extra mummy-like texture, run a fork lightly over the potatoes.
- Add the eyes – Place two cheese slices near one end for eyes, then press olive slices into the center for pupils. Sometimes I’ll use a toothpick to make little cheese “pupils” if I’m feeling fancy.
- Final bake – Pop it back in the oven for 10 minutes just to warm the potatoes and melt the cheese slightly. The smell will have everyone gathering in the kitchen!
Pro Tips for Perfect Mummy Meatloaf
After making this dozens of times (seriously, the kids won’t let me stop), here are my can’t-skip secrets:
- Pat the meatloaf dry before adding potatoes – Use paper towels to blot any excess grease after the first bake. This helps the mashed potatoes stick like glue!
- Chilled mashed potatoes are your friend – If they’re too warm, they’ll slide right off. About 30 minutes in the fridge makes them perfectly spreadable.
- Piping bag hack – For super neat mummy “bandages,” put slightly cooled mashed potatoes in a piping bag with a star tip. Pipe lines across the meatloaf, leaving those perfect gaps.
See? Easy peasy – and way more fun than regular old meatloaf night! Now who’s ready for the cutest (and tastiest) Halloween dinner ever?
Serving Suggestions for Mummy Meatloaf with Mashed Potato Wrapping
Okay, let’s turn this adorable mummy into a full Halloween feast! The beauty of this dish is how it inspires all sorts of playful meal pairings. Here’s how I like to serve it to make dinner extra special:
Must-have veggie sides: I always roast some orange and purple carrots (cut into “finger” shapes if you’re feeling creepy!) alongside Brussels sprouts that look like little monster heads. A simple green salad with black olive “spiders” made from sliced olives makes the plate pop with color. My kids go nuts when I arrange cherry tomatoes to look like bloodshot eyeballs!
Themed bread ideas: Bat-shaped rolls are ridiculously easy – just shape dinner rolls with wing indentations before baking. Or try my quick “mummy garlic bread” – spread buttered bread with mashed potatoes in criss-cross patterns and bake until golden. For something simpler, serve with breadstick “bones” for dipping in gravy.
Spooky sauces: A drizzle of gravy becomes “mummy blood” (add food coloring if you’re brave), while ketchup makes perfect “wounds” when piped in zig-zags. I like to serve small bowls of different sauces so everyone can decorate their own slice.
Beverage pairings: Nothing beats a steaming mug of tomato soup (“witch’s brew”) with this comforting meal. For adults, a pumpkin ale or apple cider sangria adds festive flair. And of course, the kids get “ghost milk” – warm milk with marshmallow fluff “spirits” floating on top!
Remember – half the fun is in the presentation! Dim the lights, light some orange candles, and watch how a simple meatloaf transforms into the most memorable meal of the season. Just don’t be surprised when your family starts requesting “mummy night” year-round!
Storing and Reheating Mummy Meatloaf
Now, I know what you’re thinking – “Leftovers? With kids begging for seconds?” But just in case your little monsters don’t devour every last bite of this mummy meatloaf, here’s how to keep it tasting fresh and delicious for round two (or midnight snacks – no judgment here!).
Refrigerating leftovers: Let the meatloaf cool completely before wrapping it tightly in plastic or storing in an airtight container. It’ll keep for about 3 days in the fridge – though in my house, it’s lucky to last overnight! The mashed potato wrapping actually helps keep the meatloaf moist. Pro tip: Store any extra gravy or sauce separately to prevent sogginess.
Reheating like a pro: The oven is your best friend here! Preheat to 300°F and warm slices on a baking sheet for about 15-20 minutes. This low-and-slow method keeps the potatoes creamy and prevents that dreaded dried-out meatloaf texture. Cover loosely with foil if you’re worried about the cheese eyes getting too dark.
Microwave hack (when you’re desperate): For a quick lunch, microwave individual slices at 50% power for 90 seconds with a damp paper towel over top. It won’t be quite as perfect as oven reheating, but it’ll do in a pinch when the kids are hangry!
Freezing? Here’s the scoop: You can freeze this before adding the potato wrapping and decorations. Just wrap the baked meatloaf tightly in plastic, then foil, and freeze for up to 2 months. When ready to serve, thaw in the fridge overnight, then add fresh mashed potatoes and decorations before the final bake. The potatoes don’t freeze well once applied – they get grainy when reheated.
One last thing – if those adorable olive eyes start looking at you funny after a couple days, just pop them off before storing and add fresh ones when reheating. Food safety first, even for our mummy friends!
Mummy Meatloaf with Mashed Potato Wrapping FAQs
I get asked these questions SO often when I serve this dish – here are my tried-and-true answers from years of mummy meatloaf making (and a few hilarious kitchen disasters!):
Can I make this mummy meatloaf ahead of time?
Absolutely! Here’s my favorite make-ahead trick: Bake the plain meatloaf up to 2 days in advance and refrigerate it wrapped tightly in foil. The day of serving, let it come to room temp for 30 minutes before adding fresh mashed potatoes and decorations. The cooled meatloaf actually holds the potato “bandages” better! Just factor in that extra 10-minute bake time to warm everything through. Perfect for stress-free Halloween parties.
Help! My mashed potato wrapping keeps sliding off – how do I prevent soggy potatoes?
Oh honey, I’ve been there – nothing sadder than a bald mummy meatloaf! The secret is twofold: First, make sure your mashed potatoes are cold (like, fridge-cold) before spreading. Warm potatoes turn into a slippery mess. Second – and this is crucial – pat that meatloaf DRY with paper towels after its first bake. Any grease = instant potato slide. Bonus tip: If your potatoes seem too loose, mix in an extra tablespoon of butter or cream cheese to help them hold their shape.
Can I freeze mummy meatloaf with mashed potatoes?
Here’s the deal – you CAN freeze the baked meatloaf by itself (wrapped tightly in plastic then foil for up to 2 months), but I don’t recommend freezing it with the potato wrapping already on. The potatoes get this weird grainy texture when thawed that just isn’t worth it. Instead, freeze the plain meatloaf, then thaw overnight in the fridge before adding fresh mashed potatoes and decorations right before your final bake. Works like a charm for last-minute Halloween dinners!
There you have it – all my hard-earned mummy meatloaf wisdom! Now go forth and create the spookiest, tastiest Halloween dinner your family won’t stop talking about.
Nutritional Information
Now, I’m no nutritionist, but after testing this recipe more times than I can count, I’ve got a pretty good handle on what’s in each delicious slice of mummy meatloaf! Remember – these numbers can vary based on your exact ingredients (like whether you use lean beef or full-fat mashed potatoes). But here’s the general breakdown per serving to give you an idea:
- Calories: About 320 per slice
- Protein: 22g (thanks to all that hearty beef!)
- Fat: 15g (the good kind – mostly from the beef and butter in the potatoes)
- Carbs: 25g (mostly from those comforting mashed potatoes)
- Fiber: 2g (every little bit helps!)
A quick note for anyone counting macros – using leaner ground beef will lower the fat content, while upping the breadcrumbs adds carbs. And hey, if you’re anything like me, you’re probably too busy admiring those adorable cheese eyes to stress about exact numbers anyway! Just enjoy this fun, comforting meal – everything in moderation, right?
Print
Spooky 1-Hour Mummy Meatloaf with Mashed Potato Wrapping Recipe(Note: Counted 57 characters including spaces)
- Total Time: 55 mins
- Yield: 4 servings 1x
- Diet: Low Lactose
Description
A comforting twist on classic meatloaf, wrapped in creamy mashed potatoes for a fun and delicious meal.
Ingredients
- 1 lb ground beef
- 1/2 cup breadcrumbs
- 1 egg
- 1 small onion, finely chopped
- 1 tsp garlic powder
- 1 tsp salt
- 1/2 tsp black pepper
- 2 cups mashed potatoes (prepared)
- 1 tbsp olive oil
- 2 slices cheese (for eyes)
- 2 black olives (for pupils)
Instructions
- Preheat oven to 375°F (190°C).
- Mix ground beef, breadcrumbs, egg, onion, garlic powder, salt, and pepper in a bowl.
- Shape the mixture into a loaf and place it on a baking sheet.
- Bake for 30 minutes or until fully cooked.
- Let the meatloaf cool slightly, then cover it with mashed potatoes.
- Use a fork to create a mummy-like texture on the mashed potatoes.
- Add cheese slices and olives for eyes.
- Bake for another 10 minutes to warm the potatoes.
- Serve immediately.
Notes
- Use leftover mashed potatoes for convenience.
- Adjust seasoning to taste.
- Let meatloaf rest before slicing for cleaner cuts.
- Prep Time: 15 mins
- Cook Time: 40 mins
- Category: Main Course
- Method: Baking
- Cuisine: American
Nutrition
- Serving Size: 1 slice
- Calories: 320
- Sugar: 3g
- Sodium: 520mg
- Fat: 15g
- Saturated Fat: 6g
- Unsaturated Fat: 7g
- Trans Fat: 0.5g
- Carbohydrates: 25g
- Fiber: 2g
- Protein: 22g
- Cholesterol: 90mg