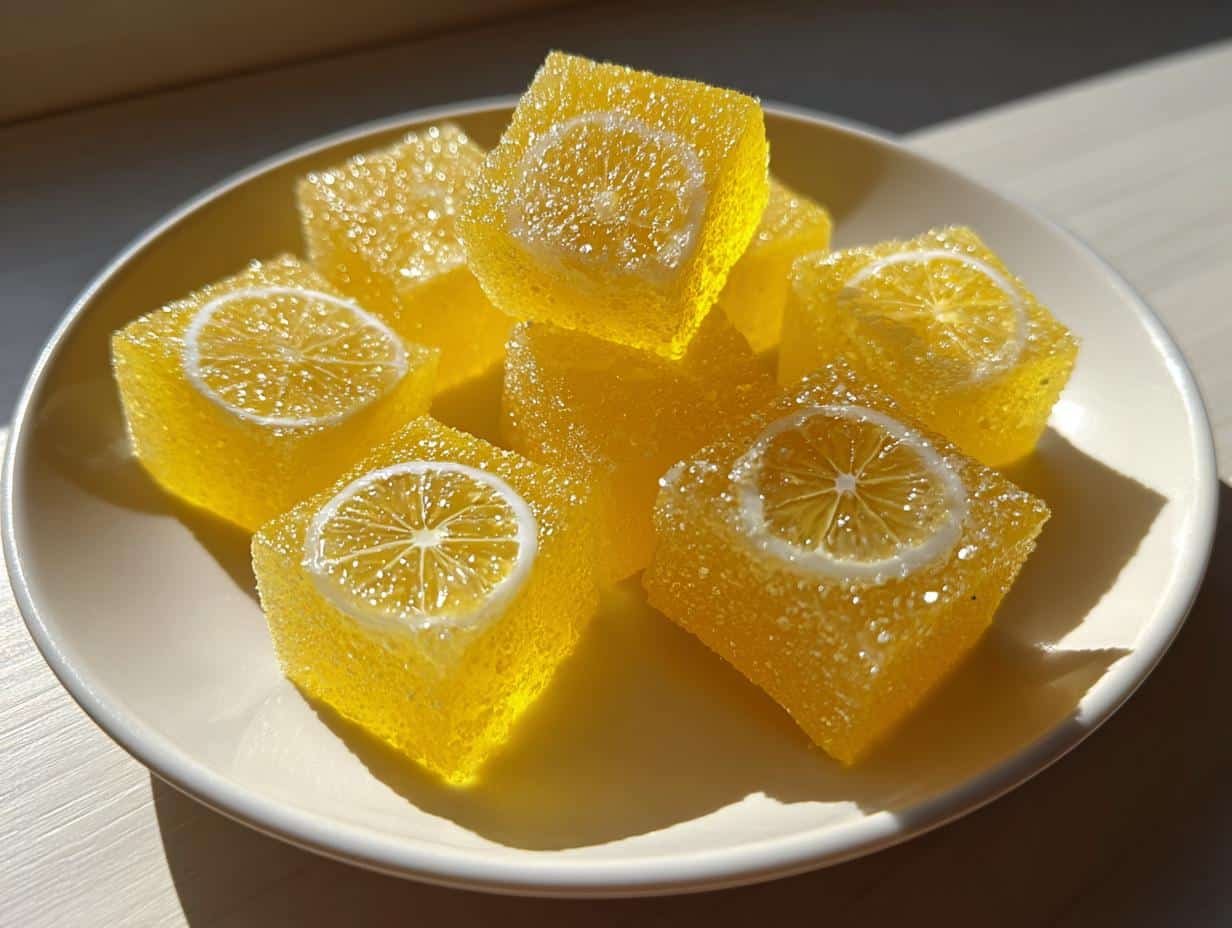
There’s something magical about homemade candy—especially when it’s bursting with bright, sunny lemon flavor! My Delicious Lemon Candy Recipe is the perfect balance of sweet and tangy, with just enough zing to make your taste buds dance. I’ve been making this for years, ever since my grandma handed me her old handwritten notes scribbled on a stained index card (trust me, those stains are from decades of love). The secret? Fresh lemon juice and zest, which give these candies their signature punch. Whether you’re craving a little treat or need a cheerful homemade gift, this recipe never disappoints. Just be warned: one bite and you’ll be hooked!
Table of Contents
Table of Contents
Why You’ll Love This Delicious Lemon Candy Recipe
This isn’t just candy—it’s pure sunshine in bite-sized form! Here’s why it’s become my go-to recipe for every occasion:
- Crazy easy to make – Just 5 ingredients and 25 minutes from start to finish (even my 10-year-old can help!)
- Perfect sweet-tart balance – The lemon zest gives that bright pop while the sugar rounds it out beautifully
- Totally customizable – Want more pucker? Add extra citric acid. Feeling fancy? Swirl in some food coloring!
- Makes the best gifts – Pretty in little jars or tied up in parchment, these candies always impress
- Better than store-bought – No weird ingredients, just real lemon flavor that’ll make your tongue tingle with happiness
Ingredients for Your Delicious Lemon Candy Recipe
Here’s everything you’ll need to make these sunshine-bright lemon candies. I promise it’s all simple stuff you probably already have in your kitchen:
- 1 cup granulated sugar – Regular white sugar works perfectly here
- 1/2 cup water – Just plain tap water is fine
- 1/4 cup freshly squeezed lemon juice – About 2 medium lemons (please don’t use bottled – it makes all the difference!)
- 1 tbsp finely grated lemon zest – Use the yellow part only – the white pith is bitter
- 1/2 tsp citric acid (optional) – This gives extra tartness if you like that lip-puckering zing!
- Yellow food coloring (optional) – Just a drop or two if you want that extra sunny look
See? Nothing complicated! Just be sure to measure everything precisely – candy making is a bit like chemistry where the proportions really matter. Oh, and absolutely use fresh lemons for the juice and zest – it’s the secret to that amazing bright flavor you can’t get from extracts.
Equipment You’ll Need
Now, let’s talk tools! Don’t worry—you don’t need any fancy equipment for these lemon candies, just a few basics that’ll make your life easier (and help you avoid sticky disasters). Here’s what I always grab from my kitchen:
- Heavy-bottomed saucepan – This prevents hot spots so your sugar cooks evenly (no burnt bits!)
- Candy thermometer – Absolutely essential for hitting that perfect 300°F hard crack stage
- Silicone spatula – Stirs like a dream and won’t melt in your boiling sugar
- Candy molds OR greased baking sheet – I use silicone molds for pretty shapes, but a simple greased pan works too
Quick tip: If you’re using an old candy thermometer, test it in boiling water first—it should read 212°F at sea level. I learned this the hard way after a batch of overcooked candy that could’ve chipped a tooth! And that silicone spatula? Worth its weight in gold when you’re scraping every last drop of that lemony goodness into the molds.
How to Make Delicious Lemon Candy
Ready to transform those simple ingredients into shiny, tangy lemon candies? Let me walk you through each step—I’ve made this recipe dozens of times (and eaten just as many “test” pieces). Follow along, and you’ll have perfect homemade lemon candy before you know it!
Step 1: Combine Ingredients
First, grab your heavy saucepan and combine the sugar, water, lemon juice, and lemon zest. This is where patience pays off! Stir gently over medium heat until every single sugar grain dissolves completely—I usually spend a good 3-4 minutes on this step. If you rush, you’ll end up with gritty candy (trust me, I’ve been there). The mixture should look clear like lemonade before moving to the next step. Pro tip: Run your finger along the spatula—if you feel any sugar crystals, keep stirring!
Step 2: Cook to Hard Crack Stage
Now comes the exciting part! Crank the heat up to medium-high and attach your candy thermometer. Once boiling starts, here’s my golden rule: NO STIRRING! Seriously, put that spatula down—disturbing the sugar can cause crystallization (aka sudden sandy texture). Just let the mixture bubble away until it hits 300°F (hard crack stage). This usually takes about 10 minutes. You’ll know it’s ready when a drop of syrup in cold water forms hard, brittle threads that snap when bent.
Step 3: Add Final Touches
Immediately remove the pan from heat when it hits temperature—sugar keeps cooking even off the burner. Now’s the time to stir in your citric acid and food coloring (if using). Work quickly but gently—the syrup starts thickening fast! I like to add these extras in one swift motion, give about 5 seconds of stirring, then pour. Don’t worry if you see tiny bubbles; they’ll settle as the candy cools.
Step 4: Shape and Cool
Pour the hot syrup into prepared molds or onto a greased baking sheet. If using molds, fill them about 3/4 full—they puff slightly as they set. For sheet candy, tilt the pan to spread an even layer. Now the hardest part: waiting! Let the candy cool completely (about 30 minutes) before removing from molds or breaking into pieces. I know it’s tempting, but don’t rush this—warm candy sticks like crazy! Once cooled, you’ll have glossy, jewel-like candies with that perfect snap when you bite into them.
Tips for Perfect Delicious Lemon Candy
After making more batches of these lemon candies than I can count (and taste-testing every single one), I’ve picked up some foolproof tricks to guarantee candy-making success every time. Here are my top secrets for getting that perfect snap and zing:
Test your thermometer first
I can’t stress this enough—your candy thermometer is your best friend here! Before you even start cooking, check its accuracy by placing it in boiling water. At sea level, it should read 212°F. Mine was off by 5 degrees once, and that little difference turned my first batch into sticky lemon taffy instead of crisp candy. Now I always do this quick test while my ingredients are prepping.
Pick sunny days for candy-making
Humidity is the enemy of perfect candy. I learned this the hard way during a rainy summer—the candies stayed sticky no matter how long I cooked them. Now I watch the weather forecast and save my candy projects for dry days. If you must make them in humid weather, run your AC or a dehumidifier in the kitchen to help the candies set properly.
Taste as you go for the perfect tartness
The beauty of this recipe is you can adjust the sourness to your liking. After adding the citric acid (start with 1/4 tsp), dip a clean spoon in the syrup and let a drop cool slightly before tasting. Want more pucker power? Add another pinch of citric acid. Prefer sweeter candy? Skip it altogether. Just remember—you can always add more, but you can’t take it out!
Work fast but don’t panic
When that syrup hits 300°F, you’ve got about 90 seconds of perfect pouring time before it starts to thicken. I like to have all my molds or pans ready, citric acid measured out, and food coloring drops counted before the mixture reaches temperature. But if it starts setting too quickly in the pan? Don’t stress—just return it to low heat for 10-15 seconds to loosen up.
The butter trick for easy cleanup
Here’s my favorite kitchen hack: rub a tiny bit of butter on your measuring cup and utensils before working with the sticky lemon syrup. The fat creates a barrier that makes cleanup a breeze. I even butter my scissors before cutting parchment paper to wrap the candies—no more glued-shut scissors!
Variations to Try
Once you’ve mastered the basic lemon candy recipe, it’s so fun to play with different flavors! Here are some of my favorite twists that always get rave reviews:
- Lime Sunshine: Swap the lemon juice and zest for lime – it gives such a refreshing tropical twist
- Citrus Blast: Use half lemon, half orange juice and zest for a multi-citrus flavor
- Spiced Ginger-Lemon: Add 1/4 tsp ground ginger to the syrup for a warm, zippy kick
- Berry-Lemon: Stir in 1 tsp raspberry or strawberry extract at the end for a fruity combo
- Honey-Lemon: Replace 1/4 cup sugar with honey (just cook to 305°F since honey adds moisture)
The possibilities are endless – these candies are like a blank citrusy canvas waiting for your creativity! My neighbor swears by adding a pinch of cayenne pepper for a sweet-heat surprise, but that might be too adventurous for some tastes.
Storing Your Delicious Lemon Candy
These lemon candies stay fresh for weeks if stored right! I always use an airtight container with parchment between layers to prevent sticking. Keep them in a cool, dry spot—humidity makes them sticky. Pro tip: Toss in a few silica packets if your kitchen tends to be damp. They’ll keep their perfect snap for about 3 weeks… if they last that long!
Nutritional Information
While we all know candy isn’t health food (wink), I like having a general idea of what’s in these sweet treats! Keep in mind these numbers are just estimates—the actual values can change based on your exact ingredients and how big you make your candies. That said, each piece comes out to roughly 50 calories, with all the sugar coming from natural lemon juice and a bit of added sugar. They’re naturally fat-free and contain a tiny boost of vitamin C from all that fresh lemon. But let’s be real—we’re here for that sunshine-bright flavor, not the nutrition facts!
FAQs About Delicious Lemon Candy
Over the years, I’ve gotten so many great questions about this lemon candy recipe! Here are the answers to the ones that pop up most often – straight from my sticky-fingered experience:
Can I use bottled lemon juice instead of fresh?
Oh honey, I know it’s tempting to grab that bottle from the fridge, but trust me—fresh lemons make ALL the difference! Bottled juice lacks that bright, vibrant flavor we love in these candies. Plus, you need the fresh zest anyway (which bottled juice doesn’t provide). When I tested both side by side, the fresh version won hands-down with its zippy, sunshiney taste. Worth the extra squeezing, promise!
How do I prevent my candies from sticking together?
This was my biggest frustration until I discovered the parchment paper trick! After the candies fully cool, wrap each one individually in small squares of parchment or wax paper. If storing many together, layer them in an airtight container with parchment between levels. The absolute game-changer? A tiny dusting of powdered sugar or cornstarch on your hands when handling them—works like magic!
Is citric acid really necessary?
Not at all! The citric acid just amps up the tartness if you’re a serious sour-lover like me. The lemon juice and zest already provide plenty of zing on their own. My grandma never used it in her original recipe, and those candies were still plenty tangy. Try it without first, then add a pinch next time if you want more pucker power!
Why did my candy turn out cloudy instead of clear?
Ah, the dreaded sugar crystallization! This usually happens if you stir after boiling starts or if sugar crystals stick to the pan sides. My foolproof fix? Brush the pan sides with a wet pastry brush as the sugar dissolves, and NEVER stir once boiling begins. Also, make sure your thermometer isn’t touching the pan bottom—that can give false readings leading to undercooking.
Can I make this recipe without a candy thermometer?
While I strongly recommend using a thermometer (they’re cheap and prevent guesswork), you can try the cold water test in a pinch. Drop a bit of syrup into ice water—it should form hard, brittle threads that snap when bent at 300°F. But fair warning: my first thermometer-less attempt resulted in some very… creative caramel-lemon hybrids! The thermometer takes the stress out of getting that perfect hard crack stage.
Share Your Experience
Nothing makes me happier than seeing YOUR lemon candy creations come to life! Whether they’re perfectly molded little gems or rustic, broken shards (my personal favorite – more “artisan” that way), I’d love to hear how they turned out. Did you add an extra zing of citric acid? Try that spicy cayenne version? Or maybe you’ve got your own brilliant twist to share – I’m always looking for new ideas to test in my kitchen! Drop a comment below or tag me on Instagram @[YourHandle] so I can cheer on your candy-making adventures. Seeing your photos with sticky fingers and bright yellow smiles is what keeps me coming back to this recipe year after year!
For more delicious recipes and inspiration, check out our Pinterest page!
Print
Zesty 5-Ingredient Lemon Candy Recipe That Shines Bright
- Total Time: 25 mins
- Yield: 20 pieces 1x
- Diet: Vegetarian
Description
A simple recipe for homemade lemon candy with a sweet and tangy flavor.
Ingredients
- 1 cup granulated sugar
- 1/2 cup water
- 1/4 cup lemon juice
- 1 tbsp lemon zest
- 1/2 tsp citric acid (optional for extra tartness)
- Food coloring (yellow, optional)
Instructions
- Mix sugar, water, lemon juice, and lemon zest in a saucepan.
- Heat on medium until sugar dissolves completely.
- Bring to a boil and cook until the mixture reaches 300°F (hard crack stage).
- Remove from heat and stir in citric acid and food coloring if using.
- Pour into candy molds or onto a greased surface.
- Let cool completely before breaking into pieces.
Notes
- Use a candy thermometer for accuracy.
- Store in an airtight container to prevent sticking.
- Adjust citric acid to taste.
- Prep Time: 10 mins
- Cook Time: 15 mins
- Category: Candy
- Method: Stovetop
- Cuisine: American
Nutrition
- Serving Size: 1 piece
- Calories: 50
- Sugar: 12g
- Sodium: 0mg
- Fat: 0g
- Saturated Fat: 0g
- Unsaturated Fat: 0g
- Trans Fat: 0g
- Carbohydrates: 13g
- Fiber: 0g
- Protein: 0g
- Cholesterol: 0mg