Nothing screams “holiday magic” quite like my chocolate peppermint mousse cups! Every December, my kitchen transforms into a peppermint-scented wonderland as I whip up batches of these creamy delights. It all started when my aunt brought them to our family’s cookie exchange years ago – now they’re our must-have Christmas Eve dessert.
The best part? These little cups of joy require zero oven time. While everyone else is fussing with pie crusts and burnt cookies, you’ll be relaxing with a mug of cocoa, knowing your dessert is chilling happily in the fridge. The combination of rich dark chocolate and refreshing peppermint is pure holiday happiness in every spoonful.
Trust me – once you see how easy these are to make (and how quickly they disappear at parties), you’ll understand why they’ve become my signature holiday treat. The hardest part is waiting those two hours while they set up!
Ingredients for Chocolate Peppermint Mousse Cups
Let’s talk ingredients – because using the right ones makes all the difference here. I’ve learned through trial and error (and a few messy kitchen experiments) that quality matters, especially when you’re keeping things simple. Here’s what you’ll need:
- 1 cup heavy cream – straight from the fridge, cold as can be. Trust me, this is the secret to getting those perfect peaks.
- 1/2 cup powdered sugar – sifted, so you don’t end up with any lumps. Nobody wants a gritty mousse!
- 1/4 cup cocoa powder – the good stuff, unsweetened and rich. It’s what gives that deep chocolate flavor.
- 1 tsp peppermint extract – or to taste. I usually start with a teaspoon, but if you’re a mint lover, feel free to add a smidge more.
- 1/2 cup dark chocolate chips – aim for 60-70% cacao. It’s the perfect balance of sweetness and intensity.
- Whipped cream – for topping. I usually make a little extra, because who doesn’t love a fluffy cloud of cream?
- Crushed peppermint candies – for garnish. They add that festive crunch and make the cups look extra special.
That’s it! Simple, right? Just make sure everything’s prepped and ready to go before you start. Cold cream, melted chocolate, and sifted sugar will set you up for success. Let’s get to the fun part – making the mousse!
How to Make Chocolate Peppermint Mousse Cups
Okay, let’s dive into the magic of making these chocolate peppermint mousse cups! I promise it’s easier than you think – I’ve made this recipe so many times I could probably do it in my sleep (though I don’t recommend trying that). Just follow these simple steps, and you’ll have the most dreamy, creamy dessert ready to impress.
Step 1: Whip the Cream to Perfect Peaks
First things first – pop your mixing bowl and beaters in the freezer for about 10 minutes. I know, I know, it seems fussy, but cold tools make ALL the difference when whipping cream. Pour in that icy-cold heavy cream and start beating on medium speed. Watch closely – you want soft peaks that gently curl when you lift the beater (not stiff peaks that stand straight up). This usually takes about 2-3 minutes. Pro tip: If your kitchen’s warm, place the bowl on top of an ice bath while whipping. Nothing worse than cream turning to butter!
Step 2: Fold in Chocolate and Peppermint
Now for the fun part! Gently sift in the powdered sugar and cocoa powder – this prevents any lumps. Add the peppermint extract (start with 1 tsp and taste – you can always add more). Melt your dark chocolate chips and let them cool slightly (hot chocolate will deflate your beautiful cream). Here’s the key: use a rubber spatula and fold everything together with slow, sweeping motions from the bottom up. Imagine you’re tucking the ingredients into bed – gentle and loving. Overmixing is the enemy of fluffy mousse!
Step 3: Chill for Set Texture
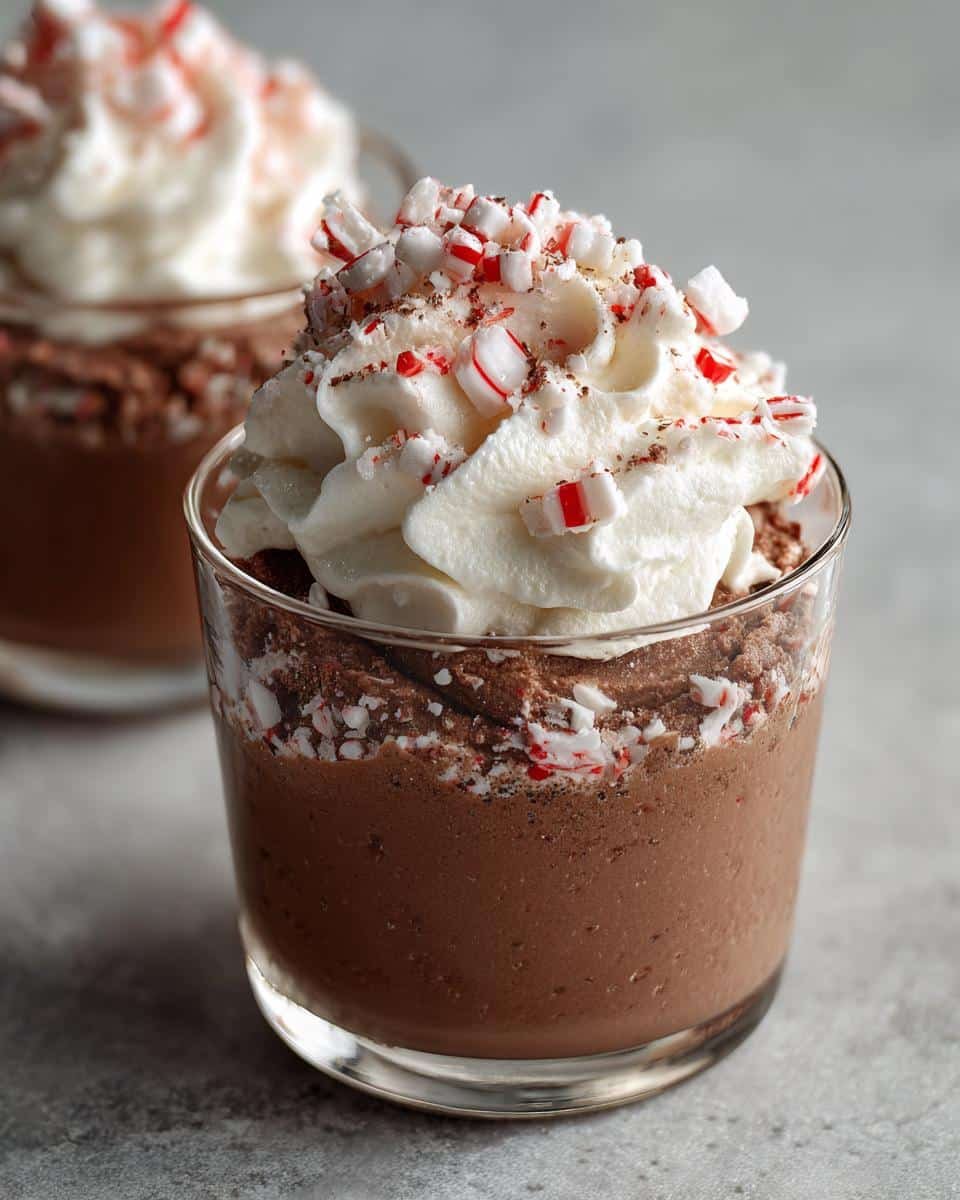
Don’t skip this step! Spoon the mixture into your cute little cups (I use pretty glass ones for holiday vibes) and pop them in the fridge for at least 2 hours. I know waiting is hard (I peek at mine constantly), but this chilling time lets the flavors meld and gives that perfect spoonable texture. The chocolate sets just enough so it’s rich and velvety, not runny. Right before serving, top with whipped cream and crushed peppermint candies – the festive finishing touch that makes everyone’s eyes light up!

Why You’ll Love These Chocolate Peppermint Mousse Cups
Okay, let me count the ways these little cups of joy will steal your heart (and probably become your new holiday obsession). I’ve made these for years, and here’s what makes them absolutely irresistible:
- No-bake magic – While everyone else is sweating over hot ovens, you’ll be the coolest cook in the kitchen. Just whip, fold, and chill. No burnt edges, no temperature drama – just perfect desserts every time.
- That festive flavor combo – Rich chocolate and cool peppermint is basically Christmas in your mouth. It’s nostalgic yet sophisticated – kids go crazy for it, and adults always ask for seconds. The kind of flavor that makes people close their eyes and go “mmm.”
- Make-ahead lifesaver – These actually taste better after chilling, which means you can prep them the day before your party. No last-minute dessert stress – just pull them out, add the toppings, and bask in the compliments.
- Instant elegance – Individual servings mean no messy slicing. The layers look so pretty in clear cups, especially with that pop of red peppermint on top. I’ve had guests think I bought them at a fancy bakery (our little secret!).
Honestly, I could go on – but you’ll understand once you try them. These mousse cups have saved my holiday hosting sanity more times than I can count. They’re the dessert equivalent of a warm hug with a candy cane twist!
Expert Tips for the Best Chocolate Peppermint Mousse
After making these chocolate peppermint mousse cups more times than I can count (seriously, my family requests them year-round now), I’ve picked up some tricks that take them from good to “oh-my-goodness” amazing. Here are my hard-earned secrets:
Chill Everything – And I Mean Everything
My mantra? Cold is gold when making mousse. I don’t just chill the cream – I freeze my mixing bowl and beaters for 15 minutes before starting. Even the measuring cups get a quick fridge visit! Why? Because warm tools make the cream melt before you’ve even started. If your kitchen’s warm, place the bowl on a larger bowl filled with ice while whipping. You’ll get those perfect, pillowy peaks every time.
Peppermint Power Control
Here’s where personal taste comes in – start with 1 tsp peppermint extract, then taste (yes, raw cream and all – live a little!). Want a subtle hint? Stop there. Prefer that candy cane punch? Add another 1/4 tsp at a time. My trick? If I’ve gone overboard with mint, a pinch of salt balances it beautifully. For parties, I sometimes make two batches – one mild for kids, one extra-minty for adults (with a splash of creme de menthe if we’re feeling fancy).
Pipe It Pretty
Want those Instagram-worthy layers? Skip the spoon and use a piping bag with a large star tip. Pipe the mousse into cups in swirling motions – it creates beautiful layers that show off the chocolate color. No piping bag? No problem! A zip-top bag with the corner snipped off works just as well. Pro tip: Pipe a little whipped cream border around the edge before adding the crushed candies – it frames the mousse like a edible snowbank!
These little tricks might seem small, but trust me – they make all the difference between “nice dessert” and “can I have your recipe?” moments. Now go forth and mousse with confidence!
Peppermint Mousse Variations
One of my favorite things about this recipe is how easily you can mix it up! Over the years, I’ve played around with all sorts of fun twists on the classic chocolate peppermint mousse cups. Here are some of my favorite variations that always get rave reviews:
White Chocolate Wonder
Swap the dark chocolate for high-quality white chocolate chips – it creates this gorgeous snowy look that’s perfect for winter parties. The flavor becomes more delicate, letting the peppermint really shine. Just be careful when melting white chocolate (it burns easily!), and reduce the powdered sugar slightly since white chocolate is sweeter. Top with crushed candy canes for that classic red-and-white holiday look.
Adult Mint Liqueur Version
For grown-up gatherings, I sometimes replace half the peppermint extract with 1 tablespoon of creme de menthe or peppermint schnapps. The alcohol gives this sophisticated edge that pairs beautifully with the richness. Just warn your guests – these little cups pack a punch! I like to garnish these with a tiny chocolate mint leaf on top for extra elegance.
Dairy-Free Delight
My niece is lactose intolerant, so I’ve perfected a dairy-free version using coconut cream (the thick part from a can of full-fat coconut milk). Chill the can overnight, scoop out the solid cream, and whip it just like heavy cream. Use dairy-free chocolate chips, and voila – same dreamy texture, no dairy! The coconut adds a subtle tropical note that actually works surprisingly well with the peppermint.
The possibilities are endless – I’ve even done a version with crushed Oreos layered in for a cookies-and-cream twist. The important thing is to keep that creamy, dreamy texture and festive minty flavor. What variations will you try first?
Storing and Serving Suggestions
Here’s the beautiful thing about these chocolate peppermint mousse cups – they practically take care of themselves when it comes to storage and serving! After years of making them for every holiday gathering, I’ve got this down to a science.
Fridge Storage Perfection
These little cups will keep happily in your fridge for up to 3 days – if they last that long! Just cover them tightly with plastic wrap or store in an airtight container. The mousse actually gets better after about 24 hours as the flavors meld together. Pro tip: If you’re making them ahead, wait to add the whipped cream and candy topping until just before serving – otherwise the candies get soggy and the whipped cream weeps.
Garnish Timing is Everything
I can’t tell you how many times I’ve gotten overexcited and garnished too early. Here’s my foolproof timeline: make the mousse base and chill it for at least 2 hours (overnight is even better). Then, right before your guests arrive – like literally as they’re taking off their coats – add the whipped cream and crushed peppermint. That way the candies stay crunchy and the cream stays fluffy. It makes such a difference in texture!
Perfect Pairings
These mousse cups are delicious on their own, but oh – when paired with coffee? Absolute magic. The bitterness of a good dark roast cuts through the sweetness beautifully. For parties, I set up a little “mousse and mocha” station with small cups of strong coffee or espresso shots. Hot chocolate is another natural pairing (peppermint overload in the best way!). If you’re feeling fancy, a glass of port or dessert wine makes it feel extra special for adult gatherings.
One last serving tip: take them out of the fridge about 10 minutes before eating – just long enough to take the chill off but not so long that they get too soft. That perfect cool-but-creamy texture is what makes people close their eyes and sigh with happiness!
Chocolate Peppermint Mousse Cups Nutrition
Let’s talk nutrition – because let’s be real, we’re all curious about what’s in these little cups of heaven. Keep in mind, nutrition values can vary depending on the brands you use, but here’s a general idea per serving (about 1 cup):
- Calories: 320
- Sugar: 25g
- Sodium: 30mg
- Fat: 22g (14g saturated, 6g unsaturated)
- Carbohydrates: 28g
- Fiber: 3g
- Protein: 4g
- Cholesterol: 45mg
These values are just estimates, so don’t stress too much. After all, it’s the holidays – a little indulgence is part of the fun! Just remember to enjoy every creamy, minty bite.
Common Questions About Chocolate Peppermint Mousse
Over the years, I’ve gotten all sorts of questions about these chocolate peppermint mousse cups – and I love helping people troubleshoot! Here are the answers to the three most common questions I hear:
Can I freeze the mousse cups?
Oh honey, I wish! But no – freezing is the one thing that really ruins the texture. The cream separates when thawed, leaving you with a grainy mess instead of that dreamy smoothness. Trust me, I learned this the hard way when I tried to stockpile them last Christmas. Your best bet? They keep perfectly in the fridge for 3 days, so just make them a couple days ahead if you need to prep early.
Help! My mousse is too runny – what now?
Don’t panic! This happens to everyone (including me – my first batch was basically peppermint soup). Here’s the fix: pop the whole bowl back in the fridge for 30 minutes to chill, then whip it again. Usually that does the trick. If it’s still too loose, you can gently fold in a tablespoon of instant pudding mix (the chocolate flavor works great) to help stabilize it without changing the taste too much.
What can I use instead of peppermint extract?
Out of extract? No problem! Crush up about 5-6 candy canes or peppermint candies super fine (I use my food processor) and fold them into the whipped cream with the chocolate. The flavor will be a bit milder but still delicious. Just know the candies might add a slight pink tint to your mousse – which I actually think looks festive! Another option is 1-2 drops of peppermint essential oil (food-grade only) if you happen to have that on hand.
Got more questions? Drop them in the comments – I love chatting about all things mousse! Remember, even the “mistakes” usually still taste amazing, so don’t stress too much. Cooking should be fun, especially during the holidays!
I can’t wait to hear how your chocolate peppermint mousse cups turn out! Did your family go crazy for them? Did you try any fun variations? Drop a comment below and let me know – I love swapping tips and hearing your holiday dessert stories. And if you loved this recipe, I’d be so grateful if you left a quick star rating! It helps other dessert lovers find this recipe and spread the peppermint joy. Wishing you the happiest of holidays filled with creamy, chocolatey goodness!
For more delicious recipes and inspiration, check out our Pinterest page!
Print
“Creamy Chocolate Peppermint Mousse Cups in Just 3 Steps”
- Total Time: 2 hours 20 minutes
- Yield: 4 servings 1x
- Diet: Vegetarian
Description
A creamy chocolate mousse with a refreshing peppermint twist, served in individual cups for a delightful dessert.
Ingredients
- 1 cup heavy cream
- 1/2 cup powdered sugar
- 1/4 cup cocoa powder
- 1 tsp peppermint extract
- 1/2 cup dark chocolate chips
- Whipped cream for topping
- Crushed peppermint candies for garnish
Instructions
- Whip the heavy cream until soft peaks form.
- Add powdered sugar, cocoa powder, and peppermint extract. Mix well.
- Melt the dark chocolate chips and fold into the whipped cream mixture.
- Spoon the mousse into individual cups.
- Chill for at least 2 hours.
- Top with whipped cream and crushed peppermint candies before serving.
Notes
- Use high-quality dark chocolate for best results.
- Adjust peppermint extract to taste.
- Chill the mixing bowl and beaters before whipping cream.
- Prep Time: 15 minutes
- Cook Time: 5 minutes
- Category: Dessert
- Method: No-Bake
- Cuisine: American
Nutrition
- Serving Size: 1 cup
- Calories: 320
- Sugar: 25g
- Sodium: 30mg
- Fat: 22g
- Saturated Fat: 14g
- Unsaturated Fat: 6g
- Trans Fat: 0g
- Carbohydrates: 28g
- Fiber: 3g
- Protein: 4g
- Cholesterol: 45mg