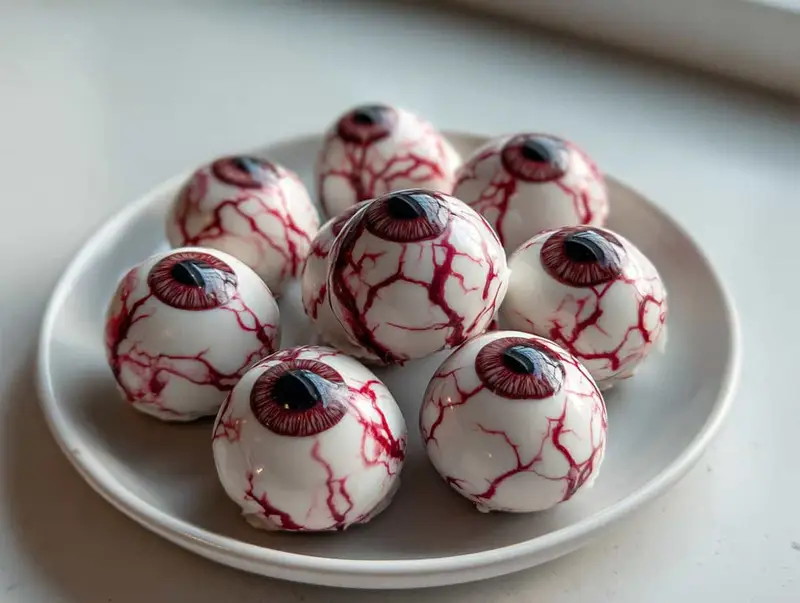
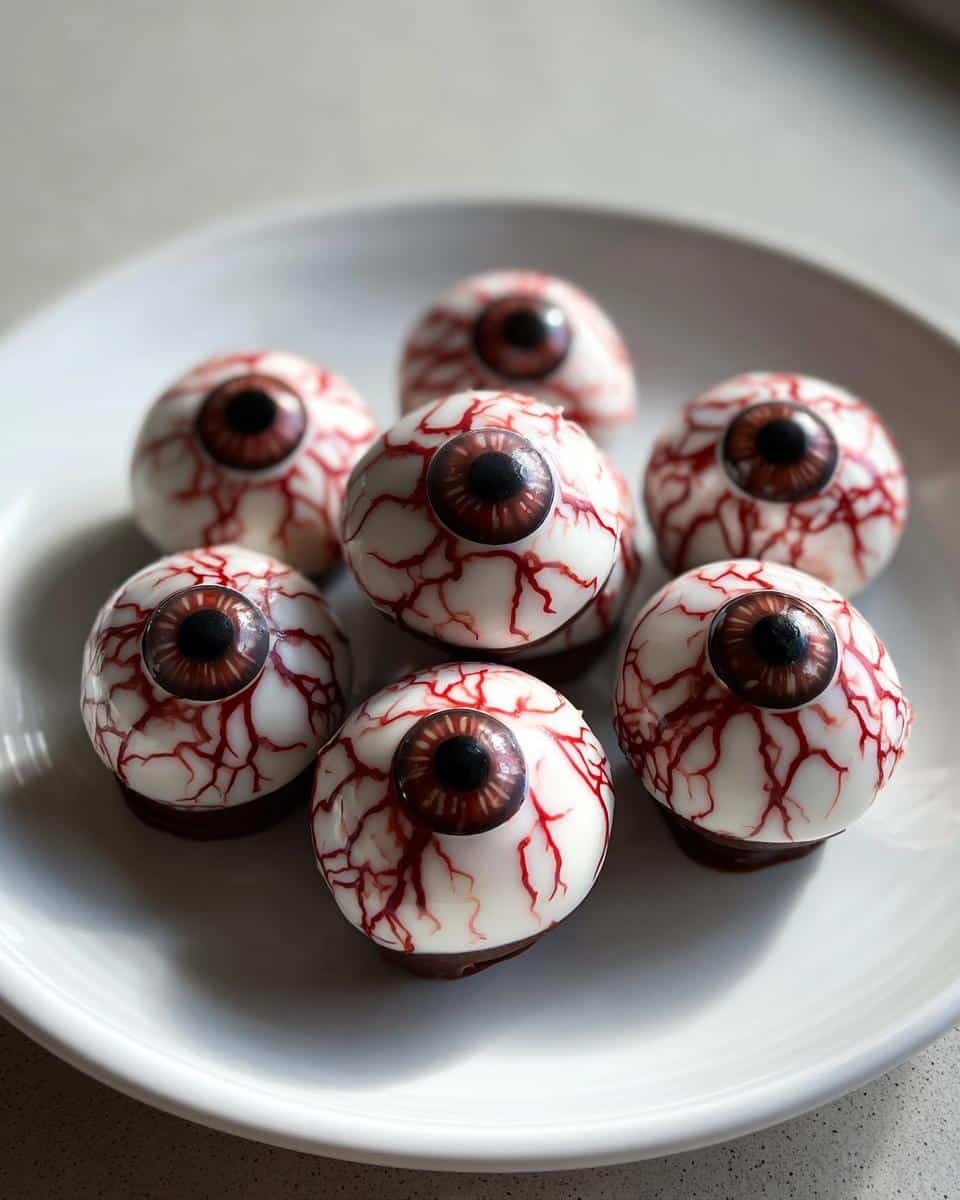
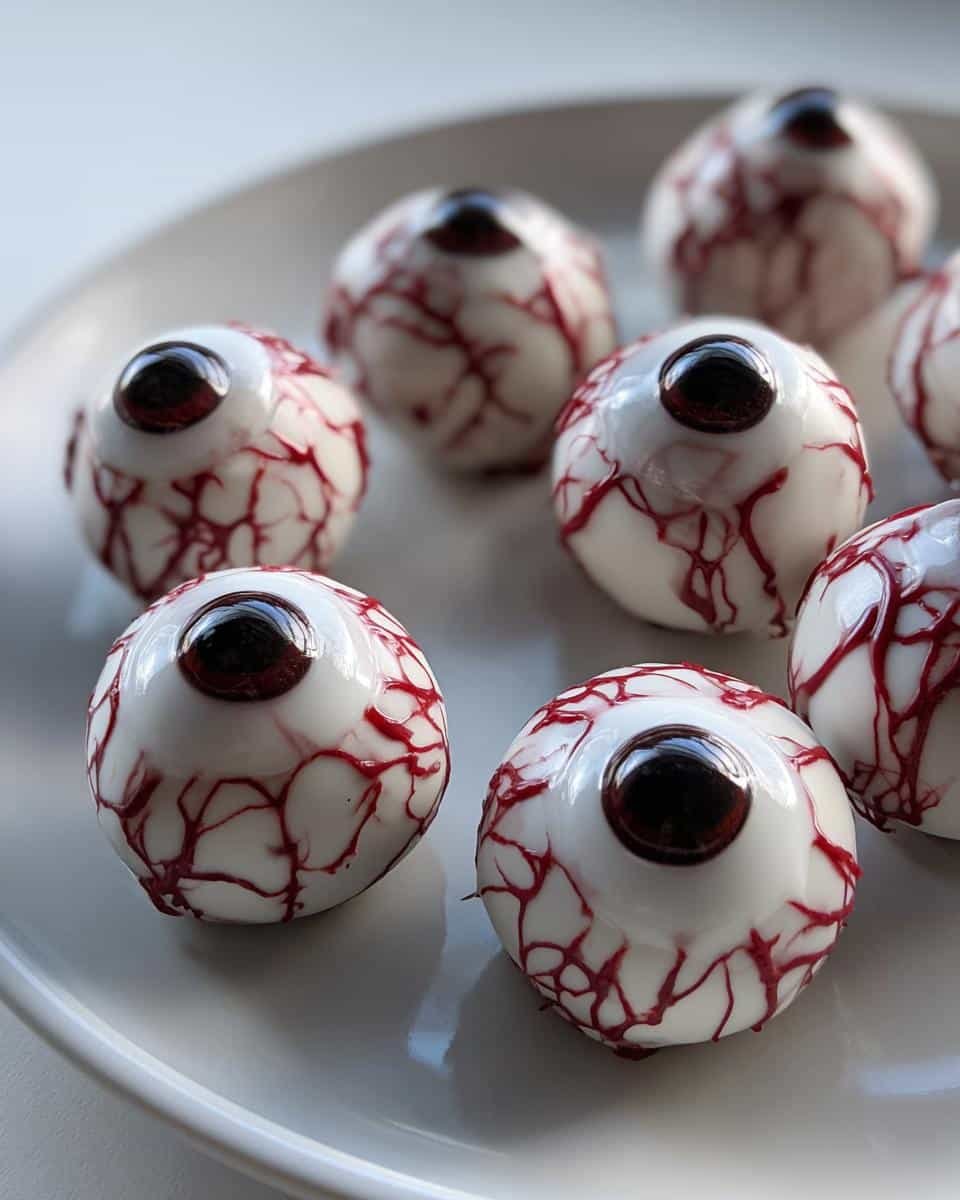
Okay, I know Halloween treats can be a little… extra sometimes, but hear me out—these Eyeball Truffles are the perfect mix of creepy and cute, and they’re SO fun to make! I came up with these a few years ago when I was desperate for a last-minute party treat, and now they’re a must-have every October. Imagine rich, creamy chocolate truffles dipped in white candy coating, then painted to look like bloodshot eyeballs staring back at you. The best part? They’re way easier than they look—just melt, mix, roll, and decorate. Trust me, these little guys will steal the show at any Halloween party!
Eyeball Truffles Ingredients
Now, let’s talk ingredients—because the magic of these truffles starts with simple, good-quality stuff. I’ve learned the hard way that skimping here leads to sad, melty eyeballs (and nobody wants that). Here’s exactly what you’ll need:
- 1 cup chocolate chips (I use semi-sweet, but dark works too—just don’t tell my kids I said that)
- ½ cup heavy cream, warmed (this makes the ganache ultra-smooth)
- 1 tsp vanilla extract (the secret flavor boost!)
- ½ cup powdered sugar (for that perfect truffle texture)
- 1 cup white candy melts (for coating—these set better than regular white chocolate)
- Red gel food coloring (gel works best for painting those creepy veins)
- Black gel food coloring (for pupils—a tiny dot goes a long way)
Pro tip: Have everything measured and ready before you start. When that chocolate melts, you’ll want to move fast!
How to Make Eyeball Truffles
Alright, let’s turn those ingredients into some seriously spooky treats! I promise it’s easier than it looks—just follow these steps, and you’ll have a tray of eyeballs staring back at you in no time. (In a good way, I swear.)
Preparing the Chocolate Mixture
First things first: that rich, velvety chocolate center. Grab a heatproof bowl and toss in your chocolate chips. Now, here’s my trick—microwave them in 30-second bursts, stirring between each one. Chocolate burns SO easily, and burnt chocolate equals sad truffles.
While that’s melting, warm your heavy cream just until you see tiny bubbles around the edges. Then, pour it over the melted chocolate and let it sit for a minute—this is called “blooming,” and it makes everything combine beautifully. Stir it all together until it’s glossy and smooth, then mix in the vanilla and powdered sugar.
Pop this glorious mixture in the fridge for about an hour. You’ll know it’s ready when you can scoop it without it sticking to your fingers like crazy. (Though, let’s be real, licking chocolate off your fingers is half the fun.)
Shaping and Decorating
Time to make some eyeballs! Scoop out tablespoon-sized portions of the chilled mixture and roll them between your palms. Don’t stress if they’re not perfectly round—real eyeballs aren’t either! (See? We’re going for creepy realism here.)
Melt your white candy melts in the same careful way you did the chocolate. Now, here’s the fun part: use a fork to dip each truffle, letting the excess coating drip off before placing them on parchment paper. If the coating starts to thicken, just zap it for 10 more seconds—this stuff sets fast!
While the coating’s still wet, use a toothpick to add details. Drag red gel food coloring in squiggly lines from the center to make veins. Then, dot the center with black for the pupil. I like to make some look bloodshot and others more “normal” (but let’s face it—none of these look normal, and that’s the point).
Let them set completely before serving. Watching people’s reactions when they see your edible eyeballs? Priceless.
Tips for Perfect Eyeball Truffles
Okay, I’ve made enough of these creepy little guys to know what works—and what ends in chocolatey disaster. Here are my tried-and-true tips to make sure your Eyeball Truffles turn out perfectly spooky every time:
Chill that ganache like your truffles depend on it (because they do). If the mixture is too soft, you’ll end up with lopsided eyeballs that look like they’ve seen a ghost. An hour in the fridge is the sweet spot—but if you’re impatient like me, 30 minutes in the freezer works in a pinch.
Keep your candy melts warm and cozy. I like to melt them in a small, deep bowl and keep the bowl sitting in a larger bowl of warm water while I work. This stops them from setting too fast—nothing’s worse than half-dipped eyeballs with lumpy coatings!
Use gel food coloring, not liquid. The gel gives you those vivid, blood-red veins without making your candy coating seize up. Just dip a toothpick in the gel and drag it across the white coating for instant creepy factor.
Roll with imperfect shapes. Seriously, uneven truffles make the best eyeballs! A slightly oval shape looks more realistic than perfect spheres. My most complimented batch had one truffle that looked like it was popping out of its socket—total accident, but now it’s my signature move.
Store them in single layers. These guys are delicate once decorated. I learned the hard way that stacking them leads to smeared eyeballs (which, okay, is kind of horrifying in a cool way, but not what we’re going for).
Eyeball Truffles Variations
Once you’ve mastered the classic Eyeball Truffles, it’s time to get creative! Here are some of my favorite ways to mix things up (because who says eyeballs can’t be colorful?):
- Zombie Eyes: Swap white candy melts for pale green and add extra “veins” with red gel. These look especially creepy peeking out from a bowl of “brains” (aka spaghetti).
- Alien Invasion: Use purple or blue candy coating and paint spiral pupils instead of dots—perfect for a sci-fi themed party!
- Glow-in-the-Dark: Mix a tiny bit of glow-in-the-dark food coloring into the candy melts. Charge them under a light before serving for an eerie effect.
- Bloodshot Sprinkle Effect: Before the candy coating sets, press red sanding sugar along the “veins” for a 3D, textured look.
- Mismatched Eyes: Make half with blue irises (using light blue food coloring) and half with brown for a surreal, doll-like appearance.
My kids love helping with these variations—last year we made “vampire eyes” with gold candy melts and tiny fondant fangs. The possibilities are endless when you start playing with colors and details!
Storing and Serving Eyeball Truffles
Okay, let’s talk about keeping these little eyeballs fresh and how to show them off at your Halloween bash! First—storage. These truffles will last up to 5 days in the fridge, but let’s be honest, they never stick around that long in my house. Just pop them in an airtight container with parchment paper between layers. If you stack them directly, you’ll end up with smudged eyeballs (which, okay, might actually add to the horror vibe, but probably not what you’re going for).
Now, for serving—this is where the fun really begins. I love arranging them on a black platter with some dry ice for a foggy, haunted effect. Or, for extra creep factor, nestle them in a bowl of “eyeball soup” (aka green-tinted melted white chocolate with floating lychee “eyeballs”). Kids go wild when I serve them on a tray with plastic skeleton hands reaching up between the truffles!
Pro tip: If your party’s outdoors or in a warm room, keep the truffles chilled until just before serving. That candy coating can get a little sweaty, and nobody wants runny eyeballs staring up at them. Unless you’re going for zombie apocalypse realism—then maybe you do!
Eyeball Truffles FAQ
I’ve gotten so many questions about these truffles over the years—here are the ones that pop up most often, along with my tested solutions!
Can I use milk chocolate instead of semi-sweet?
Absolutely! Milk chocolate makes sweeter, creamier eyeballs (my kids’ favorite version). Just know they’ll be softer at room temperature, so keep them chilled until serving. White chocolate works too, but add an extra ¼ cup powdered sugar to firm up the centers.
Help! My candy coating cracked—how do I fix it?
Oh no, we’ve all been there! If it’s just small cracks, melt a tiny bit more candy melt and “glue” them with a toothpick. For major fractures? Embrace the horror—add extra red veins to disguise them as “injured” eyeballs. Spooky bonus!
Can I make these ahead of time?
You bet! The undecorated truffle balls keep for 3 days in the fridge or a month frozen. Just coat and decorate them the day of your event for the freshest-looking stares. The candy coating tends to “sweat” if stored too long.
Why won’t my food coloring stick to the candy coating?
Timing is everything! You’ve got about a 2-minute window after dipping when the surface is tacky enough for the color to adhere. If you miss it, lightly brush the truffles with corn syrup first—it creates a sticky base for the food coloring.
Any nut-free alternatives if I can’t use candy melts?
Try white chocolate chips with 1 tsp coconut oil—they’ll melt smoother. For school-safe versions, colored white frosting works too. Pipe veins with stiff icing and use mini M&M’s for pupils!
Nutritional Information
Now, let’s be real—these Eyeball Truffles are Halloween treats, not health food! But since I know some folks like to keep track (or need to for allergies), here’s the deal: nutritional values are always estimates and can vary based on the exact ingredients you use. The chocolate, cream, and candy coating make these rich little indulgences—so enjoy them in moderation unless you’re going full monster mode for the holiday!
Pro tip: If you’re serving these at a party with dietary restrictions, you can always make a separate batch with dairy-free chocolate and coconut cream. The eyeballs will still stare just as creepily!
I can’t wait to see how your Eyeball Truffles turn out—every batch tells its own spooky story! Did yours come out perfectly creepy? Maybe you came up with an even freakier variation? Snap a photo and share your edible eyeball masterpieces in the comments below. Bonus points if they’re so realistic they make someone scream! And if you’ve got questions or hilarious serving ideas, drop those too. Happy haunting… I mean, baking! Check out more Halloween recipes!
Print
Spooky Eyeball Truffles: 5 Easy Steps to Halloween Magic
- Total Time: 1 hour 30 minutes
- Yield: 20 truffles 1x
- Diet: Vegetarian
Description
Eyeball Truffles are spooky, fun, and delicious treats perfect for Halloween. These truffles are made with creamy chocolate and decorated to resemble eyeballs.
Ingredients
- 1 cup chocolate chips
- 1/2 cup heavy cream
- 1 tsp vanilla extract
- 1/2 cup powdered sugar
- White candy melts
- Food coloring (red and black)
Instructions
- Melt chocolate chips in a bowl.
- Heat heavy cream and mix it with melted chocolate.
- Add vanilla extract and powdered sugar, then stir until smooth.
- Chill the mixture in the fridge for 1 hour.
- Roll the mixture into small balls and place them on a tray.
- Melt white candy melts and dip each truffle to coat.
- Use red and black food coloring to create eyeball details.
- Let the truffles set before serving.
Notes
- Store truffles in the fridge for up to 5 days.
- Use a toothpick for precise detailing.
- Experiment with different colors for a creative twist.
- Prep Time: 20 minutes
- Cook Time: 10 minutes
- Category: Dessert
- Method: No-Bake
- Cuisine: American
Nutrition
- Serving Size: 1 truffle
- Calories: 120
- Sugar: 10g
- Sodium: 5mg
- Fat: 8g
- Saturated Fat: 5g
- Unsaturated Fat: 2g
- Trans Fat: 0g
- Carbohydrates: 12g
- Fiber: 1g
- Protein: 1g
- Cholesterol: 10mg