There’s something magical about turning simple ingredients into spooky little haunted house cupcakes just in time for Halloween. My kids go absolutely wild for these every year – they love helping decorate them almost as much as they love eating them! I still remember the first time we made them, when my youngest insisted we add “ghost footprints” with extra icing (which turned into a delicious mess, of course).
What I love most about these haunted house cupcakes is how they let you get creative. Whether you’re throwing a Halloween party or just want to surprise your family with a fun treat, these little chocolate masterpieces always bring smiles. And the best part? They’re way easier to make than they look!
Ingredients for Haunted House Cupcakes
Here’s what you’ll need to bring these spooky treats to life – and trust me, most of these are probably already in your pantry! For the cupcake bases, grab 1 box of chocolate cake mix (and don’t forget the eggs, oil, and water it calls for). You’ll also need 1 can of chocolate frosting to create that perfect haunted house look. For the decorations, you’ll want 1 cup of white chocolate chips (tinted black for windows), black and orange gel food coloring, 12 large marshmallows for roofs, 24 mini pretzel sticks for fences, and 1 tube of black decorating icing for all those spooky details. Easy, right?
How to Make Haunted House Cupcakes
Okay, let’s get spooky! These haunted house cupcakes come together in three fun parts – baking the bases, making the decorations, and assembling everything into mini haunted masterpieces. The key is taking your time with each step, especially letting those chocolate decorations set properly. Trust me, rushing leads to melty ghost disasters!
Baking the Cupcake Bases
First things first – preheat your oven to 350°F and line your muffin tin with cupcake liners (black or orange make it extra festive!). Mix up your chocolate cake batter according to the package directions, then fill each liner about 2/3 full. This gives them room to rise without overflowing – nobody wants haunted mushroom-shaped cupcakes!
Bake for 18-20 minutes until a toothpick comes out clean. Let them cool completely in the pan before decorating. Warm cupcakes plus frosting equals a slumpy haunted house, and we’re going for creepy-chic here!
Creating the Spooky Decorations
While your cupcakes cool, let’s make the haunted house elements. Melt your white chocolate chips carefully – I do 30-second bursts in the microwave, stirring between each. Once smooth, stir in black gel food coloring (gel works best – liquid makes chocolate seize up!). Spread the dark chocolate thinly on parchment paper in jagged shapes for broken windows and crooked doors.
Here’s my pro tip: pop that parchment sheet in the fridge for 10 minutes to set. Trying to handle warm chocolate leads to fingerprint ghosts everywhere!
Assembling Your Haunted House Cupcakes
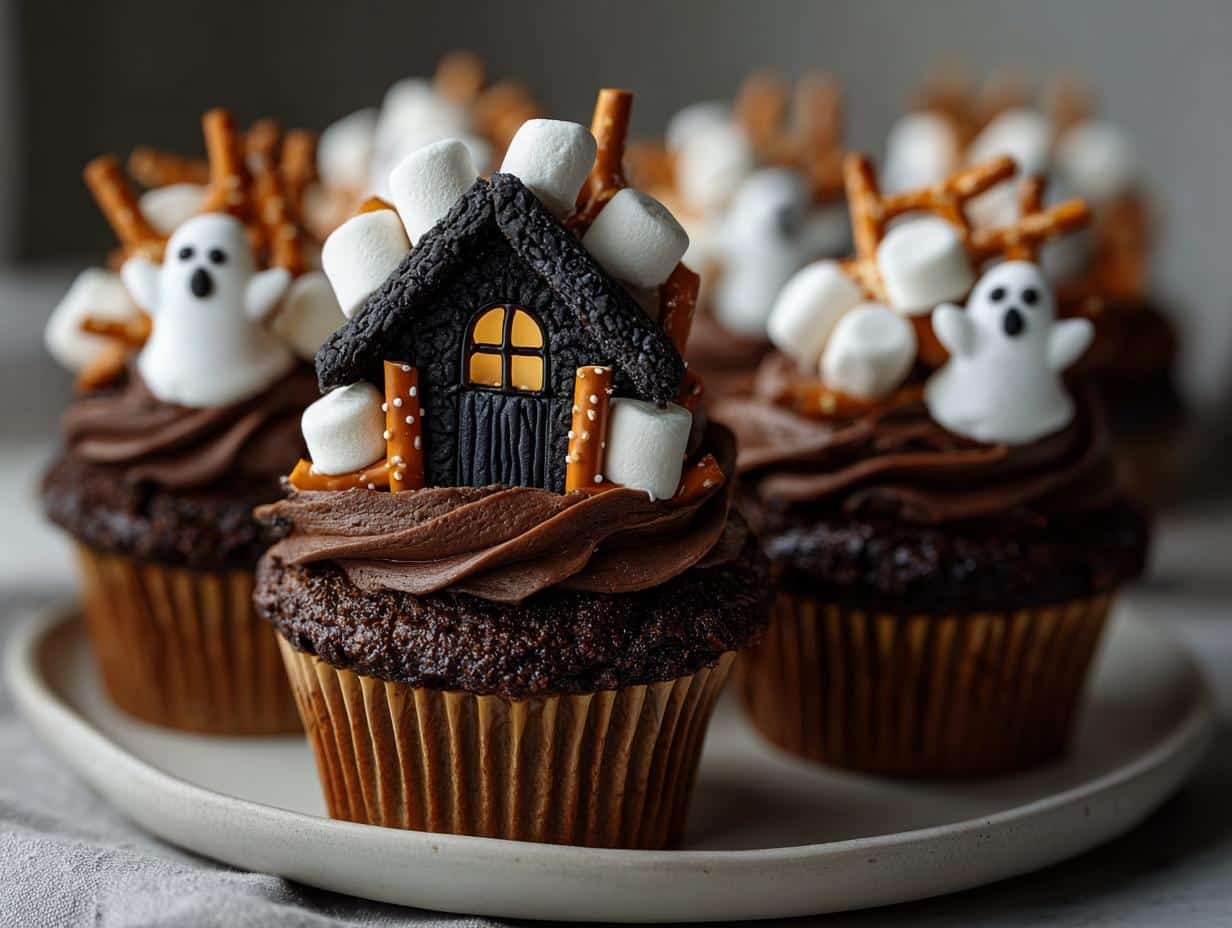
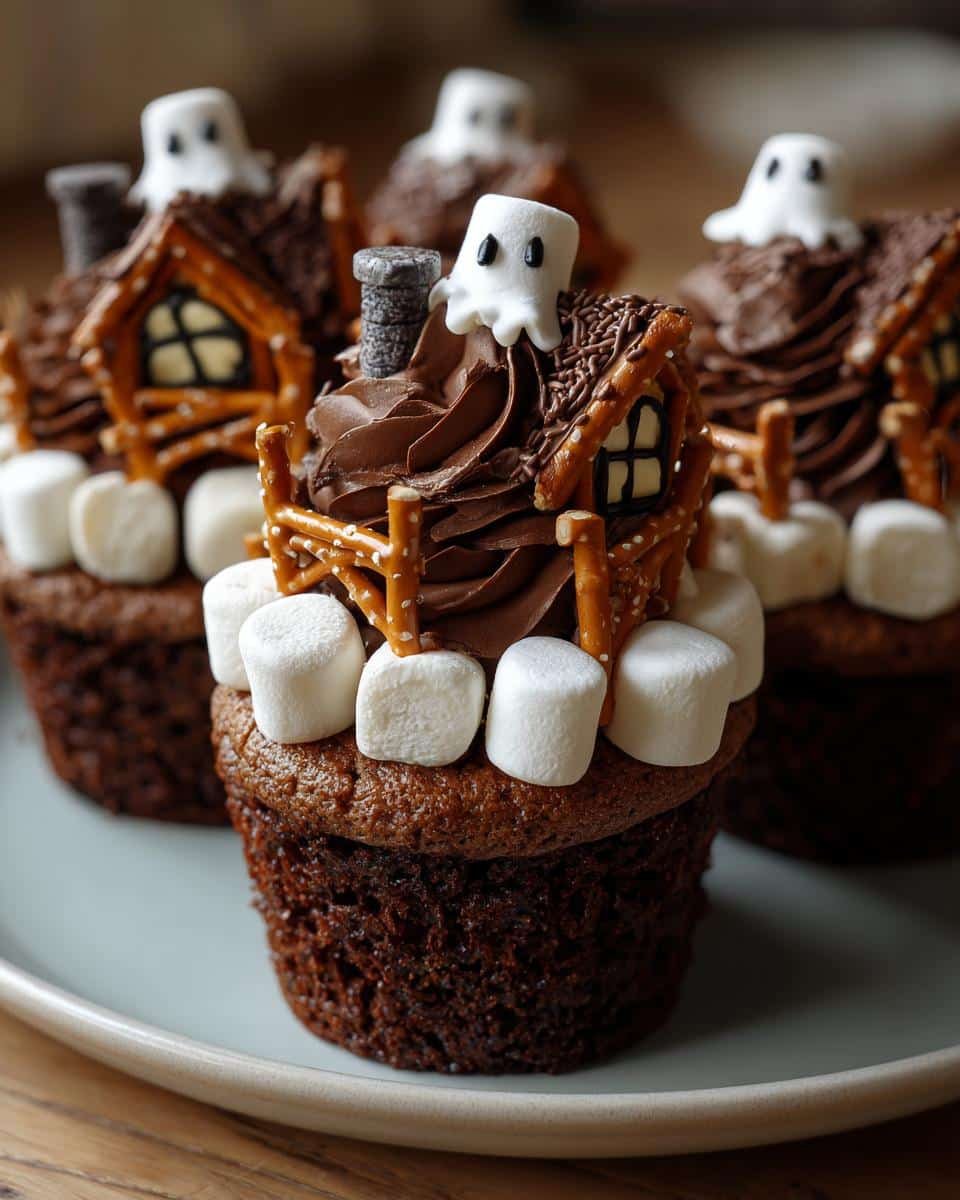
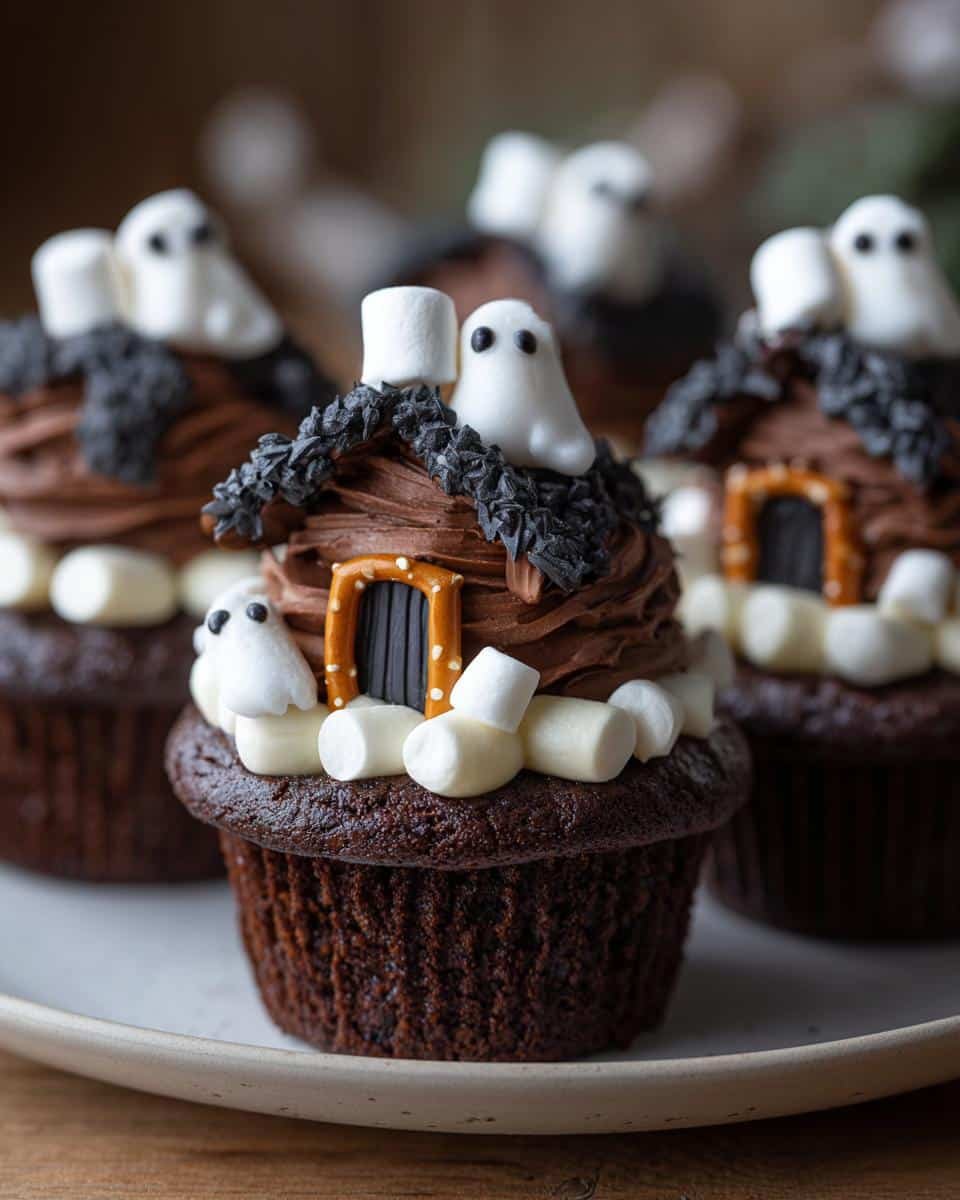
Now the fun part! Frost each cooled cupcake generously with chocolate frosting – this is your haunted house “paint job.” Cut marshmallows diagonally (kitchen scissors work great!) and press them gently onto the frosting as roofs. Insert two mini pretzel sticks on each side for fences.
Break your set chocolate into uneven pieces and press them in as windows and doors. Finally, grab that black icing tube and go wild – draw cracks, ghosts, bats, or whatever spooky details your heart desires. My kids love adding little orange jack-o-lantern faces!
Pro Tips for Perfect Haunted House Cupcakes
After making these spooky treats for years (and surviving a few Halloween baking disasters), here are my hard-earned secrets:
- Gel food coloring is your best friend – it gives vibrant colors without thinning your chocolate like liquid dyes do
- Patience with the chocolate! Let those windows and doors set completely before handling – 10 minutes in the fridge saves fingerprints
- Store at room temperature in an airtight container – the fridge makes the frosting sweat and the marshmallows weep (spooky, but not in a good way!)
- Use kitchen scissors for clean marshmallow cuts – they stick less than knives
- Keep extra pretzel sticks handy – little fingers tend to “sample” the fence supplies!
Haunted House Cupcake Variations
Want to mix things up? Try using purple or green food coloring for your chocolate windows – it’s perfect for a witchy vibe! Add candy ghosts (those little marshmallow ones work great) or sprinkle some crushed Oreos around the base for “haunted dirt.” You can even swap the pretzel fences for candy corn tombstones – so fun and creative!
Serving and Storing Haunted House Cupcakes
These haunted house cupcakes are best served at room temperature – it keeps the frosting smooth and the marshmallows from getting sticky. Store them in an airtight container for up to 2 days (if they last that long!). Perfect for parties or a spooky snack!
Haunted House Cupcakes Nutrition Info
Just so you know what you’re biting into (because let’s be real – you’ll eat at least two!), here’s the nutrition breakdown per cupcake. These are estimates since ingredients can vary: about 320 calories, 28g sugar, and 12g fat. Not exactly health food, but hey – it’s Halloween! Everything in moderation, right?
Frequently Asked Questions
Can I use homemade cake batter instead of a mix?
Absolutely! Just use your favorite chocolate cake recipe and adjust the bake time if needed. Homemade batter might take a few extra minutes – just keep an eye on it and do the toothpick test to check for doneness.
How can I make these cupcakes vegan?
Easy! Use a vegan cake mix or your own vegan chocolate cake recipe. Swap the frosting for a dairy-free version, use vegan white chocolate, and check that your marshmallows are gelatin-free. Pretzels and gel food coloring are usually vegan-friendly too!
What’s the best way to transport these cupcakes?
A cupcake carrier is your best bet – it keeps them upright and protects all those spooky details. If you don’t have one, a sturdy box with cupcake liners cut out of cardboard works in a pinch. Just drive carefully – haunted houses don’t like bumpy roads!
Tag Us @YourBakerHandle!
I can’t wait to see your spooky creations! Snap a photo of your haunted house cupcakes and tag @YourBakerHandle – I’ll feature my favorites on my page. Nothing makes me happier than seeing all the creative twists you come up with. Did you add bats? A candy ghost family? Maybe even a tiny chocolate spider web? Show me everything!
Don’t forget to share your kitchen adventures too – the time the chocolate seized up, the marshmallow roof that slid sideways (we’ve all been there!), or how your kids decorated them completely differently than you planned. Those messy, happy baking moments are what Halloween memories are made of!
For more delicious recipes and inspiration, check out our Pinterest page!
Print
Spooky Haunted House Cupcakes Kids Beg To Make Again
- Total Time: 50 minutes
- Yield: 12 cupcakes 1x
- Diet: Vegetarian
Description
Spooky and delicious cupcakes perfect for Halloween or themed parties. These haunted house cupcakes are fun to make and decorate.
Ingredients
- 1 box chocolate cake mix (plus required eggs, oil, and water)
- 1 can chocolate frosting
- 1 cup white chocolate chips
- Black and orange gel food coloring
- 12 large marshmallows
- 24 mini pretzel sticks
- 1 tube black decorating icing
Instructions
- Preheat oven to 350°F and line a muffin tin with cupcake liners.
- Prepare cake mix according to package instructions and fill liners 2/3 full.
- Bake for 18-20 minutes or until a toothpick comes out clean. Let cool completely.
- Melt white chocolate chips and tint with black food coloring. Spread on parchment paper to create thin sheets for windows and doors.
- Once set, break into jagged pieces for haunted house windows.
- Frost each cupcake with chocolate frosting.
- Cut marshmallows diagonally and place on cupcakes as rooftops.
- Insert pretzel sticks as fence posts around the edges.
- Add white chocolate windows and doors.
- Use black icing to draw spooky details like cracks, ghosts, or bats.
Notes
- Let chocolate set completely before handling.
- Use gel food coloring for vibrant colors without thinning the chocolate.
- Store cupcakes at room temperature in an airtight container.
- Prep Time: 30 minutes
- Cook Time: 20 minutes
- Category: Dessert
- Method: Baking
- Cuisine: American
Nutrition
- Serving Size: 1 cupcake
- Calories: 320
- Sugar: 28g
- Sodium: 220mg
- Fat: 12g
- Saturated Fat: 4g
- Unsaturated Fat: 7g
- Trans Fat: 0g
- Carbohydrates: 48g
- Fiber: 2g
- Protein: 3g
- Cholesterol: 25mg


