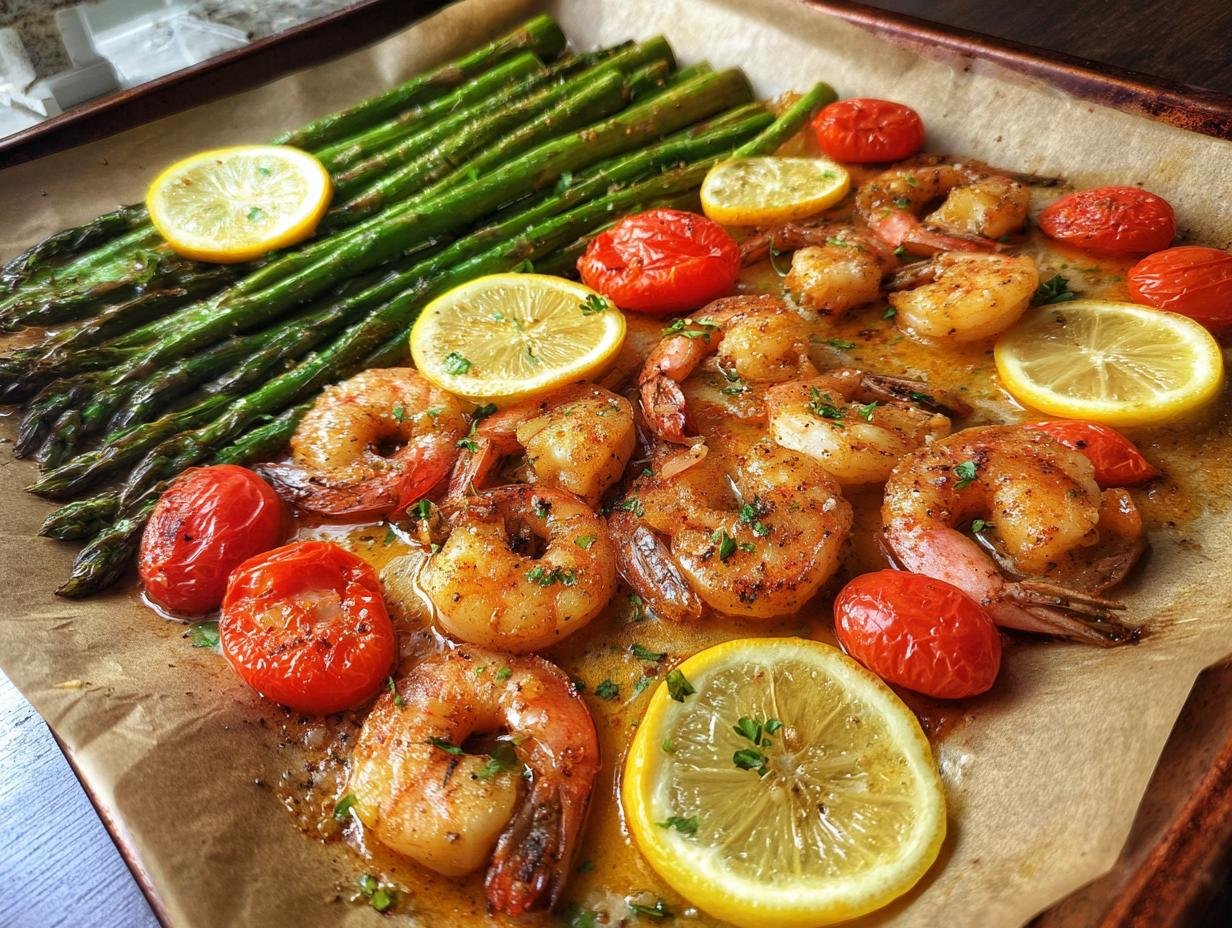
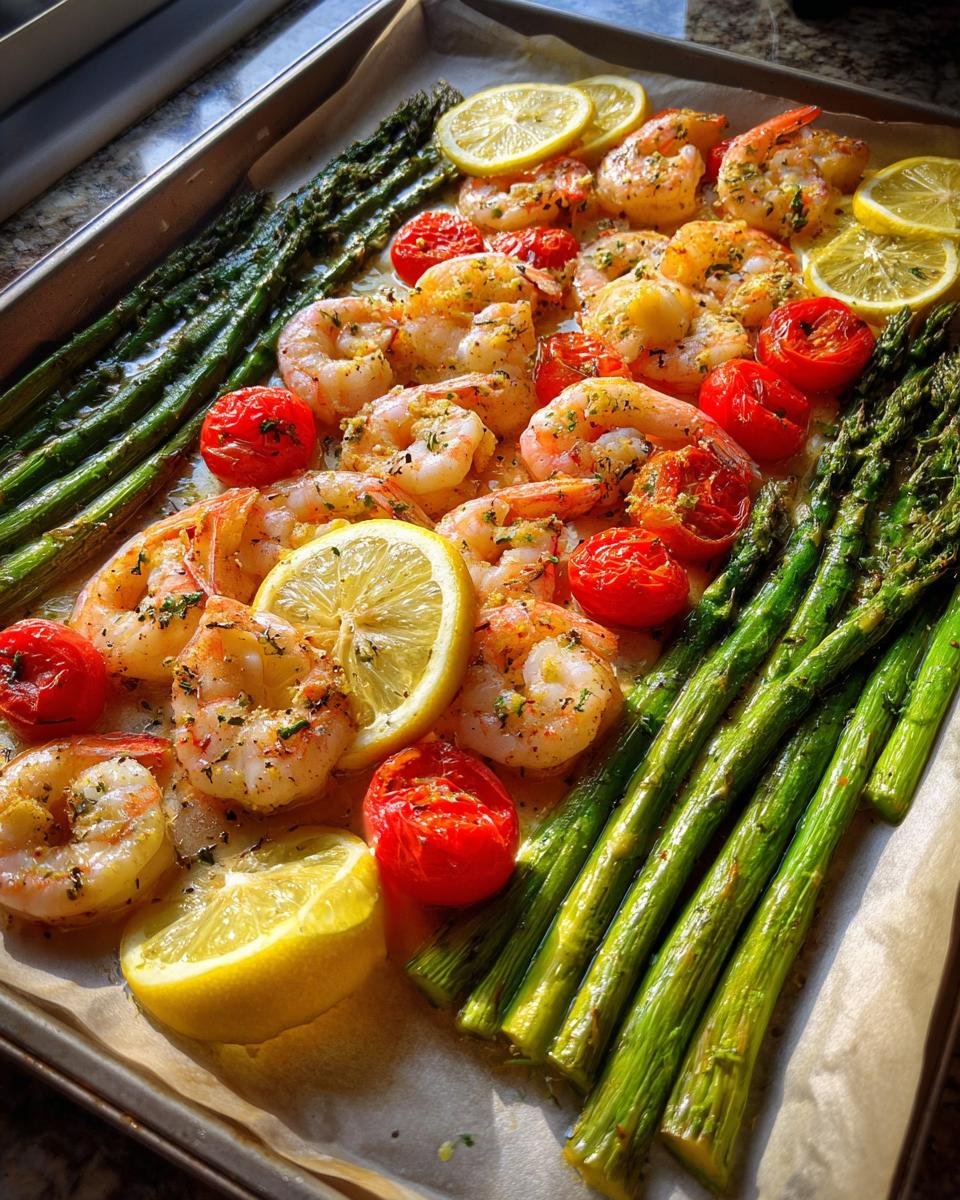
Ever have one of those nights where you’re staring into the fridge, willing dinner to magically appear? That was me every Wednesday for years – until I discovered garlic butter shrimp sheet pan magic. This recipe saved my sanity (and my family’s stomachs) more times than I can count. In just 20 minutes, you get juicy shrimp swimming in garlicky butter alongside colorful veggies – all roasted to perfection on one glorious pan.
The first time I made this, my kids actually stopped arguing long enough to ask for seconds. Now it’s our go-to when schedules get crazy but we still want something that tastes like I spent hours cooking. Trust me, the heavenly aroma of garlic butter shrimp baking will make you feel like a weeknight dinner hero with zero stress.
Why You’ll Love This Garlic Butter Shrimp Sheet Pan
This recipe is my weeknight superhero for so many reasons:
- Lightning fast – From fridge to table in under 25 minutes (yes, I’ve timed it!)
- One-pan wonder – Just toss everything on the sheet pan – cleanup takes 30 seconds
- Flavor bomb – That garlic butter sauce? It’ll make you want to lick the pan (no judgment)
- Healthy-ish – Packed with lean protein and veggies, but tastes indulgent
Seriously, it’s the dinner trifecta – easy, delicious, and actually good for you. What’s not to love?
Garlic Butter Shrimp Sheet Pan Ingredients
Here’s everything you’ll need to make magic happen on your sheet pan tonight:
- 1 lb large shrimp – peeled and deveined (trust me, do this first unless you like picking shells)
- 3 tbsp unsalted butter – melted (the good stuff, none of that margarine nonsense)
- 4 cloves garlic – minced (fresh only! That jarred stuff just won’t give you the same punch)
- 1 lemon – sliced (half for baking, half for squeezing at the end)
- 1 cup cherry tomatoes – halved (they burst beautifully in the oven)
- 1 cup asparagus – trimmed (snap off those woody ends)
- 1 tbsp olive oil – the glue that helps everything crisp up
- 1/2 tsp salt – kosher or sea salt works best
- 1/4 tsp black pepper – freshly ground if you’ve got it
- 1/4 tsp red pepper flakes – optional but gives a nice little kick
- 2 tbsp fresh parsley – chopped (save half for garnish)
See? Nothing fancy – just simple ingredients that turn into something spectacular together. I keep most of these stocked at all times for emergency dinner situations!
Equipment Needed for Garlic Butter Shrimp Sheet Pan
The beauty of this recipe? You probably already have everything:
- A trusty sheet pan (half-size baking sheet works perfectly)
- Parchment paper (life-changing for easy cleanup)
- Small mixing bowl (for that glorious garlic butter sauce)
That’s it – no fancy gadgets needed!
How to Make Garlic Butter Shrimp Sheet Pan
Alright, let’s turn these simple ingredients into the easiest, most delicious dinner you’ll make all week. Follow these steps and you’ll have restaurant-quality garlic butter shrimp with minimal effort!
Preparing the Garlic Butter Mixture
First, make that magical sauce that makes this dish so irresistible. In a small bowl, mix together your melted butter, minced garlic, salt, black pepper, and (if you’re feeling spicy) those red pepper flakes. I like to let this sit for a few minutes while I prep the other ingredients – it helps the garlic infuse into the butter beautifully. Pro tip: if your garlic is fresh and potent, the aroma at this stage will make your whole kitchen smell amazing!
Arranging the Sheet Pan
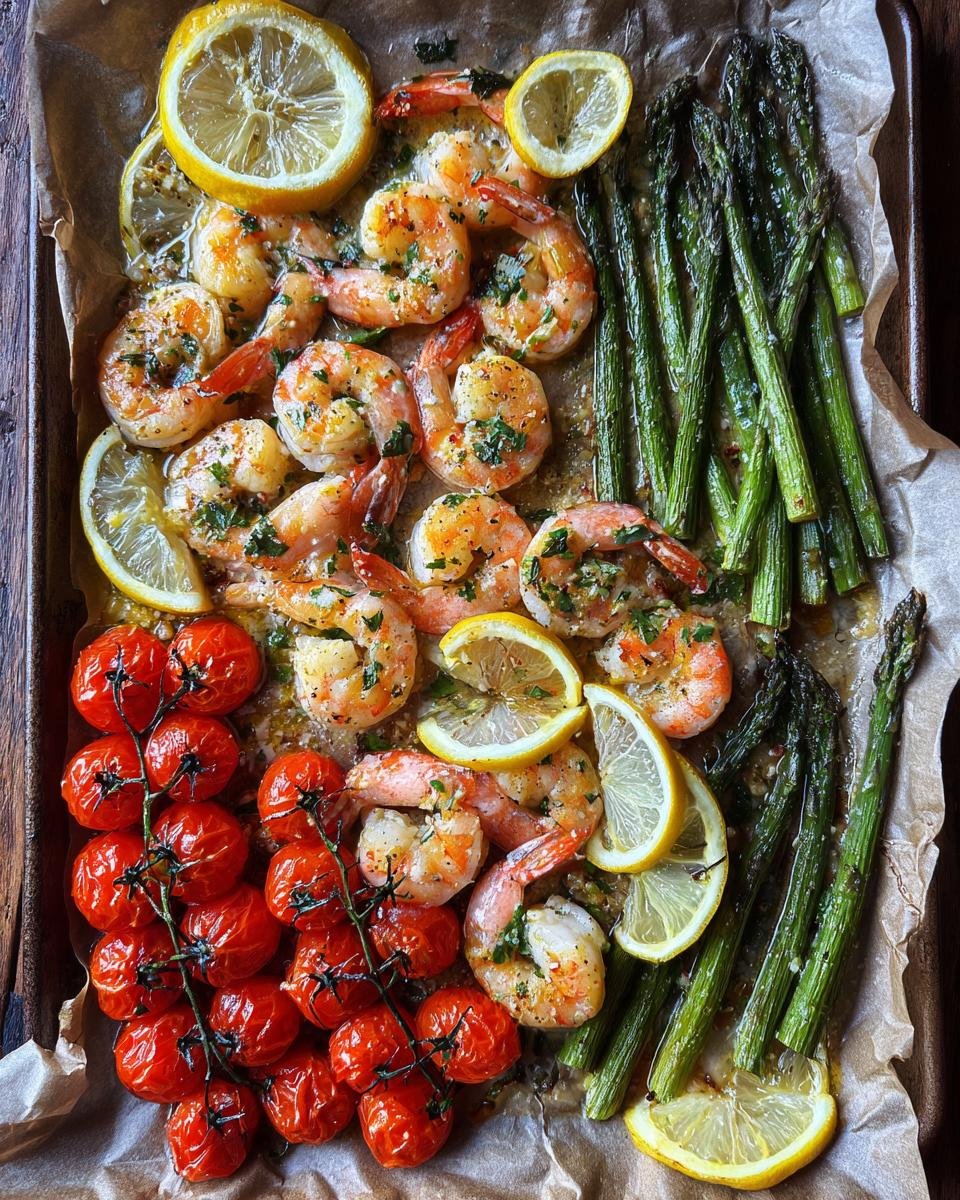
Now for the fun part! Line your sheet pan with parchment paper (seriously, don’t skip this – it’s a game changer for cleanup). Spread out your shrimp, cherry tomatoes, and asparagus in a single layer. Drizzle everything with olive oil, then pour that heavenly garlic butter mixture over the top. Use your hands or tongs to toss everything together – you want every single shrimp and veggie coated in that buttery goodness. Tuck the lemon slices in between everything – they’ll add brightness and help prevent the shrimp from drying out.
Baking the Garlic Butter Shrimp
Pop that beautiful sheet pan into your preheated 400°F oven and set a timer for 10 minutes. Don’t wander off though – shrimp cooks fast! You’ll know it’s done when the shrimp turn opaque and pink (no more gray bits!) and the tails curl slightly. The tomatoes should be just starting to burst, and the asparagus will be tender-crisp. If anything looks underdone, give it another minute or two, but watch closely – overcooked shrimp turns rubbery fast. As soon as it comes out of the oven, sprinkle with fresh parsley for that perfect finishing touch.
Tips for Perfect Garlic Butter Shrimp Sheet Pan
After making this weekly for years, here are my foolproof secrets:
- Fresh is best – Spring for fresh shrimp if you can (they plump up juicier!), but thawed frozen works in a pinch
- Space it out – Crowding the pan steams instead of roasts – give everything breathing room!
- Watch the clock – Shrimp cooks crazy fast; pull it at the first sign of pinkness
- Taste your butter – Adjust garlic and spice levels before pouring – you’ll thank me later
Follow these and you’ll nail it every time!
Garlic Butter Shrimp Sheet Pan Variations
The beauty of this recipe? You can switch it up based on what’s in your fridge! Try swapping asparagus for zucchini slices or broccoli florets – they roast up beautifully. Feeling fancy? A sprinkle of Parmesan during the last 2 minutes of baking adds a delicious crust. For heartier meals, toss in some sliced baby potatoes (parboil them first). The garlic butter makes everything taste amazing, so don’t be afraid to get creative!
Serving Suggestions for Garlic Butter Shrimp Sheet Pan
This dish shines all on its own, but I love serving it over a bed of fluffy rice to soak up that amazing garlic butter sauce. Crusty bread is mandatory at our house – perfect for swiping up every last drop! Sometimes I’ll add an extra sprinkle of fresh parsley or a squeeze of lemon right before serving for a bright finish. For lighter meals, just pair it with a simple green salad. Either way, prepare for clean plates all around!
Garlic Butter Shrimp Sheet Pan Storage & Reheating
Leftovers? No problem! Just transfer your garlic butter shrimp to an airtight container – it’ll keep in the fridge for 2-3 days. The garlic flavor actually gets better as it sits! When you’re ready to eat, reheat gently in a 350°F oven for about 5 minutes (this keeps the shrimp from getting rubbery). If you’re in a hurry, 30 seconds in the microwave works too – just don’t overdo it. Pro tip: The veggies will be softer after reheating, but that sauce? Still every bit as delicious spooned over rice or bread. My kids actually fight over the cold leftovers straight from the fridge – not that I’d know anything about that…
Garlic Butter Shrimp Sheet Pan Nutritional Information
Now, I’m no nutritionist, but I do love knowing what’s going into our family meals! These numbers are estimates based on the ingredients – your actual values might dance around a bit depending on exact shrimp size or how much butter gets licked off the spoon (we’ve all been there). Here’s the breakdown per generous serving:
- Calories: 250 (surprisingly light for something so decadent-tasting!)
- Fat: 12g (6g saturated from that glorious butter)
- Protein: 25g – shrimp packs a lean protein punch
- Carbs: 8g (mostly from those sweet roasted veggies)
- Fiber: 2g (thanks, asparagus!)
- Sugar: 3g (natural sugars from tomatoes and lemon)
The best part? This meal feels indulgent but won’t weigh you down. All that garlic and lemon brighten things up while the shrimp gives you a serious protein boost. It’s the kind of dinner that leaves you satisfied but still ready to tackle that after-dinner walk (or couch session – no judgment here).
FAQs About Garlic Butter Shrimp Sheet Pan
Can I use frozen shrimp for this recipe?
Absolutely! I use frozen shrimp all the time when fresh isn’t available. Just thaw them overnight in the fridge or run under cold water for a quick defrost. Pat them really dry with paper towels before using – this helps them get that perfect sear instead of steaming in their own juices. The texture might be slightly less firm than fresh, but with that garlic butter bath, nobody will notice!
How do I know when the shrimp are done cooking?
Here’s my foolproof test: shrimp are ready when they turn from gray to pink and form a loose “C” shape. If they curl into tight “O’s,” you’ve gone too far! They’ll keep cooking a bit after coming out of the oven, so err on the side of underdone. I always peek at the thickest part – it should be opaque white, not translucent. The first time I made this, I hovered by the oven like a nervous parent – now I can tell by smell alone when they’re perfect!
Can I make this with other vegetables?
Please do! This recipe is my canvas for cleaning out the veggie drawer. Zucchini, bell peppers, and broccoli florets work amazingly. Just remember: denser veggies like carrots or potatoes need a head start – I’ll toss them with oil and roast for 5-10 minutes before adding the shrimp. More delicate veggies (looking at you, spinach) should go in during the last few minutes. The only veggie I avoid? Mushrooms – they release too much water and make the shrimp soggy.
Why does my garlic sometimes burn?
Oh honey, I’ve been there – nothing worse than bitter, burnt garlic ruining your perfect shrimp! The trick is mixing the minced garlic with the melted butter first – the fat protects it from direct heat. If you’re really worried (especially with older ovens that run hot), add half the garlic to the butter mixture and sprinkle the rest over the shrimp right before baking. And never, ever use pre-minced jarred garlic – it burns faster and lacks that fresh garlic punch we’re after!
What’s the best way to reheat leftovers without drying out the shrimp?
My secret? A cold oven! Place your leftover garlic butter shrimp on a baking sheet, pop it in a cold oven, THEN set to 300°F. By the time the oven reaches temp (about 5 minutes), your shrimp will be perfectly warmed through without turning rubbery. Microwave works in a pinch – just cover with a damp paper towel and use 30 second bursts. Whatever you do, don’t let it boil – that’s when shrimp turns into little pink erasers!
Now stop reading and go make this garlic butter shrimp sheet pan magic happen! Snap a pic of your creation and tag me – I love seeing your kitchen wins (and we’ve all had those “learning experiences” too – no judgment here!). You can find more delicious recipes on Pinterest.
Print
25-Minute Garlic Butter Shrimp Sheet Pan – Insanely Delicious
- Total Time: 22 minutes
- Yield: 4 servings 1x
- Diet: Low Calorie
Description
A quick and easy Garlic Butter Shrimp Sheet Pan recipe perfect for a hassle-free dinner. Juicy shrimp baked with garlic butter and veggies for a flavorful meal.
Ingredients
- 1 lb large shrimp, peeled and deveined
- 3 tbsp unsalted butter, melted
- 4 cloves garlic, minced
- 1 lemon, sliced
- 1 cup cherry tomatoes, halved
- 1 cup asparagus, trimmed
- 1 tbsp olive oil
- 1/2 tsp salt
- 1/4 tsp black pepper
- 1/4 tsp red pepper flakes (optional)
- 2 tbsp fresh parsley, chopped
Instructions
- Preheat your oven to 400°F (200°C). Line a sheet pan with parchment paper.
- In a small bowl, mix melted butter, minced garlic, salt, black pepper, and red pepper flakes.
- Arrange shrimp, cherry tomatoes, and asparagus on the sheet pan. Drizzle with olive oil and the garlic butter mixture. Toss to coat evenly.
- Spread the ingredients in a single layer. Add lemon slices on top.
- Bake for 10-12 minutes or until shrimp are pink and cooked through.
- Sprinkle with fresh parsley before serving.
Notes
- Use fresh shrimp for the best flavor and texture.
- Adjust red pepper flakes to your spice preference.
- Serve with rice or crusty bread for a complete meal.
- Prep Time: 10 minutes
- Cook Time: 12 minutes
- Category: Main Course
- Method: Baking
- Cuisine: American
Nutrition
- Serving Size: 1 serving
- Calories: 250
- Sugar: 3g
- Sodium: 450mg
- Fat: 12g
- Saturated Fat: 6g
- Unsaturated Fat: 5g
- Trans Fat: 0g
- Carbohydrates: 8g
- Fiber: 2g
- Protein: 25g
- Cholesterol: 200mg